Quick Overview
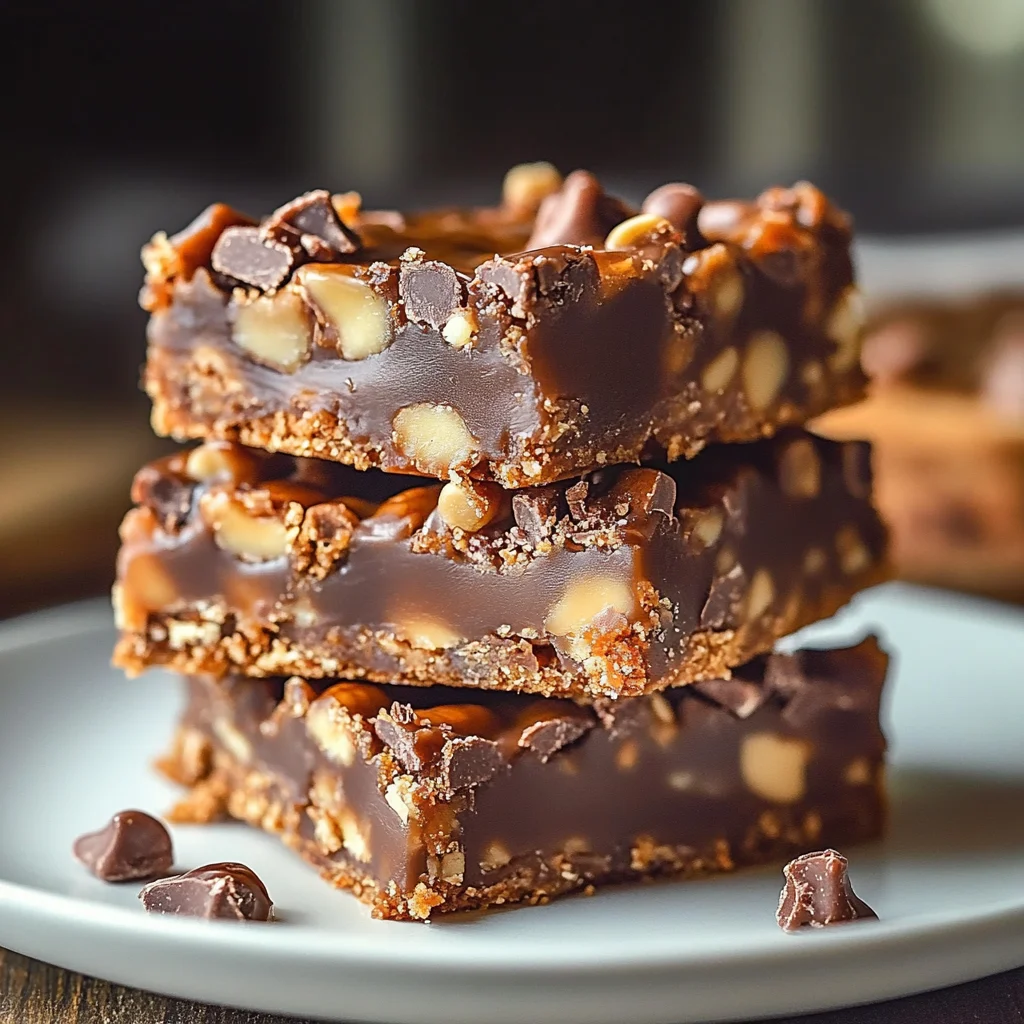
Turtle Bars are a delightful treat that brings together the rich flavors of chocolate, caramel, and pecans in a chewy bar form. These irresistible dessert bars are perfect for any occasion—whether you are hosting a party or simply need something sweet to satisfy your cravings. With their easy preparation and delightful taste, Turtle Bars will quickly become a favorite among friends and family. Let’s dive into this mouthwatering recipe!
Ingredient Breakdown
Graham Cracker Crumbs
You will need 1 ½ cups of graham cracker crumbs. These crumbs form the base of the turtle bars, providing a crunchy texture that complements the smooth toppings.
Unsalted Butter
Use ½ cup (one stick) of unsalted butter, melted. The butter adds richness to the crust and helps bind all the ingredients together for a deliciously moist base.
Brown Sugar
1 cup of packed brown sugar is essential for adding sweetness and depth to the flavor profile. It also contributes to the chewy texture of the bars.
Sweetened Condensed Milk
A can (14 ounces) of sweetened condensed milk provides creaminess and sweetness that enhances the overall flavor while helping to hold everything together.
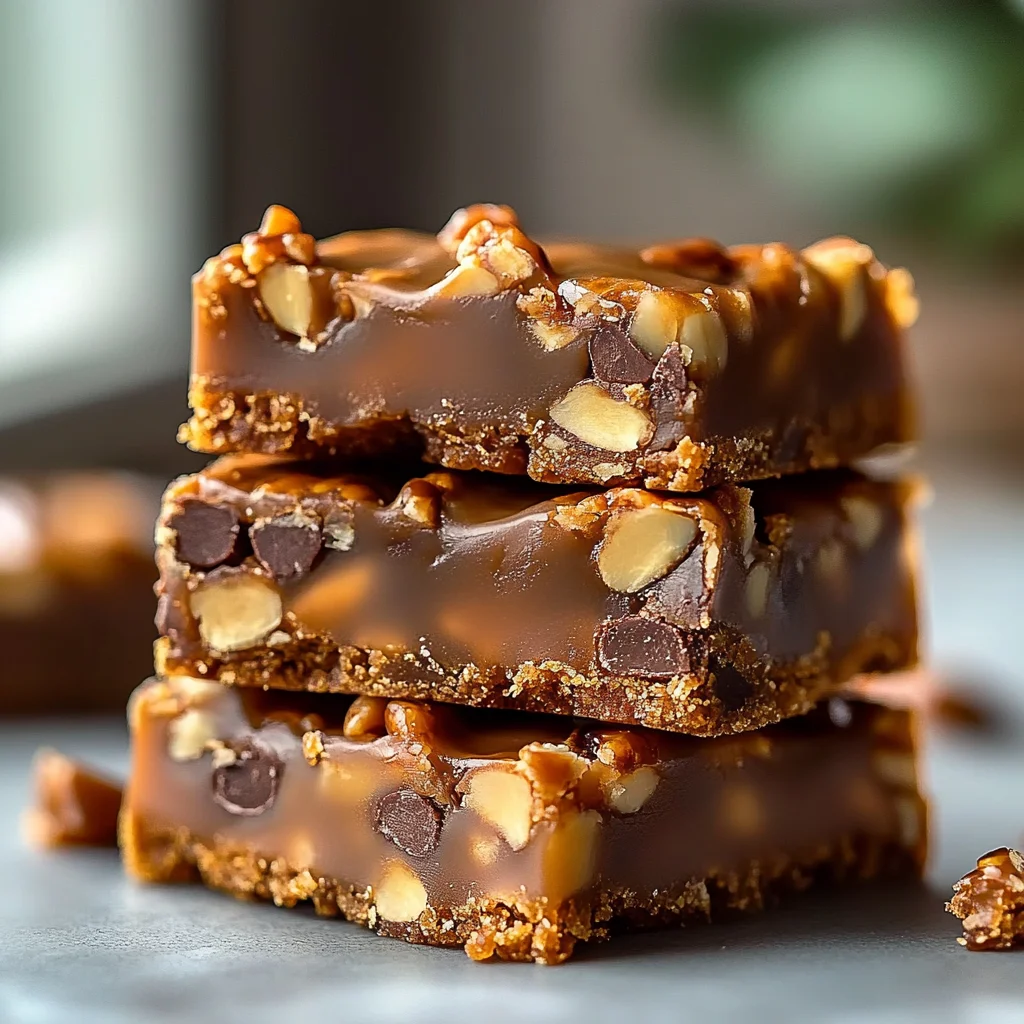
Semi-Sweet Chocolate Chips
Add 1 cup of semi-sweet chocolate chips for a rich chocolatey taste. They melt beautifully on top and create an indulgent layer over the other ingredients.
Chopped Pecans
Use 1 cup of chopped pecans to introduce a nutty flavor and crunch. These nuts pair perfectly with chocolate and caramel for a classic turtle taste.
Caramel Sauce
Finally, you will need 1 cup of caramel sauce for drizzling over the top. This sticky sweetness is what truly makes these turtle bars irresistible.
Step By Step Recipe : Turtle Bars
Step 1: Preheat Oven
Begin by preheating your oven to 350°F (175°C). This ensures an even baking temperature throughout the process, allowing your Turtle Bars to bake perfectly without burning or undercooking.
Step 2: Prepare Baking Pan
Line a 9×13 inch baking pan with parchment paper or lightly grease it with non-stick spray. This step helps prevent sticking, making it easier to remove the bars once baked.
Step 3: Mix Base Ingredients
In a large mixing bowl, combine graham cracker crumbs, melted butter, brown sugar, and half of the chopped pecans. Stir until fully combined; the mixture should resemble wet sand but hold together when pressed.
Step 4: Press Mixture into Pan
Transfer the crumb mixture into your prepared baking pan. Use your hands or a spatula to press it evenly across the bottom. This forms a solid crust for your Turtle Bars that will hold up once baked.
Step 5: Bake Base Layer
Place the pan in the preheated oven and bake for about 10 minutes until golden brown. This step helps set the crust before adding additional layers on top.
Step 6: Add Chocolate Chips
After baking the base layer, remove it from the oven and sprinkle semi-sweet chocolate chips evenly over it. As they melt slightly during cooling, they will create a deliciously gooey layer.
Step 7: Drizzle with Caramel Sauce
Drizzle approximately half of your caramel sauce over the melted chocolate chips. Use as much as you like; this adds sweetness and enhances flavor while creating an attractive presentation on top.
Step 8: Sprinkle Pecans
Sprinkle remaining chopped pecans over caramel-covered chocolate chips evenly across the surface. This adds texture and crunch that complements each bite of these tasty turtle bars.
Step 9: Final Bake
Return your pan to the oven and bake again for another 15 minutes until everything is bubbly and set nicely together. Keep an eye on them towards the end so they don’t burn!
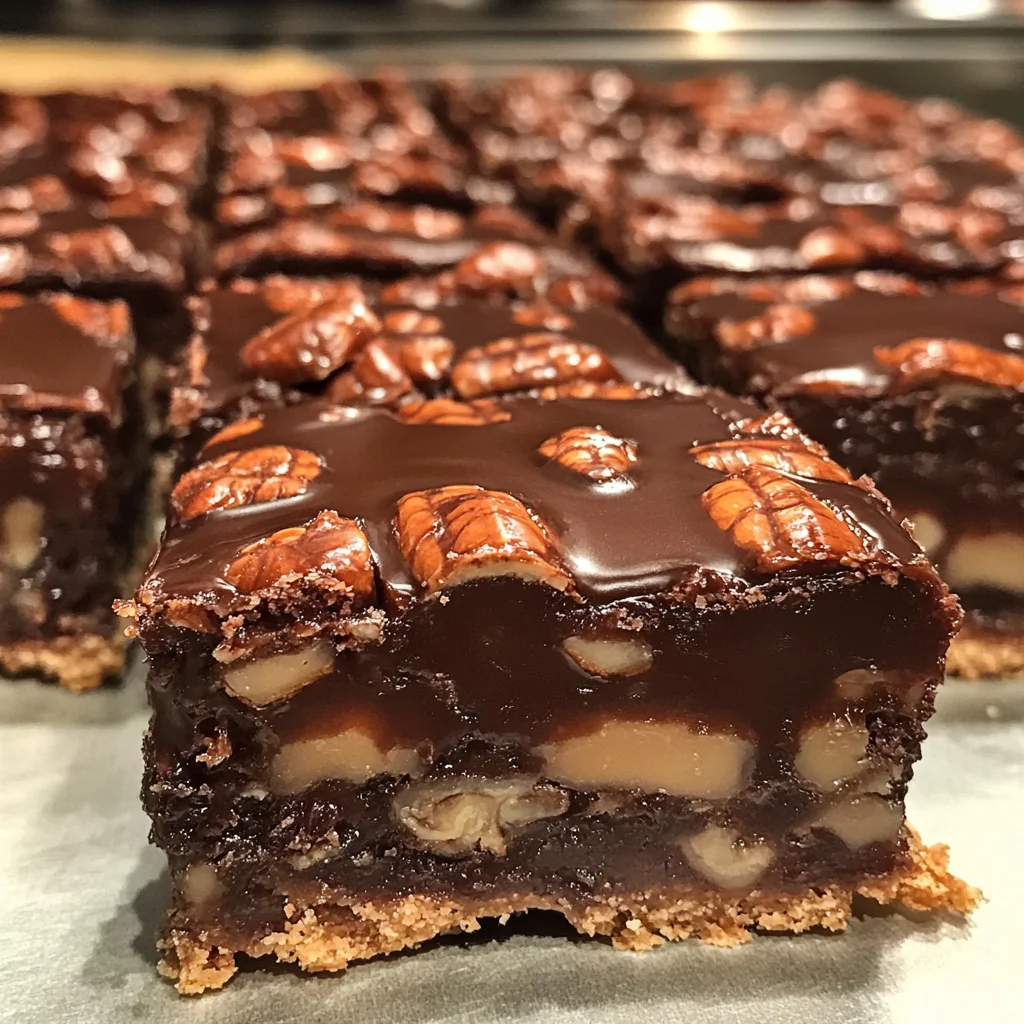
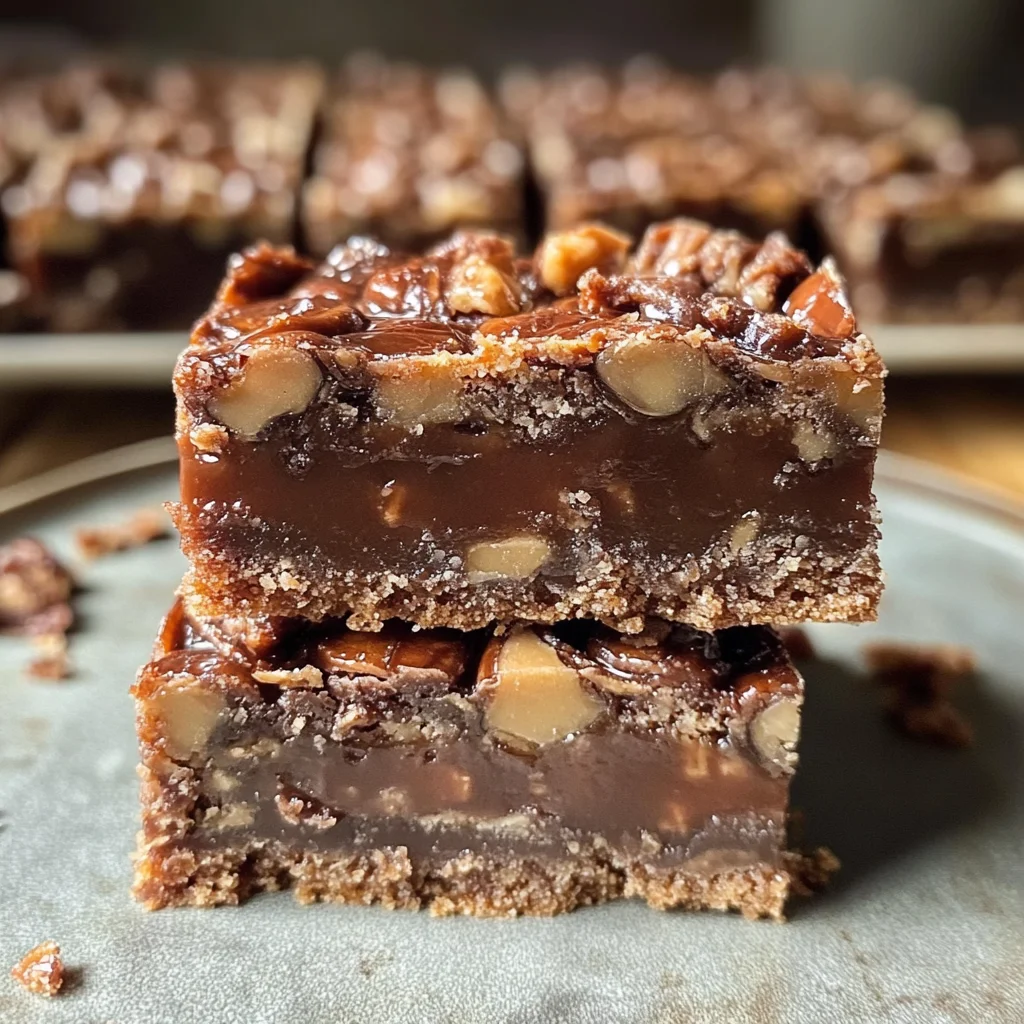
Step 10: Cool Completely
Once baked, remove from oven and allow cooling completely in pan on wire rack before cutting into squares. Cooling helps firm up layers so they cut neatly without falling apart when serving.
Serving and Storing Tips
Serving Suggestions
Cut your cooled Turtle Bars into squares or rectangles before serving them on a platter or individual plates. Pair them with whipped cream or vanilla ice cream for an extra treat!
Storage Guidelines
Store any leftovers in an airtight container at room temperature for up to five days or refrigerate them for longer freshness up to two weeks maximum! Be sure to separate layers with parchment paper if stacking them.
With this delicious Turtle Bars recipe at hand, you’re ready to impress family and friends alike with these sweet treats!
Mistakes to avoid
One common mistake when making turtle bars is not measuring the ingredients accurately. Precision is key in baking, as even slight variations can affect the final texture and flavor. Always use a kitchen scale for dry ingredients and measuring cups for liquids to ensure consistency.
Another mistake is overbaking the turtle bars. Keep a close eye on them while they are in the oven. Overbaking can lead to a dry texture, ruining the chewy goodness that makes turtle bars so delightful. Aim for a golden-brown color and a soft center.
Using low-quality chocolate or caramel can also compromise the taste of your turtle bars. Opt for high-quality chocolate chips and rich caramel sauce for a more indulgent flavor profile. Cheap alternatives may result in a less satisfying dessert.
Failing to let the turtle bars cool completely before cutting them is another error. Allowing them to cool will help them set properly, making it easier to slice without crumbling. Patience pays off when you want clean, beautiful cuts.
Lastly, don’t skip refrigeration after baking. Chilling the turtle bars helps solidify the caramel and chocolate layers, enhancing their overall texture. Skipping this step might leave your bars too soft and messy.
Tips and tricks
To create perfect turtle bars, start with room-temperature ingredients. Using butter and eggs at room temperature ensures better incorporation into the batter, yielding a smoother mixture that bakes evenly. This small step can significantly impact your final product’s texture and taste.
Incorporate nuts wisely. Chopped pecans or walnuts add crunch but should be evenly distributed throughout the batter instead of clumping together in one spot. Toasting these nuts beforehand enhances their flavor, giving your turtle bars an extra layer of deliciousness.
Be mindful of layering components correctly. Start with your base layer, typically made from cookie dough or graham cracker crumbs, then add caramel and chocolate layers thoughtfully. A well-structured layering process ensures each bite contains all flavors harmoniously combined.
Experiment with different types of toppings to personalize your turtle bars. Consider adding sea salt on top for contrast or experimenting with flavored chocolate chips like dark or white chocolate. This customization allows you to make each batch unique while still maintaining that classic turtle bar essence.
Finally, store your turtle bars correctly to maintain freshness. Use an airtight container at room temperature for short-term storage or refrigerate them if you want them to last longer without losing quality. Proper storage prevents them from becoming stale or losing their delightful texture.
Suggestions for Turtle Bars
Try using gluten-free flour if you’re catering to gluten-sensitive guests; this allows everyone to enjoy delicious turtle bars without worry about gluten content. Many recipes work well with gluten-free substitutes, ensuring no one misses out on this sweet treat.
Consider adding a drizzle of flavored syrup on top of your finished turtle bars for visual appeal and added flavor depth. A simple drizzle of caramel or chocolate syrup elevates presentation and gives an extra indulgent touch that guests will adore.
For those who prefer healthier options, substitute half of the butter with applesauce in the recipe. This substitution reduces calories while maintaining moisture in your turtle bars without sacrificing taste. It’s a great way to make your treats slightly healthier while keeping them delicious.
If you want an extra crunch factor, sprinkle some crushed pretzels over the finished product before serving. The salty-sweet combination creates an exciting contrast that complements the rich flavors of chocolate and caramel beautifully.
Lastly, consider making mini versions of turtle bars in muffin tins for easy portion control at parties or gatherings. These bite-sized treats are perfect for sharing and encourage guests to enjoy just one more!
FAQs
What are Turtle Bars?
Turtle Bars are a delicious dessert combining layers of cookie dough, gooey caramel, crunchy nuts like pecans or walnuts, and rich chocolate drizzle on top. They are named after “turtle” candies due to their similar flavors and textures, making them irresistible for sweet tooth lovers everywhere.
How long do Turtle Bars last?
When stored properly in an airtight container at room temperature, Turtle Bars typically last about 3-5 days before they start losing freshness. If you refrigerate them, they can last up to two weeks without compromising taste or texture significantly.
Can I freeze Turtle Bars?
Yes! You can freeze Turtle Bars for up to three months if wrapped tightly in plastic wrap and placed in an airtight container. Allow them to thaw at room temperature before serving so they regain their delightful texture without becoming soggy.
What variations can I make with Turtle Bars?
You can customize Turtle Bars by using different types of nuts like almonds or hazelnuts instead of traditional pecans or walnuts; try incorporating flavored chocolate chips such as mint or peanut butter for a unique twist on this classic treat!
Are there gluten-free options for Turtle Bars?
Absolutely! Substitute regular flour with gluten-free all-purpose flour when making Turtle Bars; this allows those with gluten sensitivities to enjoy these tasty bites without worry about gluten content interfering with their enjoyment!
How do I know when my Turtle Bars are done baking?
Check the edges of your Turtle Bars; they should appear slightly golden brown while remaining soft in the center when removed from the oven—this indicates perfectly baked bars ready for cooling before cutting into squares!
Summary
In summary, creating delicious Turtle Bars requires attention to detail throughout every step—from ingredient selection to baking time management and proper storage techniques after preparation! By avoiding common mistakes like overbaking or skimping on quality ingredients while incorporating helpful tips such as using room-temperature items and experimenting with toppings ensures you’ll achieve mouthwatering results everyone will love!
Print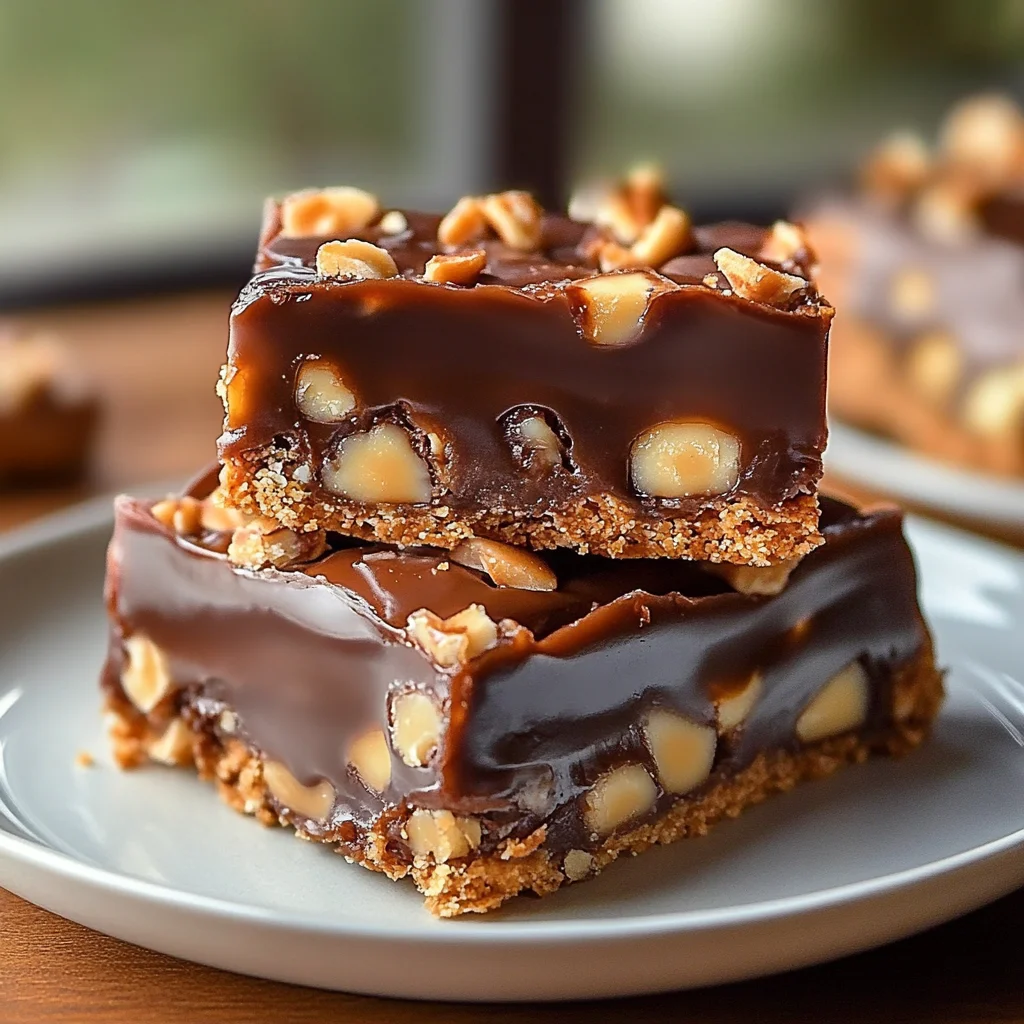
Turtle Bars
- Total Time: 45 minutes
- Yield: 16 servings 1x
Description
These delicious Turtle Bars are a rich combination of chocolate, caramel, and pecans, making them a perfect treat for any occasion!
Ingredients
1 cup all-purpose flour
1/2 cup unsweetened cocoa powder
1/2 cup brown sugar
1/4 cup granulated sugar
1/2 cup unsalted butter, melted
2 large eggs
1 teaspoon vanilla extract
1 cup chopped pecans
1 cup chocolate chips
1/2 cup caramel sauce
Instructions
1. Preheat your oven to 350°F (175°C) and grease a 9×9-inch baking pan.
2. In a large bowl, mix the melted butter, brown sugar, and granulated sugar until well combined.
3. Add in the eggs and vanilla extract, mixing until smooth.
4. Slowly stir in the flour and cocoa powder until fully incorporated.
5. Fold in the chopped pecans and half of the chocolate chips.
6. Spread half of the batter into the prepared pan, then drizzle with half of the caramel sauce.
7. Pour the remaining batter over the caramel layer and top with remaining chocolate chips and caramel sauce.
8. Bake for 25-30 minutes or until a toothpick comes out mostly clean.
Notes
Add more nuts or chocolate chips as per your preference! Allow to cool completely before cutting into bars.
- Prep Time: 15 minutes
- Cook Time: 30 minutes
Nutrition
- Serving Size: 1 bar
- Calories: 250
- Sugar: 18g
- Fat: 12g
- Carbohydrates: 32g
- Protein: 4g
Keywords: turtle bars, dessert, baking, chocolate, caramel