Quick Overview
Garlic Bread Rolls are a fantastic addition to any meal. Their soft texture and rich flavor make them an irresistible treat. Whether you’re serving them alongside pasta or as a delightful appetizer, these rolls are sure to impress. Made with simple ingredients that come together easily, this recipe will have you baking up a batch in no time. Not only are they delicious, but they also fill your kitchen with the heavenly aroma of garlic and herbs. Let’s dive into the details of making these scrumptious Garlic Bread Rolls!
Ingredient Breakdown
Flour
You will need 3 cups of all-purpose flour for this recipe. Flour serves as the foundation for the rolls, providing structure and chewiness. Be sure to measure it accurately for the best results.
Yeast
Using 2 teaspoons of active dry yeast is essential for making your dough rise. The yeast ferments and creates bubbles that help the bread expand and become fluffy. Always check the expiration date for optimal performance.
Water
One cup of warm water (100°F to 110°F) activates the yeast effectively. It is crucial not to use boiling water as it can kill the yeast. Warm water creates an ideal environment for fermentation.
Sugar
Adding 1 tablespoon of sugar feeds the yeast and enhances flavor. The sugar helps in browning the crust during baking while adding just a hint of sweetness to balance the savory garlic.
Salt
Two teaspoons of salt enhance taste and control yeast activity in your dough. Salt strengthens gluten strands in flour while helping to preserve freshness.
Butter
You will need 1/4 cup of unsalted butter, softened to room temperature. Butter enriches the dough and adds a delightful richness that complements the garlic flavor beautifully.
Garlic
Three cloves of minced garlic infuse your rolls with robust flavor. Fresh garlic provides a stronger taste compared to powdered versions and gives an aromatic quality that elevates every bite.
Herbs
A teaspoon each of dried parsley and Italian seasoning adds flavor complexity to your Garlic Bread Rolls. These herbs complement garlic well, creating an aromatic experience.
Step By Step Recipe: Garlic Bread Rolls
Prepare the Dough
In a large mixing bowl, combine warm water and sugar; stir until dissolved. Sprinkle yeast on top and let it sit for about 5 minutes until frothy. This step ensures that your yeast is active and ready to help your dough rise.
Mix Ingredients
Add flour, salt, softened butter, minced garlic, parsley, and Italian seasoning into the bowl with activated yeast. Stir using a wooden spoon until all ingredients form a shaggy dough that sticks together but is not overly wet or dry.
Knead the Dough
Transfer the dough onto a lightly floured surface. Knead it for about 8-10 minutes until smooth and elastic. This process develops gluten which gives your rolls their chewy texture. If necessary, sprinkle more flour during kneading but avoid adding too much.
First Rise
Place your kneaded dough in a greased bowl; cover it with a clean cloth or plastic wrap. Let it rise in a warm environment for about 1-2 hours or until doubled in size. This step is crucial for achieving light and fluffy rolls.
Shape Your Rolls
Once risen, punch down your dough gently to release excess air. Divide it into equal pieces; shape each piece into smooth balls by tucking edges underneath towards the center before placing them on a greased baking sheet.
Second Rise
Cover shaped rolls again with a cloth or plastic wrap; allow them to rise for another 30-60 minutes until puffy and nearly doubled in size again. This second rise contributes significantly to their lightness after baking.
Bake Your Rolls
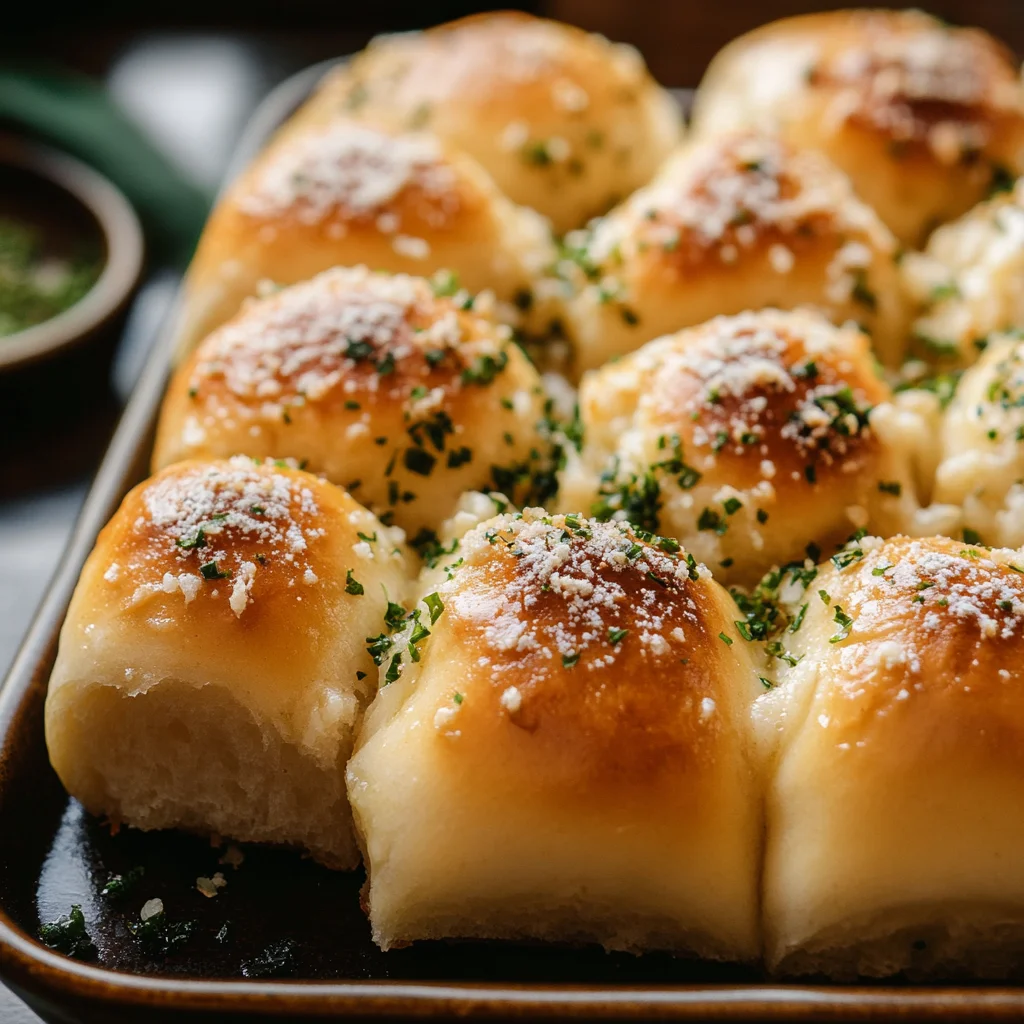
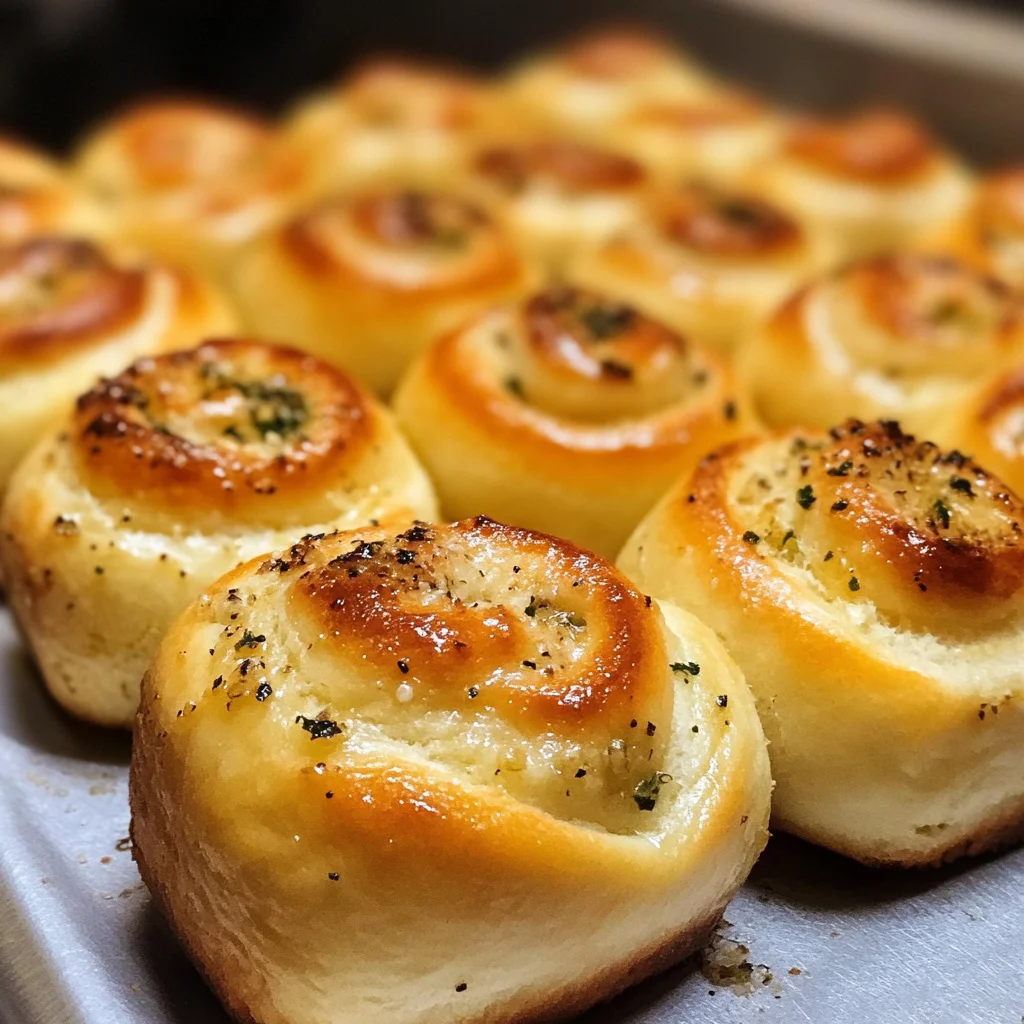
Preheat your oven to 375°F (190°C). Once preheated, bake your rolls for about 15-20 minutes or until golden brown on top. Keep an eye on them towards the end so they don’t over-bake; you want soft centers.
Brush with Butter
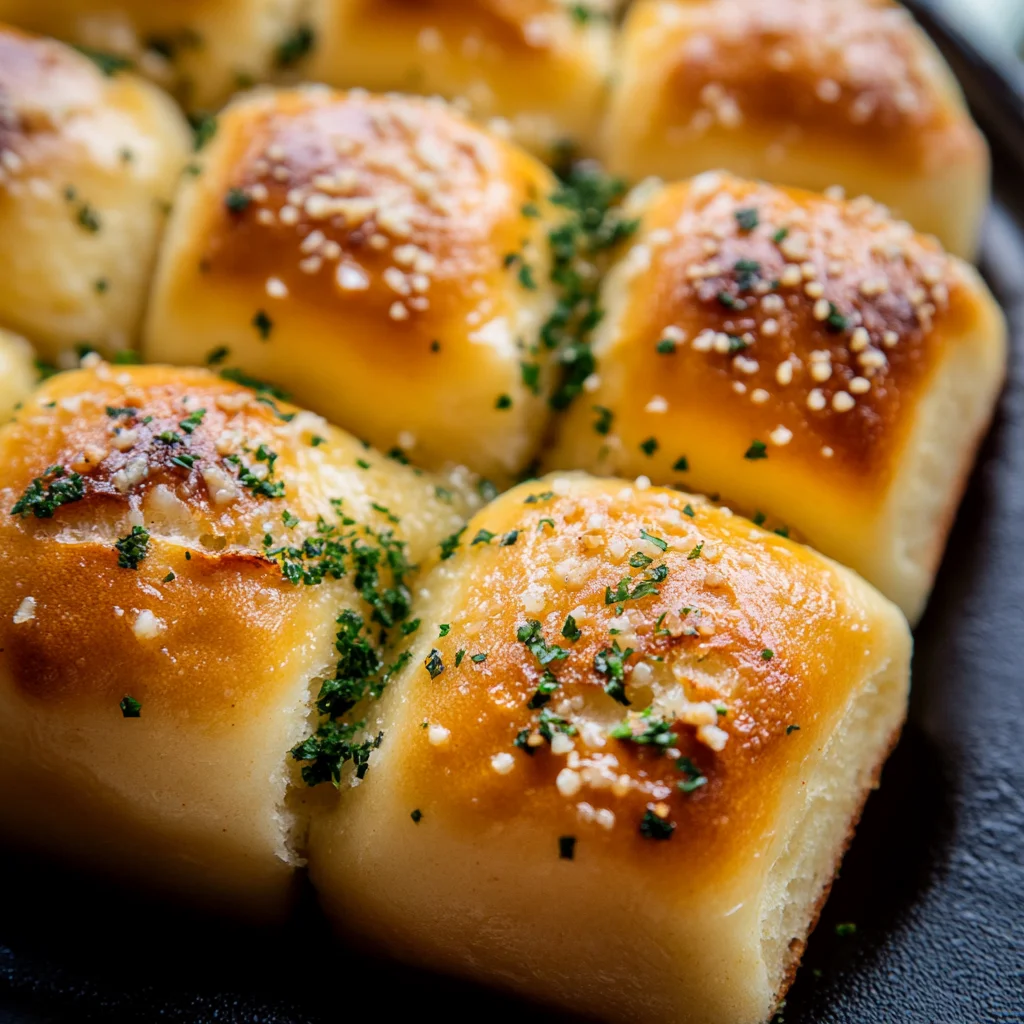
Remove baked rolls from the oven; immediately brush melted butter on top using a pastry brush while they are still warm. This adds extra moisture and flavor while creating a beautiful shiny finish on each roll.
Serving and Storing Tips
Serving Suggestions
Serve these Garlic Bread Rolls warm alongside spaghetti or as part of a hearty soup meal. They also pair wonderfully with salads or can be enjoyed on their own as snacks at gatherings or parties.
Storage Guidelines
Store leftover Garlic Bread Rolls at room temperature in an airtight container for up to two days if not consumed right away. For longer storage life up to one month, freeze them individually wrapped in plastic wrap then placed inside resealable bags.
These simple yet delicious Garlic Bread Rolls will surely become a staple in your recipe collection! Enjoy baking!
Mistakes to avoid
When making Garlic Bread Rolls, one common mistake is using stale bread. Stale bread can lead to a dense texture that won’t rise properly. Always opt for fresh bread or dough to achieve the desired fluffiness. Another mistake is not allowing the dough to rise adequately. Skipping this step can result in rolls that are flat and chewy. Make sure to give the dough enough time to double in size for light and airy rolls.
Overloading on garlic is another pitfall. While garlic enhances flavor, too much can overpower the taste. Stick to the recommended amount in your recipe for balanced flavor. Additionally, neglecting to preheat your oven can ruin the baking process. A properly preheated oven ensures even cooking and browning of your Garlic Bread Rolls, resulting in a perfect finish.
Tips and tricks
To achieve perfect Garlic Bread Rolls, consider using high-quality ingredients. Fresh garlic offers a stronger flavor compared to powdered garlic, while real butter provides richness that margarine cannot replicate. When mixing your ingredients, be careful not to over-knead the dough; this can make your rolls tough instead of fluffy. Instead, knead just until combined and smooth.
Another helpful tip is to use a kitchen thermometer when checking for doneness. The internal temperature should reach around 190°F (88°C) for fully cooked rolls. If you don’t have a thermometer, look for a golden-brown color on top and a hollow sound when tapping the bottom of a roll. Experiment with different herbs like parsley or oregano mixed into your garlic butter for added depth of flavor.
Finally, brush the tops of your Garlic Bread Rolls with melted butter right after removing them from the oven. This step adds shine and enhances flavor while keeping the tops soft and moist.
Suggestions for Garlic Bread Rolls
Pair your Garlic Bread Rolls with marinara sauce or a creamy dip for an irresistible appetizer that’s perfect for gatherings or movie nights. You can also serve these rolls alongside hearty soups or salads as a delightful side dish that complements any meal.
For an extra twist, consider adding cheese inside your rolls before baking. Mozzarella or cheddar creates a gooey surprise that will delight everyone at the table. Alternatively, try adding a sprinkle of grated Parmesan on top before baking for an added layer of flavor.
Lastly, if you have leftovers, store them in an airtight container at room temperature for up to two days or freeze them for longer storage options. Reheat in the oven for best results and enjoy them just as fresh as when they first came out!
FAQs
What ingredients are needed for Garlic Bread Rolls?
To make delicious Garlic Bread Rolls, you’ll need basic ingredients such as all-purpose flour, water, sugar, salt, yeast, garlic (fresh or powdered), and butter. Optional ingredients include herbs like parsley or oregano and cheese if you want extra flavor. Using high-quality fresh ingredients will significantly enhance the taste of your rolls.
Can I make Garlic Bread Rolls ahead of time?
Yes, you can prepare Garlic Bread Rolls ahead of time! After shaping the rolls, place them on a baking sheet and cover with plastic wrap. Refrigerate the uncooked rolls overnight before baking them in the morning. Let them come to room temperature before placing them in a preheated oven so they rise adequately during baking.
How do I store leftover Garlic Bread Rolls?
To store leftover Garlic Bread Rolls effectively, place them in an airtight container at room temperature if consuming within two days. For longer storage, wrap each roll tightly in plastic wrap and place them in freezer bags before freezing them. When ready to enjoy again, reheat them directly in the oven until warm.
Can I use whole wheat flour instead of all-purpose flour?
Absolutely! You can substitute whole wheat flour for all-purpose flour when making Garlic Bread Rolls; however, keep in mind that whole wheat flour will yield denser rolls due to its higher fiber content. To maintain fluffiness while using whole wheat flour, consider combining it with some all-purpose flour or adding vital wheat gluten.
What variations can I try with my Garlic Bread Rolls?
There are endless possibilities when it comes to variations on Garlic Bread Rolls! You could incorporate various cheeses such as mozzarella or feta into the dough itself or create different flavored butters by mixing herbs like basil or rosemary into softened butter instead of just garlic alone.
Why are my rolls dense instead of fluffy?
Dense Garlic Bread Rolls might stem from several factors: using stale dough or not allowing adequate rising time could result in flatness as well as over-kneading during preparation leading to tough texture issues rather than lightness expected from soft rolls baked perfectly!
Summary
In summary, creating delightful Garlic Bread Rolls requires attention to detail and quality ingredients. Avoid common pitfalls like using stale bread or overloading on garlic while adhering closely to rising times during preparation stages ensures successful outcomes every time! With helpful tips about ingredient choices along with storage suggestions provided here today—your culinary endeavors will be nothing short of extraordinary!
Print
Garlic Bread Rolls
- Total Time: 30 minutes
- Yield: 12 rolls 1x
Description
Deliciously soft and buttery garlic bread rolls that are perfect as a side dish or appetizer. These rolls are fluffy and infused with a rich garlic flavor, making them irresistible!
Ingredients
2 cups of all-purpose flour
1 packet (2 1/4 tsp) of active dry yeast
1/2 cup of warm water (110°F or 43°C)
1/4 cup of unsalted butter, melted
1/4 cup of milk
1 tsp of sugar
1 tsp of salt
3 cloves of garlic, minced
2 tbsp of fresh parsley, chopped (optional)
1/4 cup of grated Parmesan cheese (optional)
Instructions
1. In a small bowl, dissolve the yeast and sugar in warm water. Let it sit for about 5 minutes until frothy.
2. In a large mixing bowl, combine the flour and salt. Make a well in the center and add the yeast mixture, melted butter, and milk. Mix until a dough forms.
3. Knead the dough on a floured surface for about 5-7 minutes until smooth and elastic.
4. Place the dough in a greased bowl, cover with a cloth, and let it rise in a warm place for about 1 hour or until doubled in size.
5. Preheat your oven to 375°F (190°C).
6. Once risen, punch down the dough and divide it into 12 equal pieces. Shape each piece into a roll.
7. Place the rolls on a baking sheet lined with parchment paper.
8. In a small bowl, mix melted butter, minced garlic, and parsley (if using). Brush this mixture over each roll.
9. If desired, sprinkle grated Parmesan cheese on top.
10. Bake for 15-20 minutes or until golden brown.
Notes
You can adjust the amount of garlic based on your preference for flavor intensity! These rolls are best served warm.
- Prep Time: 10 minutes
- Cook Time: 20 minutes
Nutrition
- Serving Size: 1 roll
- Calories: 150
- Sugar: 0g
- Fat: 6g
- Carbohydrates: 22g
- Protein: 3g
Keywords: garlic bread, rolls, baking