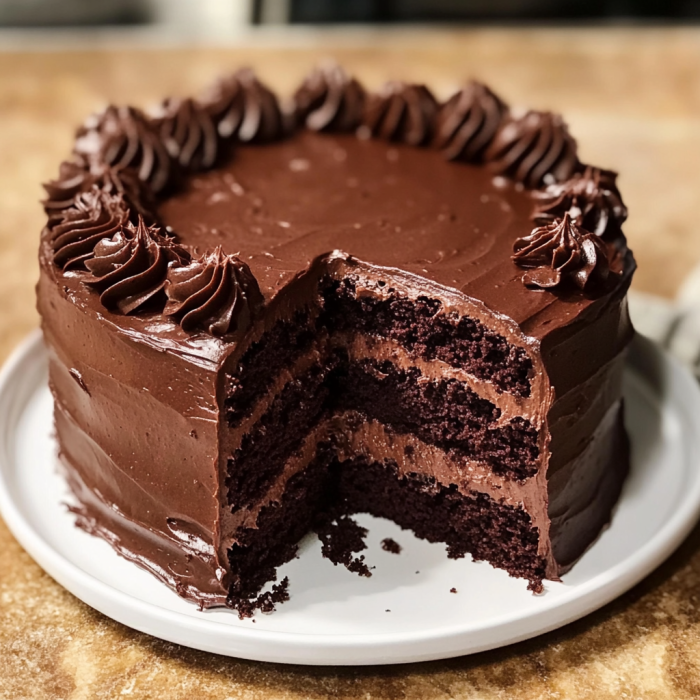
Holy cow, this cake is actually good?!
Let me tell you about the time I brought this cake to my sister-in-law’s birthday. She’s got both dairy and gluten allergies and usually gets stuck with those sad, dry “allergy cakes” that taste like sweetened cardboard. When I set this beast of a chocolate cake down, people literally LAUGHED because they thought I forgot about her allergies. Then she took a bite and almost cried. No joke – this cake is so rich and moist that nobody believes me when I tell them it’s free from dairy and gluten. It’s become my secret weapon at family gatherings, and I’ve had several people beg me for the recipe. So here it is – my ultimate “No way that’s allergy-friendly” chocolate cake that’ll make you question everything you thought you knew about gluten-free baking.
Why You’ll Love This Recipe
- It’s actually MOIST. Like, embarrassingly moist. Not that sad, crumbly gluten-free nonsense.
- Non-allergic people will have zero clue it’s “special” – my chocolate-snob father had thirds.
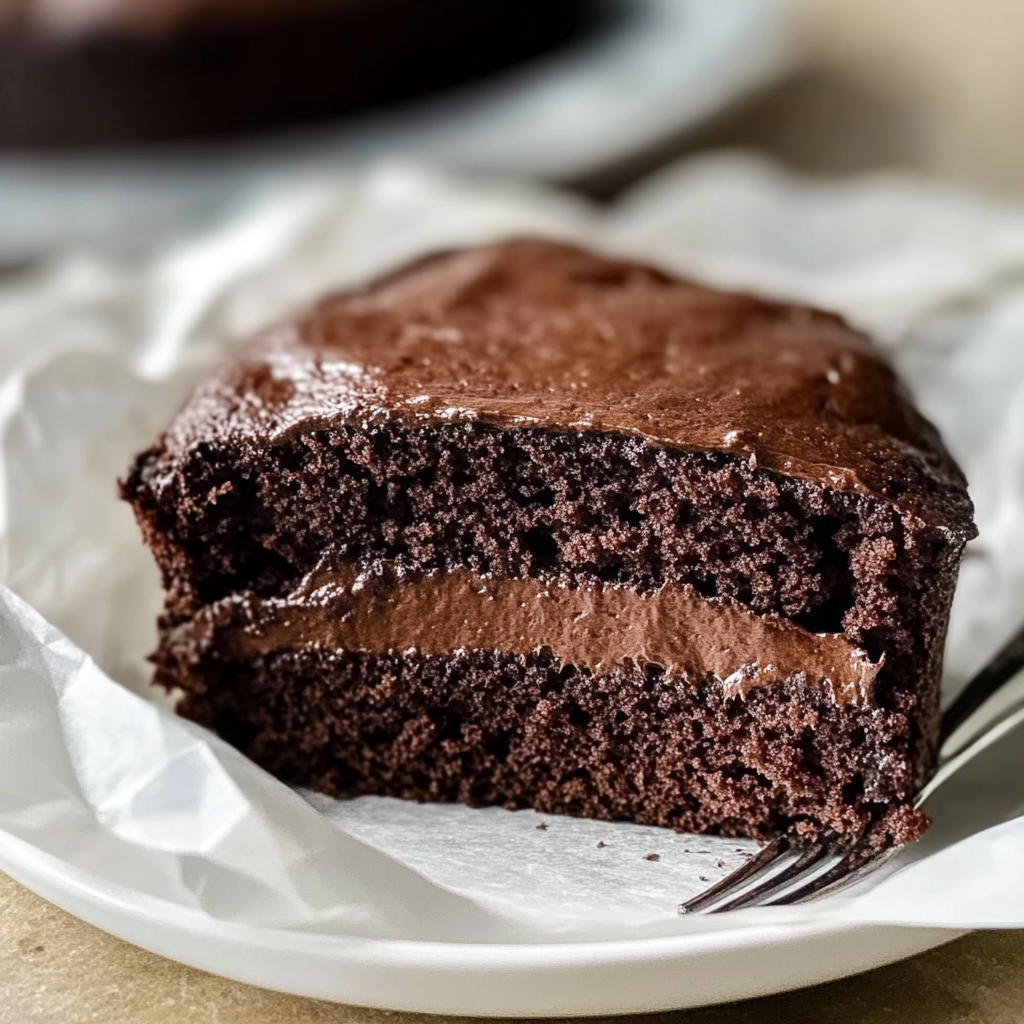
- It holds together for actual slicing! No falling apart when you cut it!
- The frosting is so creamy you’ll question reality. (How can something dairy-free be this silky?)
- You don’t need weird ingredients that cost a fortune and get used once.
- It’s actually EASIER than regular chocolate cake (fewer steps, less that can go wrong).
- Perfect for birthdays, holidays, Tuesday nights when you need chocolate therapy…
The Good Stuff You’ll Need
For the Cake:
- 3 cups gluten-free flour blend (I use Bob’s Red Mill 1-to-1 in the blue bag – NOT the red bag, trust me on this)
- 2 cups granulated sugar (regular sugar, nothing fancy)
- 1 cup unsweetened cocoa powder (go for the good stuff here, it makes a difference)
- 2 tsp baking soda (not baking powder!)
- 1 tsp salt (fine sea salt if you’ve got it)
- 2 tsp xanthan gum (SKIP THIS if your GF flour blend already has it)
- 2/3 cup neutral oil (I use avocado, but vegetable or canola work too)
- 2 tbsp apple cider vinegar (white vinegar works too, but don’t freak out about the vinegar – you won’t taste it)
- 2 tsp vanilla extract (the real stuff, not the fake junk)
- 2 cups cold coffee or water (coffee makes it more chocolatey but water works fine)
- Optional but awesome: 1 tsp espresso powder mixed into the liquid
For the Fudge Filling:
- 1 cup dairy-free chocolate chips (I like Enjoy Life brand)
- 1/4 cup coconut cream (the thick part from the top of a can of coconut milk)
- 2 tbsp coconut oil
- 1/4 cup powdered sugar
- Pinch of salt
- 1/2 tsp vanilla extract
For the Frosting:
- 1 cup dairy-free butter (Earth Balance sticks work great)
- 1 cup vegetable shortening (helps it stay stable at room temp)
- 5-6 cups powdered sugar (depending how sweet you like it)
- 3/4 cup unsweetened cocoa powder
- 1/4 cup dairy-free milk (almond, oat, whatever you’ve got)
- 1 tbsp vanilla extract
- 1/4 tsp salt
- Optional: 2 tbsp instant coffee dissolved in the milk (deepens the chocolate flavor)
Optional Decorations:
- Dairy-free chocolate shavings (just take a bar and use a vegetable peeler)
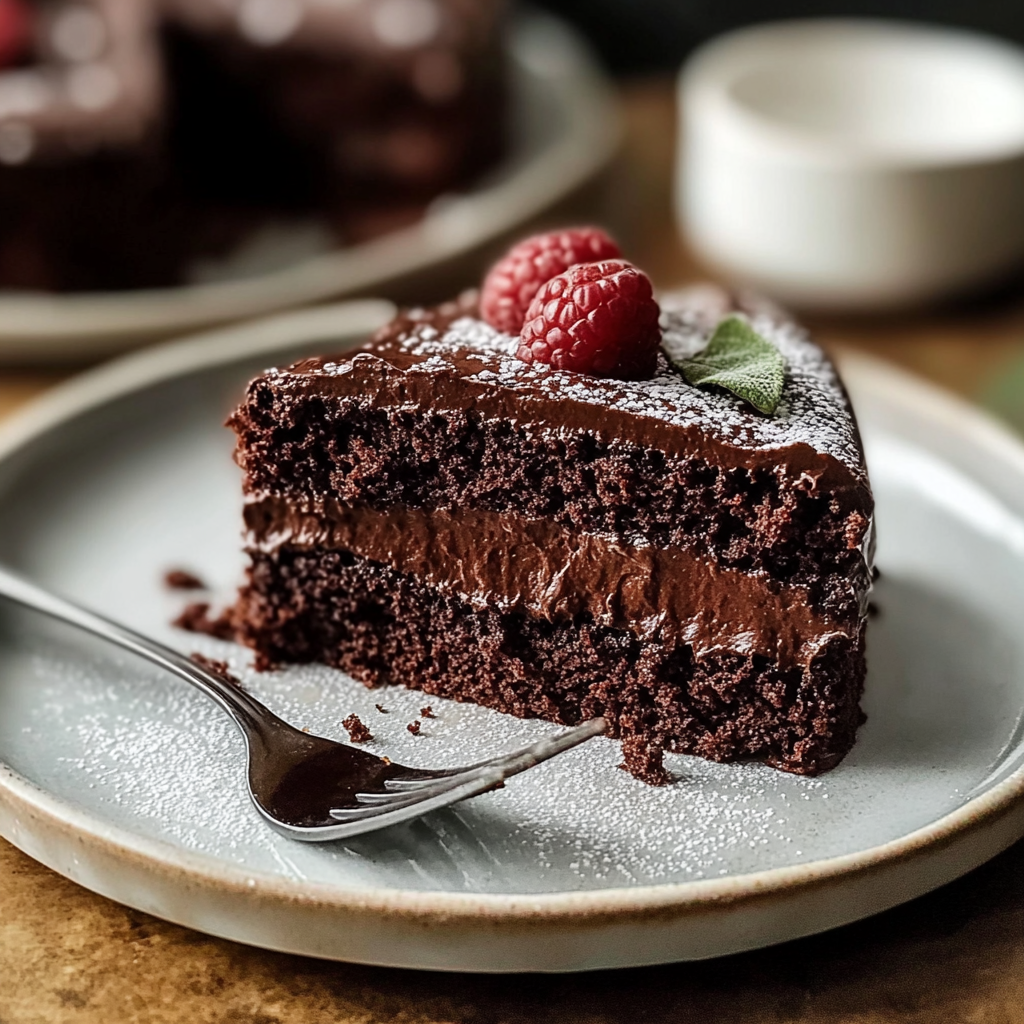
- Fresh berries (raspberries look amazing on chocolate)
- Edible flowers if you’re feeling fancy
- Chocolate curls (melt chocolate, spread thin, cool, then scrape with a spatula)
Let’s Do This
Cake Time (15 min prep + 30 min baking + cooling):
- Preheat your oven to 350°F. Get three 8-inch round cake pans and either grease and flour them with GF flour OR line with parchment rounds and spray the sides. (I always do parchment because I have trust issues with cakes sticking.)
- In a big bowl, whisk together all your dry ingredients: GF flour, sugar, cocoa powder, baking soda, salt, and xanthan gum (if using). Make sure to get all the cocoa powder lumps out.
- Here’s where it gets weird but stay with me: Make THREE HOLES in your dry ingredients. In one hole, pour the oil. In another hole, pour the vanilla. In the third hole, pour the vinegar. Then pour the cold coffee/water over everything.
- Using a hand mixer or stand mixer, mix on medium speed for about 2 minutes until smooth. The batter will be VERY runny, like almost soup. This is normal! Don’t panic and add more flour – this is why it’s so moist.
- Divide the batter evenly between your three pans. I use a measuring cup to make sure they’re equal.
- Bake for 25-30 minutes until a toothpick comes out clean or with a few moist crumbs. DON’T OVERBAKE or I’ll come to your house and be disappointed in you.
- Let the cakes cool in the pans for 10 minutes, then flip onto wire racks to cool COMPLETELY. Like, totally cool. If they’re even a little warm, your frosting will melt and you’ll have a sad cake disaster.
Make the Fudge Filling (10 minutes + cooling time):
- While cakes are cooling, make the filling. Put chocolate chips, coconut cream, and coconut oil in a microwave-safe bowl.
- Microwave in 30-second bursts, stirring each time, until just melted and smooth.
- Stir in powdered sugar, salt, and vanilla until smooth.
- Let it cool until it’s thick but still spreadable – about the consistency of pudding. If it gets too firm, microwave for 5-10 seconds and stir.
Whip Up the Frosting (15 minutes):
- In a stand mixer with the paddle attachment (or a hand mixer if that’s what you’ve got), beat the dairy-free butter and shortening together until fluffy, about 2 minutes.
- Add the cocoa powder and mix on low until combined (unless you enjoy a chocolate dust storm in your kitchen).
- Gradually add the powdered sugar, about a cup at a time, mixing well after each addition.
- Pour in the dairy-free milk, vanilla, and salt, and beat on medium-high for about 3-5 minutes until fluffy and smooth.
- If it’s too thick, add a splash more milk. Too thin? Add more powdered sugar. You want it to be easily spreadable but still hold its shape.
Assembly Time (20 minutes):
- If your cake layers have domes on top, level them with a serrated knife. (Save these scraps for snacking. Baker’s privilege.)
- Place your first layer on a cake plate or cardboard round. Spread half of your fudge filling on top.
- Add the second layer and spread with the remaining fudge filling.
- Top with the third layer, then give the whole cake a thin “crumb coat” of frosting. This is just a thin layer to seal in the crumbs. Pop it in the fridge for 15-20 minutes to firm up.
- Now frost the whole cake with the remaining frosting. If you want to get fancy, reserve about a cup of frosting to pipe decorations on top.
- Decorate however you want! I like to press chocolate shavings around the bottom edge and put some fresh raspberries on top. Makes it look like you know what you’re doing.
Let’s Eat This Thing
- This cake is actually BETTER the day after you make it. The flavors deepen and everything gets even more moist.
- If you need cleaner slices, chill the cake for 30 minutes before cutting, and use a hot knife (run under hot water and wipe dry between cuts).
- For maximum “wow factor,” serve on a pretty cake stand with some fresh berries scattered around the base.
- It pairs amazing with dairy-free vanilla ice cream (NadaMoo coconut milk ice cream is my go-to).
- Coffee or a dairy-free latte is the perfect beverage pairing. The slight bitterness balances the sweetness.
Switch It Up
- Mocha Madness: Add 1 tablespoon instant espresso to both the cake batter and frosting.
- Raspberry Dream: Spread a thin layer of raspberry jam between the cake layers before adding the fudge filling.
- Mexican Chocolate: Add 1-2 teaspoons of cinnamon and a pinch of cayenne to the cake batter for a spicy twist.
- Black Forest Style: Soak each layer with a bit of cherry liqueur (or cherry juice), and add a layer of cherry preserves on top of the fudge filling.
- Peanut Butter Cup: Swap one third of the frosting for dairy-free peanut butter mixed with a bit of powdered sugar.
- Mint Madness: Add 1/2 teaspoon peppermint extract to the frosting and sprinkle crushed dairy-free mint cookies between layers.
Storing Your Masterpiece
- This cake can sit at room temperature for about 2 days (assuming your house isn’t super hot).
- For longer storage, refrigerate for up to 5 days. Just let it come to room temperature before serving (about 30 minutes) so the frosting softens back up.
- YES, you can freeze this cake! Wrap individual slices in plastic wrap and then foil. Thaw in the fridge overnight or on the counter for an hour.
- The unfrosted cake layers freeze beautifully for up to 3 months. Just wrap them well in plastic wrap and then foil. Thaw at room temperature before frosting.
Questions People Actually Ask
Q: Can I make this as cupcakes instead?
A: Definitely! Fill liners about 2/3 full and bake for around 18-22 minutes. Makes about 24-30 cupcakes. Use the fudge filling as a surprise center by cutting a small cone out of each cupcake, filling, and replacing the top before frosting.
Q: I can’t have eggs either – will this still work?
A: This cake is ALREADY egg-free! That’s why it uses vinegar and baking soda for leavening. Pretty cool, right?
Q: Do I really need THREE layers? Seems like a lot.
A: You can absolutely do two thicker layers instead. Just divide between two pans and increase baking time by about 5-8 minutes. But honestly, three layers looks impressive as heck when you cut into it.
Q: My local store doesn’t have dairy-free butter. Can I use something else?
A: You can use all shortening for the frosting, but add an extra pinch of salt and maybe a squeeze of lemon juice to balance the flavor. Coconut oil can work too if it’s solid at room temperature, but the frosting will be softer.
Q: Can I use a different gluten-free flour blend?
A: You can, but results may vary wildly. If you use one without xanthan gum, definitely add the 2 tsp xanthan gum listed. And avoid bean-based GF flours for this recipe unless you want your chocolate cake to taste vaguely of beans.
Q: My cake sank in the middle! What happened?
A: Three most common culprits: 1) You opened the oven door too early, 2) Your baking soda is old, or 3) You overmixed the batter. Remember – just mix until combined!
Decadent Triple Layer Chocolate Cake (Dairy & Gluten Free!)
Description
Let me tell you about the time I brought this cake to my sister-in-law’s birthday. She’s got both dairy and gluten allergies and usually gets stuck with those sad, dry “allergy cakes” that taste like sweetened cardboard. When I set this beast of a chocolate cake down, people literally LAUGHED because they thought I forgot about her allergies. Then she took a bite and almost cried. No joke – this cake is so rich and moist that nobody believes me when I tell them it’s free from dairy and gluten. It’s become my secret weapon at family gatherings, and I’ve had several people beg me for the recipe. So here it is – my ultimate “No way that’s allergy-friendly” chocolate cake that’ll make you question everything you thought you knew about gluten-free baking.
Ingredients
For the Cake:
- 3 cups gluten-free flour blend (I use Bob’s Red Mill 1-to-1 in the blue bag – NOT the red bag, trust me on this)
- 2 cups granulated sugar (regular sugar, nothing fancy)
- 1 cup unsweetened cocoa powder (go for the good stuff here, it makes a difference)
- 2 tsp baking soda (not baking powder!)
- 1 tsp salt (fine sea salt if you’ve got it)
- 2 tsp xanthan gum (SKIP THIS if your GF flour blend already has it)
- 2/3 cup neutral oil (I use avocado, but vegetable or canola work too)
- 2 tbsp apple cider vinegar (white vinegar works too, but don’t freak out about the vinegar – you won’t taste it)
- 2 tsp vanilla extract (the real stuff, not the fake junk)
- 2 cups cold coffee or water (coffee makes it more chocolatey but water works fine)
- Optional but awesome: 1 tsp espresso powder mixed into the liquid
For the Fudge Filling:
- 1 cup dairy-free chocolate chips (I like Enjoy Life brand)
- 1/4 cup coconut cream (the thick part from the top of a can of coconut milk)
- 2 tbsp coconut oil
- 1/4 cup powdered sugar
- Pinch of salt
- 1/2 tsp vanilla extract
For the Frosting:
- 1 cup dairy-free butter (Earth Balance sticks work great)
- 1 cup vegetable shortening (helps it stay stable at room temp)
- 5–6 cups powdered sugar (depending how sweet you like it)
- 3/4 cup unsweetened cocoa powder
- 1/4 cup dairy-free milk (almond, oat, whatever you’ve got)
- 1 tbsp vanilla extract
- 1/4 tsp salt
- Optional: 2 tbsp instant coffee dissolved in the milk (deepens the chocolate flavor)
Optional Decorations:
- Dairy-free chocolate shavings (just take a bar and use a vegetable peeler)
- Fresh berries (raspberries look amazing on chocolate)
- Edible flowers if you’re feeling fancy
- Chocolate curls (melt chocolate, spread thin, cool, then scrape with a spatula)