What the heck is this beauty?
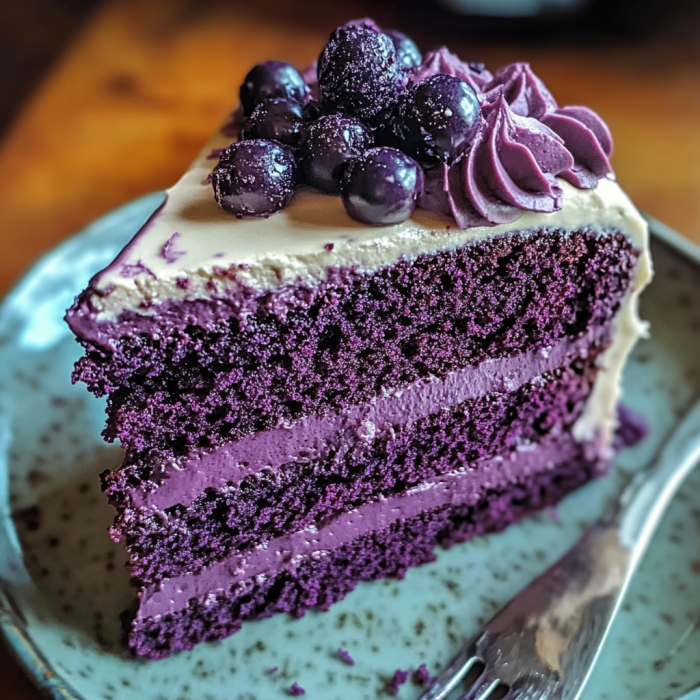
Okay, so you know red velvet cake, right? Well, this is its glamorous, mysterious cousin that shows up to the party and steals the spotlight. I accidentally created this when I was experimenting with natural food coloring (trying to avoid those scary artificial dyes) and ended up with this gorgeous purple masterpiece. It’s got that same tender, slightly tangy crumb as red velvet, but with this stunning deep purple color that looks like something out of a fairy tale. Top it with creamy white chocolate frosting, and you’ve got yourself a showstopper that’ll have people asking for the recipe all night long.
Why You’ll Love This Recipe
Trust me when I say this cake is going to become your new obsession:
- The color is absolutely STUNNING – like, people will literally gasp when you bring this out.
- It tastes as good as it looks (which is saying something because it looks incredible).
- That slight tang from the buttermilk pairs perfectly with the sweet white chocolate frosting.
- It’s surprisingly easy to make, even though it looks super fancy and complicated.
- Perfect for birthdays, anniversaries, or just because you want to feel like cake royalty.
- The texture is so moist and tender, it practically melts in your mouth.
- It photographs like a dream if you’re into that whole Instagram thing.
The Good Stuff You’ll Need
For the Purple Velvet Cake:
- 2 1/2 cups all-purpose flour (don’t pack it down, just scoop and level)
- 1 1/2 cups granulated sugar (the foundation of sweetness)
- 1 teaspoon baking soda (our leavening hero)
- 1 teaspoon salt (brings out all the flavors)
- 1 tablespoon unsweetened cocoa powder (just a hint for that velvet complexity)
- 1 1/2 cups vegetable oil (keeps it super moist)
- 1 cup buttermilk, room temperature (the tang that makes it special)
- 2 large eggs, room temperature (let them sit out for about 30 minutes)
- 2 tablespoons white vinegar (works with the baking soda for that perfect texture)
- 1 teaspoon vanilla extract (the good stuff, not the fake vanilla)
- Purple food coloring (gel works best – you’ll need about 1-2 tablespoons depending on how deep you want it)
For the White Chocolate Frosting:
- 8 oz white chocolate, chopped (get the good quality stuff, not white chips)
- 8 oz cream cheese, room temperature (super important it’s soft!)
- 1/2 cup unsalted butter, room temperature (again, soft is key)
- 3-4 cups powdered sugar, sifted (start with 3 and add more if needed)
- 1 teaspoon vanilla extract
- Pinch of salt (trust me on this one)
- 2-3 tablespoons heavy cream if needed (to get the perfect consistency)
For Decoration (optional but gorgeous):
- White chocolate shavings or curls
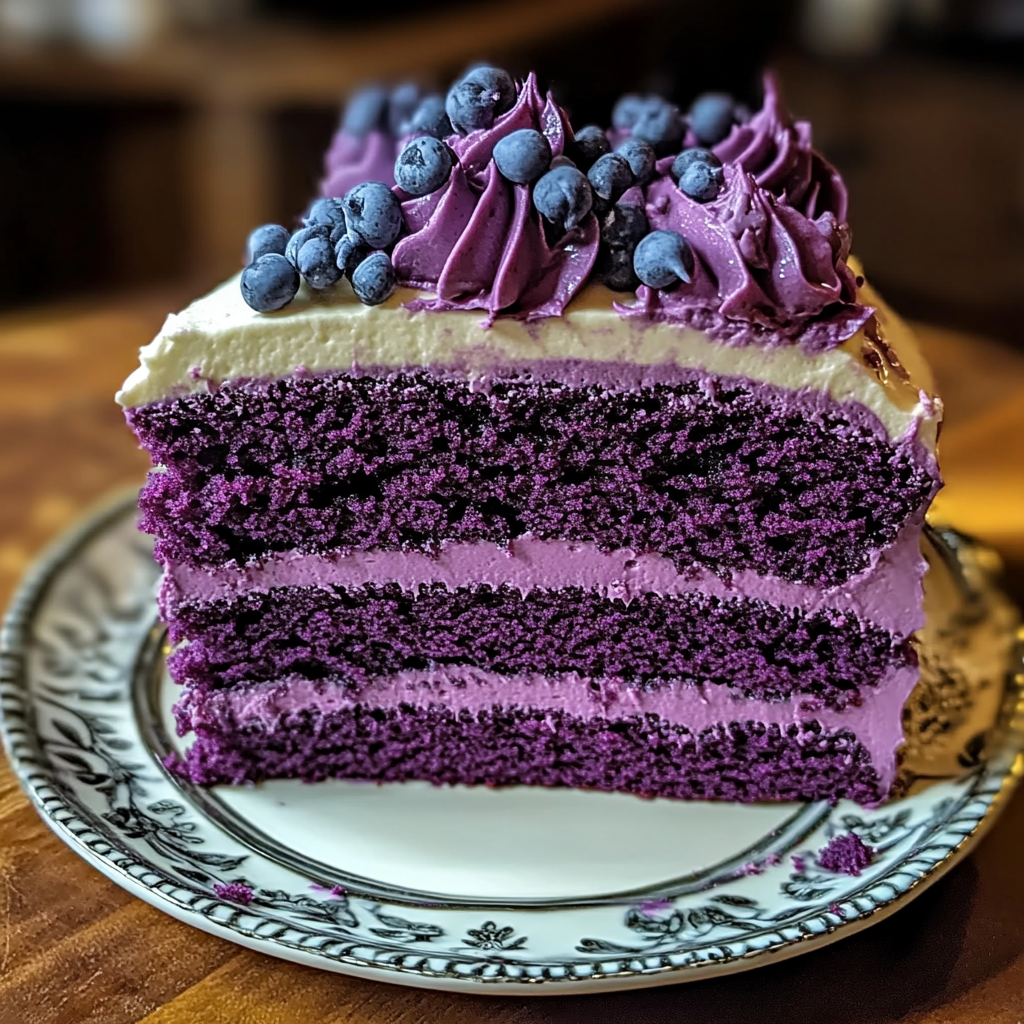
- Fresh berries (blueberries look amazing against the purple)
- Edible purple flowers if you can find them
- Pearl dust for that extra sparkle
Let’s Make Magic Happen
Prep Work (10 minutes):
- Preheat your oven to 350°F (175°C). This is crucial – don’t skip the preheating!
- Grease two 9-inch round cake pans really well (I use butter AND flour, or that baking spray with flour already in it). Line the bottoms with parchment paper if you’re feeling extra careful.
- Get all your ingredients to room temperature. I know it’s annoying to wait, but it makes a HUGE difference in how everything mixes together.
Make the Cake (15 minutes mixing):
- In a large bowl, whisk together flour, sugar, baking soda, salt, and cocoa powder. Make sure there are no lumps – nobody wants a lumpy cake.
- In another bowl (or a large measuring cup), whisk together oil, buttermilk, eggs, vinegar, and vanilla until well combined.
- Here’s where the magic happens: Add your purple food coloring to the wet ingredients. Start with about a tablespoon and mix well. Keep adding until you get that gorgeous deep purple color you’re dreaming of. Don’t be scared – it takes more than you think!
- Pour the wet ingredients into the dry ingredients and stir just until combined. Don’t overmix or you’ll get a tough cake. A few lumps are totally fine.
- Divide the batter evenly between your prepared pans. I use a kitchen scale for this, but eyeballing it works too.
Baking Time (25-30 minutes):
- Bake for 25-30 minutes, or until a toothpick inserted in the center comes out with just a few moist crumbs. Don’t overbake or it’ll be dry!
- Let the cakes cool in the pans for about 10 minutes, then turn them out onto wire racks to cool completely. I mean COMPLETELY – at least an hour. Warm cake + frosting = disaster.
Make That Dreamy Frosting (20 minutes):
- First, melt your white chocolate. I do this in the microwave in 30-second intervals, stirring between each one. Let it cool slightly but don’t let it harden again.
- In a large bowl, beat the cream cheese until super smooth and fluffy (about 2-3 minutes). Scrape down the sides a few times.
- Add the butter and beat until combined and fluffy.
- Slowly drizzle in the cooled melted white chocolate while beating. This part is key – if the chocolate is too hot, it’ll melt your butter and you’ll have soup instead of frosting.
- Add vanilla and salt, then gradually add the powdered sugar, one cup at a time, beating well after each addition.
- If it’s too thick, add cream a tablespoon at a time. If it’s too thin, add more powdered sugar. You want it spreadable but not runny.
Assembly Time (The Fun Part!):
- Place one cake layer on your serving plate. If it’s domed on top, slice that off with a long knife so it’s flat.
- Spread about 1/3 of the frosting on top of the first layer, leaving a little border around the edge.
- Gently place the second layer on top, pressing down slightly to secure.
- Use the remaining frosting to cover the top and sides. Don’t worry about making it perfect – rustic looks are totally in!
- Decorate however your heart desires. White chocolate curls look amazing, or just keep it simple with some fresh berries.
Serving This Beauty
- This cake is rich, so cut smaller slices than you normally would. Trust me on this one.
- It pairs beautifully with fresh berries or a scoop of vanilla ice cream.
- Coffee or milk are perfect beverages to cut through all that richness.
- For extra fancy points, dust the plate with a little powdered sugar before plating each slice.
- This cake actually gets better overnight, so don’t stress if you need to make it ahead.
Switch It Up
Feeling creative? Try these variations:
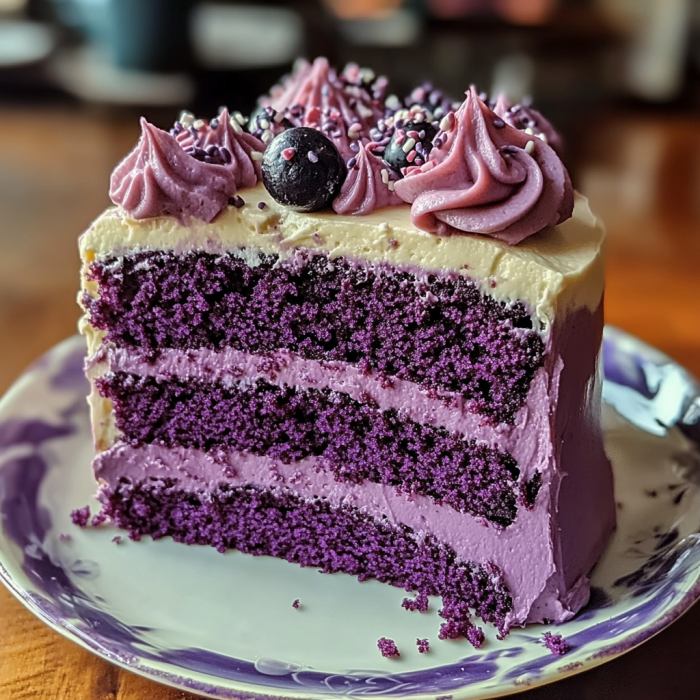
- Ombre Effect: Make three layers and use different amounts of food coloring for each – light purple, medium purple, dark purple. Instagram gold!
- Cream Cheese Frosting: Skip the white chocolate and just make classic cream cheese frosting if you prefer something less sweet.
- Berry Filling: Add a layer of fresh berry compote between the layers. Blueberry or blackberry would be amazing.
- Lemon Twist: Add some lemon zest to the frosting for a citrus pop that cuts through the richness.
- Naked Cake Style: Just frost between the layers and on top, leaving the sides mostly bare for that trendy rustic look.
- Mini Versions: Make cupcakes instead! Bake for about 18-20 minutes and you’ll have adorable purple velvet cupcakes.
Storage and Make-Ahead Tips
- This cake keeps covered at room temperature for 2-3 days, or in the fridge for up to a week.
- You can freeze the unfrosted cake layers for up to 3 months. Wrap them really well in plastic wrap.
- The frosting can be made a day ahead and kept in the fridge. Just bring it back to room temperature and give it a quick beat before using.
- Frosted cake can be frozen for up to 2 months, but let it thaw in the fridge overnight, then bring to room temp before serving.
Questions People Actually Ask
Q: Can I use natural food coloring instead of artificial?
A: Absolutely! Butterfly pea flower powder or purple sweet potato powder work great, but you might need quite a bit to get that deep color. Beet powder works too but can affect the taste slightly.
Q: My frosting is too runny. What did I do wrong?
A: Probably added the white chocolate when it was too hot, or your cream cheese and butter weren’t at the right temperature. Pop it in the fridge for 30 minutes, then beat again. Add more powdered sugar if needed.
Q: Can I make this as sheet cake instead of layers?
A: Totally! Use a 9×13 pan and bake for about 35-40 minutes. You’ll have enough frosting to cover the top generously.
Q: I don’t have buttermilk. Can I substitute?
A: Mix 1 cup regular milk with 1 tablespoon white vinegar or lemon juice. Let it sit for 5 minutes until it curdles slightly. Boom – homemade buttermilk!
Q: Why is my cake dense instead of fluffy?
A: You probably overmixed the batter, or your baking soda might be old. Baking soda loses its power after about 6 months, so if yours has been hanging out in your pantry since 2019, it’s time for a fresh box.
Q: Can I make this dairy-free?
A: The cake part is pretty easy – use non-dairy milk with vinegar instead of buttermilk. The frosting is trickier since it’s basically all dairy, but you could try a vegan cream cheese and butter substitute. Results may vary though!
Decadent Purple Velvet Cake with White Chocolate Frosting
Description
Okay, so you know red velvet cake, right? Well, this is its glamorous, mysterious cousin that shows up to the party and steals the spotlight. I accidentally created this when I was experimenting with natural food coloring (trying to avoid those scary artificial dyes) and ended up with this gorgeous purple masterpiece. It’s got that same tender, slightly tangy crumb as red velvet, but with this stunning deep purple color that looks like something out of a fairy tale. Top it with creamy white chocolate frosting, and you’ve got yourself a showstopper that’ll have people asking for the recipe all night long.
Ingredients
For the Purple Velvet Cake:
- 2 1/2 cups all-purpose flour (don’t pack it down, just scoop and level)
- 1 1/2 cups granulated sugar (the foundation of sweetness)
- 1 teaspoon baking soda (our leavening hero)
- 1 teaspoon salt (brings out all the flavors)
- 1 tablespoon unsweetened cocoa powder (just a hint for that velvet complexity)
- 1 1/2 cups vegetable oil (keeps it super moist)
- 1 cup buttermilk, room temperature (the tang that makes it special)
- 2 large eggs, room temperature (let them sit out for about 30 minutes)
- 2 tablespoons white vinegar (works with the baking soda for that perfect texture)
- 1 teaspoon vanilla extract (the good stuff, not the fake vanilla)
- Purple food coloring (gel works best – you’ll need about 1-2 tablespoons depending on how deep you want it)
For the White Chocolate Frosting:
- 8 oz white chocolate, chopped (get the good quality stuff, not white chips)
- 8 oz cream cheese, room temperature (super important it’s soft!)
- 1/2 cup unsalted butter, room temperature (again, soft is key)
- 3–4 cups powdered sugar, sifted (start with 3 and add more if needed)
- 1 teaspoon vanilla extract
- Pinch of salt (trust me on this one)
- 2–3 tablespoons heavy cream if needed (to get the perfect consistency)
For Decoration (optional but gorgeous):
- White chocolate shavings or curls
- Fresh berries (blueberries look amazing against the purple)
- Edible purple flowers if you can find them
- Pearl dust for that extra sparkle