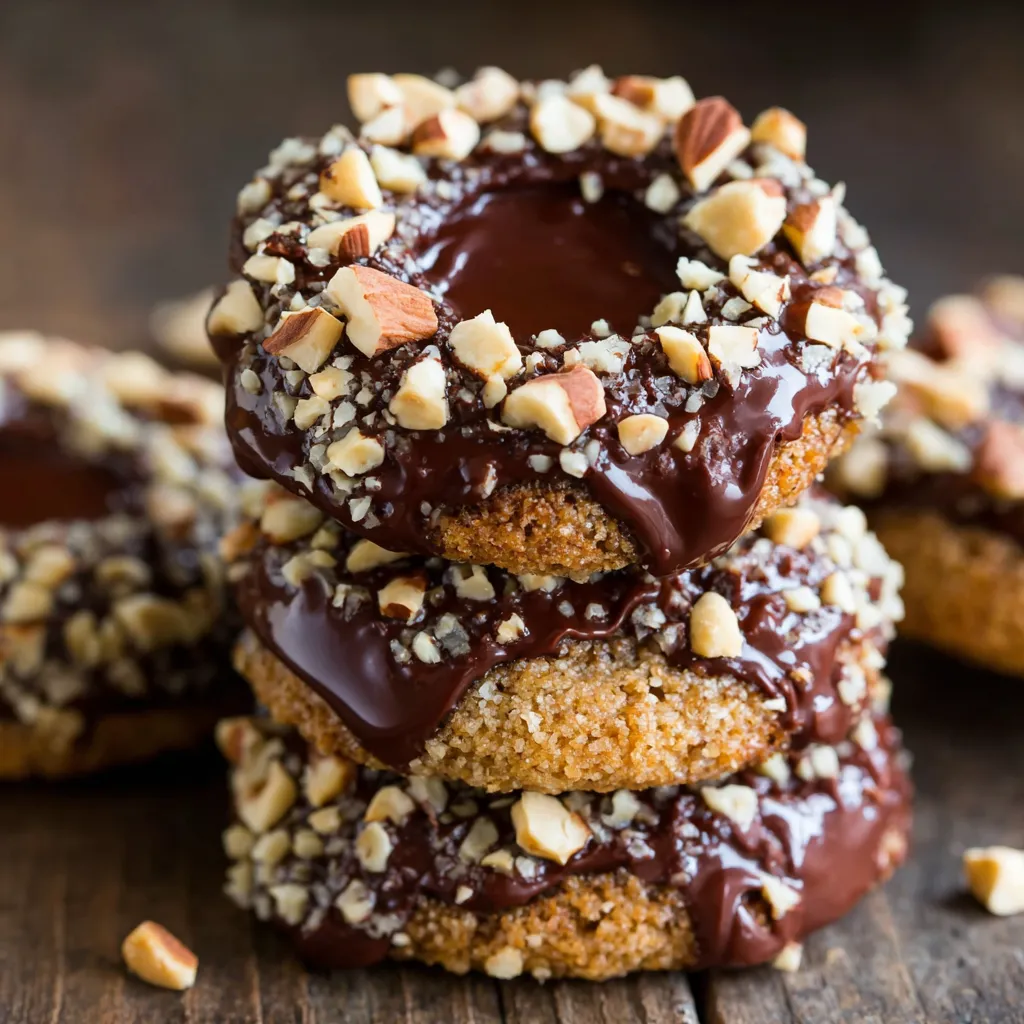
There’s something timeless about the combination of chocolate and hazelnut. Rich, buttery, and delicately nutty, these Chocolate Hazelnut Thumbprint Cookies are the perfect marriage of flavors and textures. Each cookie features a soft cocoa-infused dough, rolled in crunchy hazelnuts, with a glossy pool of chocolate hazelnut spread nestled right in the center. They’re the kind of cookies that look elegant enough for a dessert platter but taste cozy enough for an afternoon coffee break.
Whether you’re baking for the holidays, gifting a batch to friends, or just indulging your sweet tooth, these cookies deliver that melt-in-your-mouth moment you’ll want to experience again and again.
Ingredients
For the Cookies:
- 1 cup (2 sticks) unsalted butter, softened
- 2/3 cup granulated sugar
- 2 teaspoons vanilla extract
- 2 cups all-purpose flour
- 1/2 cup unsweetened cocoa powder
- 1/2 teaspoon salt
- 1/2 cup finely chopped hazelnuts (for rolling)
For the Filling:
- 1/2 cup chocolate hazelnut spread (like Nutella)
- Extra whole hazelnuts for garnish (optional)
Instructions
1. Prepare the Oven and Baking Sheets
Preheat your oven to 350°F (175°C). Line two baking sheets with parchment paper to prevent sticking and ensure even baking.
2. Cream the Butter and Sugar
In a large mixing bowl, beat together the softened butter and granulated sugar using an electric mixer. Continue mixing for 2–3 minutes until the mixture is light, creamy, and pale. Add the vanilla extract and mix until well incorporated.
3. Combine Dry Ingredients
In another bowl, whisk together the flour, cocoa powder, and salt. This helps distribute the cocoa evenly and prevents any lumps.
4. Form the Cookie Dough
Gradually add the dry ingredients to the butter mixture, mixing on low speed. The dough should come together into a soft, firm consistency that’s easy to roll. If it feels too sticky, chill it for 10–15 minutes in the refrigerator.
5. Shape the Cookies
Scoop out about a tablespoon of dough and roll it between your palms into smooth balls (around 1 inch in diameter). Roll each ball in the chopped hazelnuts until fully coated. Arrange them on the prepared baking sheets, leaving about 2 inches between each cookie.
6. Create the Thumbprint
Using your thumb or the back of a small spoon, gently press a small indentation into the center of each dough ball. This will hold your filling later.
7. Bake the Cookies
Place the baking sheets in the preheated oven and bake for 12–14 minutes, or until the cookies are set but still soft in the center. They should not turn crisp or dry.
8. Add the Chocolate Filling
As soon as the cookies come out of the oven, re-press the centers lightly if they’ve puffed up during baking. Spoon about a teaspoon of chocolate hazelnut spread into each indentation while the cookies are still warm. If desired, top each with a whole hazelnut for a decorative finish.
9. Cool and Serve
Allow the cookies to cool on the baking sheets for 5 minutes before transferring them to a wire rack to cool completely. The filling will firm up slightly as they cool, creating that perfect glossy center.
Tips for the Perfect Chocolate Hazelnut Thumbprint Cookies
- Use Softened Butter: This ensures the dough blends smoothly and gives your cookies a tender, buttery texture.
- Finely Chop the Hazelnuts: Smaller pieces stick better to the dough and create a more even coating.
- Keep an Eye on the Bake Time: Overbaking can cause the cookies to dry out. They should still feel soft when you remove them from the oven.
- Re-press the Centers: Doing this right after baking ensures a deeper well for your chocolate filling.
- Try Toasted Hazelnuts: Toasting enhances the nutty aroma and adds depth to the cookie flavor.
- Chill the Dough: If your dough feels too soft or sticky to roll, refrigerate it briefly—it’ll make shaping much easier.
FAQs
Can I use a different filling instead of hazelnut spread?
Yes! You can fill these cookies with raspberry jam, caramel, or even peanut butter for a different twist. Each option creates a unique flavor pairing with the chocolate base.
Can I make the dough ahead of time?
Absolutely. The dough can be made up to 2 days in advance. Wrap it tightly in plastic wrap and refrigerate until you’re ready to bake.
How do I store the baked cookies?
Keep the cookies in an airtight container at room temperature for up to 5 days. For longer storage, freeze them for up to 3 months—just let them thaw at room temperature before serving.
Can I make them gluten-free?
Yes. Simply replace the all-purpose flour with a high-quality gluten-free flour blend. Make sure to use a 1:1 baking blend for best results.
Why did my cookies crack?
A bit of cracking around the edges is normal, but if your dough is too dry, try adding a teaspoon of milk or reducing the bake time slightly next time.
Final Thoughts
Chocolate Hazelnut Thumbprint Cookies are more than just another sweet treat—they’re a small indulgence with big flavor. The tender cocoa cookie, the crunch of toasted hazelnuts, and the silky chocolate center create a dessert that feels both homemade and luxurious.
Serve them at a family gathering, include them in a holiday cookie box, or enjoy one quietly with your morning espresso. However you choose to savor them, these cookies are proof that a little chocolate and hazelnut magic never goes out of style.