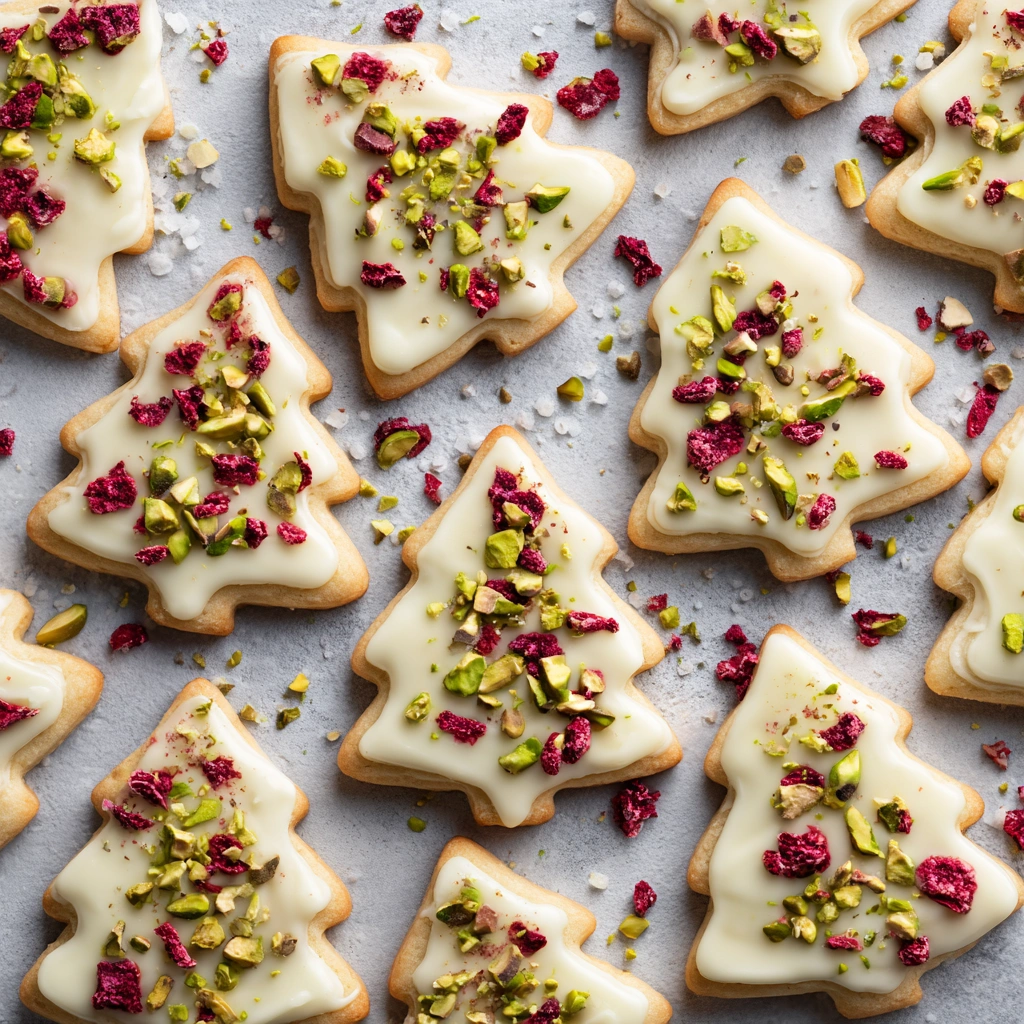
Crunchy, buttery cookies shaped like Christmas trees — festive, fun to decorate, and perfect for holiday parties, gifts, or cozy winter baking.
Why You’ll Love This Recipe
- Simple short-bread/sugar-cookie base — buttery, light, and bakes evenly
- Festive tree shape makes them great for holiday parties or gift tins
- You can decorate in many ways — icing, sprinkles, chocolate dip, nuts — fun and creative
- Easy enough for beginners; decorative enough for holiday cookie exchanges
- Keeps well — good for making ahead and storing
Ingredients
For the Cookie Dough
- 300 g (about 2 ½ cups) all-purpose flour
- 200 g (about 1 cup) unsalted butter, softened
- 100 g (½ cup) granulated sugar (or caster sugar)
- Optional: a pinch of salt (if using unsalted butter)
- Optional flavor: 1 tsp vanilla extract — for subtle flavor
For Decorating / Optional Finish
You can choose how to decorate — here are some ideas:
- Icing (royal icing or simple powdered-sugar glaze)
- Melted chocolate or white-chocolate coating
- Sprinkles, colored sugar, edible pearls, mini candies (for “ornaments”)
- Crushed nuts, chopped pistachios, or freeze-dried berries for texture
- Pretzel sticks (for trunk) — fun if you want each cookie to look like a full little tree
Instructions
- Make the Dough
- In a bowl, cream together the softened butter and sugar until light and fluffy. If using vanilla extract, add it here.
- Gradually add flour (and a pinch of salt if using), mixing until the dough just comes together. Don’t overwork it — you want it smooth but not tough.
- Form the dough into a disk, wrap in plastic wrap, and chill in the fridge for at least 20–30 minutes. Chilling helps keep cookies from spreading too much and holds the shape.
- Shape the Cookies
- Preheat oven to 350 °F (175 °C).
- On a lightly floured surface, roll out the chilled dough to about ¼-inch (≈ 5–6 mm) thickness.
- Use a Christmas-tree cookie cutter (or a knife if you don’t have one) to cut out tree shapes. Place on a baking sheet lined with parchment or a silicone baking mat.
- If you want “trunks,” you can insert a small piece of pretzel stick at the bottom of each tree cookie (press gently so it stays in place).
- Bake
- Bake for 10–14 minutes, or until edges are just starting to turn golden. Cookies should remain fairly pale for a tender, buttery texture — avoid over-baking for a soft short-bread-like bite.
- Remove from oven and let cool on the baking sheet 5 minutes, then transfer to a cooling rack to cool completely before decorating.
- Decorate
You have many decorating options depending on how fancy you want to go:- Icing & Sprinkles: Pipe or spread a thin layer of royal icing or powdered-sugar glaze, then add sprinkles or candy decorations (like ornaments).
- Chocolate-dipped trees: Dip half (or base) of each cooled cookie in melted chocolate or white chocolate; allow to set. Optionally sprinkle crushed nuts or crushed freeze-dried berries on the wet chocolate for festive color and crunch.
- Colorful sugar/simple glaze: Mix powdered sugar + a little milk + food coloring for a quick glaze. Drizzle or flood the cookies, then add edible pearls, colored sugar for ornaments, or dust with colored sugar for sparkle.
- Trunk + ornaments look: Use pretzel stick as trunk, pipe brown icing or melt chocolate for trunk, decorate tree with green icing and “ornaments” — candies, sugar pearls, or sprinkles.
You Must Know
- Chilling the dough before cutting helps the cookies hold their shape — important for tree shapes.
- Don’t over-bake: cookies should stay light in color for a tender, buttery texture.
- Wait until cookies are fully cooled before decorating — warm cookies melt icing/chocolate.
- When using melted chocolate or glaze, ensure it is cooled slightly before decorating to avoid overly runny topping.
Pro Tips
- For smoother dough, use room-temperature butter and don’t overmix once flour is added.
- After cutting cookies, chill on the baking sheet 10 minutes before baking — helps maintain shape.
- Try mixing up decorate styles: half with chocolate-dip + nuts, half with icing + sprinkles — fun variety on cookie platters.
- Store decorated cookies in airtight container at room temperature — layering with parchment paper helps prevent sticking.
- Want a more festive crunch? Add chopped nuts or crushed freeze-dried fruit on top of melted chocolate before it sets.
Ingredient Substitutions & Variations
- Use whole-wheat flour (or part whole-wheat / part all-purpose) for a more rustic texture — but expect slightly denser cookies.
- Use plant-based butter / margarine for a dairy-free version (flavor slightly changes).
- Replace sugar with coconut sugar or other sweetener (texture and sweetness may vary slightly).
- Instead of plain butter cookies — make sugar-cookie dough (with egg) if you prefer a slightly sweeter, lighter cookie.
- For a spicy twist — add ¼ tsp cinnamon or ground ginger for a subtle holiday spice.
Serving Suggestions
- Arrange on a festive platter with assorted Christmas cookies (stars, snowflakes, gingerbread) for holiday parties.
- Package in small cellophane bags tied with ribbon — makes a lovely homemade gift.
- Serve with hot cocoa, tea, or coffee for a cozy winter treat.
- Pair with warm desserts — fruit compote, pudding, or whipped cream for a sweet holiday dessert spread.
Storage Tips
- Once fully cooled and decorated, store in an airtight container at room temperature for up to 5–7 days.
- If storing multiple layers, place parchment paper between layers so cookies don’t stick or smudge.
- Cookies freeze well (without decorations) — freeze dough or baked plain cookies; thaw and decorate when ready.
Frequently Asked Questions
→ Can I use powdered-sugar icing instead of chocolate?
Yes — a simple glaze or royal icing works great and allows for colorful decorations.
→ My cookies spread / lost shape — why?
Probably the dough was too warm or not chilled before baking. Next time, chill dough longer or pop shaped cookies in fridge 10–15 min before baking.
→ Can kids help decorate?
Absolutely — decorating with icing, sprinkles, and candy makes it a fun holiday activity for all ages.
→ Are these cookies good for gifting?
Yes — they travel well when stored in airtight containers or wrapped carefully, and make a festive homemade gift.
Enjoy baking and decorating your Christmas-Tree Cookies — a festive, buttery treat that brings holiday spirit to your kitchen 🎄
Print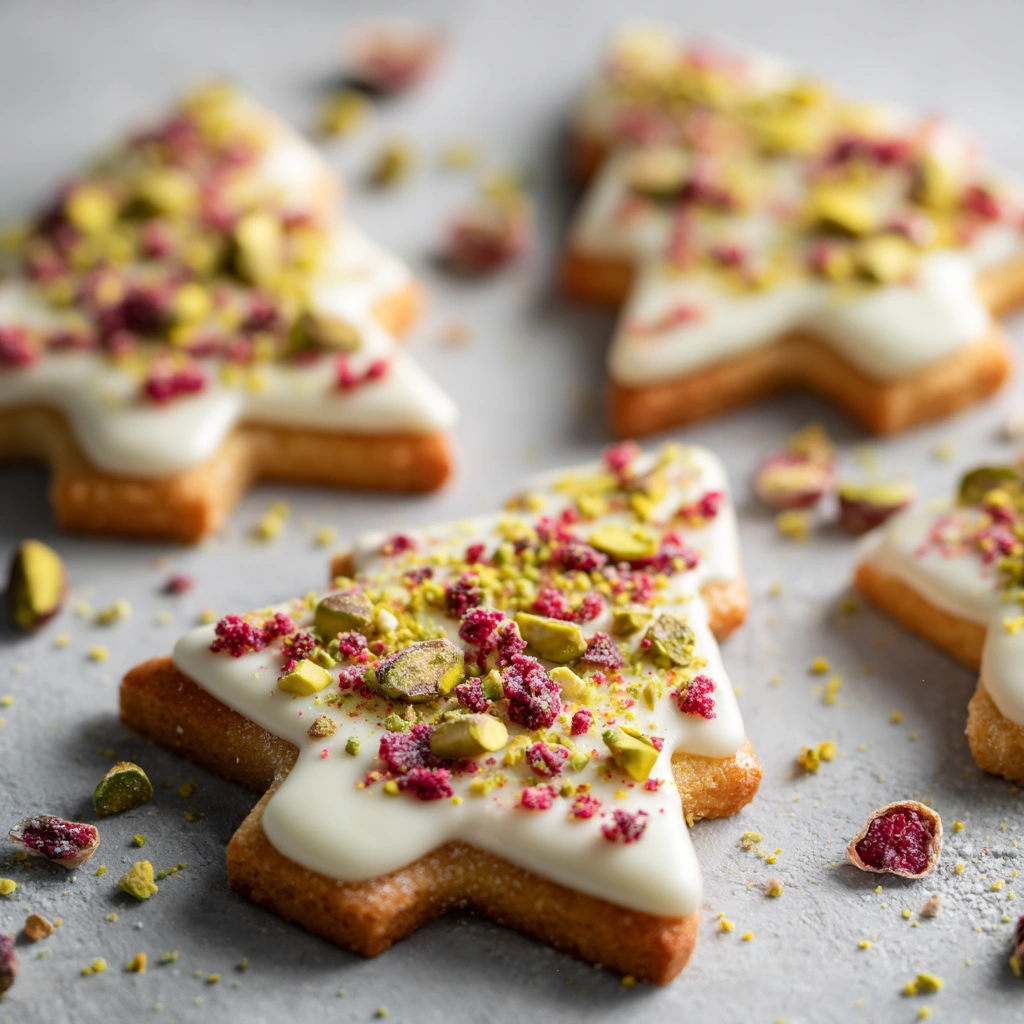
Christmas-Tree Cookies
Description
Crunchy, buttery cookies shaped like Christmas trees — festive, fun to decorate, and perfect for holiday parties, gifts, or cozy winter baking.
Ingredients
For the Cookie Dough
-
300 g (about 2 ½ cups) all-purpose flour
-
200 g (about 1 cup) unsalted butter, softened
-
100 g (½ cup) granulated sugar (or caster sugar)
-
Optional: a pinch of salt (if using unsalted butter)
-
Optional flavor: 1 tsp vanilla extract — for subtle flavor
For Decorating / Optional Finish
You can choose how to decorate — here are some ideas:
-
Icing (royal icing or simple powdered-sugar glaze)
-
Melted chocolate or white-chocolate coating
-
Sprinkles, colored sugar, edible pearls, mini candies (for “ornaments”)
-
Crushed nuts, chopped pistachios, or freeze-dried berries for texture
-
Pretzel sticks (for trunk) — fun if you want each cookie to look like a full little tree
Instructions
-
Make the Dough
-
In a bowl, cream together the softened butter and sugar until light and fluffy. If using vanilla extract, add it here.
-
Gradually add flour (and a pinch of salt if using), mixing until the dough just comes together. Don’t overwork it — you want it smooth but not tough.
-
Form the dough into a disk, wrap in plastic wrap, and chill in the fridge for at least 20–30 minutes. Chilling helps keep cookies from spreading too much and holds the shape.
-
-
Shape the Cookies
-
Preheat oven to 350 °F (175 °C).
-
On a lightly floured surface, roll out the chilled dough to about ¼-inch (≈ 5–6 mm) thickness.
-
Use a Christmas-tree cookie cutter (or a knife if you don’t have one) to cut out tree shapes. Place on a baking sheet lined with parchment or a silicone baking mat.
-
If you want “trunks,” you can insert a small piece of pretzel stick at the bottom of each tree cookie (press gently so it stays in place).
-
-
Bake
-
Bake for 10–14 minutes, or until edges are just starting to turn golden. Cookies should remain fairly pale for a tender, buttery texture — avoid over-baking for a soft short-bread-like bite.
-
Remove from oven and let cool on the baking sheet 5 minutes, then transfer to a cooling rack to cool completely before decorating.
-
-
Decorate
You have many decorating options depending on how fancy you want to go:-
Icing & Sprinkles: Pipe or spread a thin layer of royal icing or powdered-sugar glaze, then add sprinkles or candy decorations (like ornaments).
-
Chocolate-dipped trees: Dip half (or base) of each cooled cookie in melted chocolate or white chocolate; allow to set. Optionally sprinkle crushed nuts or crushed freeze-dried berries on the wet chocolate for festive color and crunch.
-
Colorful sugar/simple glaze: Mix powdered sugar + a little milk + food coloring for a quick glaze. Drizzle or flood the cookies, then add edible pearls, colored sugar for ornaments, or dust with colored sugar for sparkle.
-
Trunk + ornaments look: Use pretzel stick as trunk, pipe brown icing or melt chocolate for trunk, decorate tree with green icing and “ornaments” — candies, sugar pearls, or sprinkles.
-
Notes
-
Chilling the dough before cutting helps the cookies hold their shape — important for tree shapes.
-
Don’t over-bake: cookies should stay light in color for a tender, buttery texture.
-
Wait until cookies are fully cooled before decorating — warm cookies melt icing/chocolate.
-
When using melted chocolate or glaze, ensure it is cooled slightly before decorating to avoid overly runny topping.