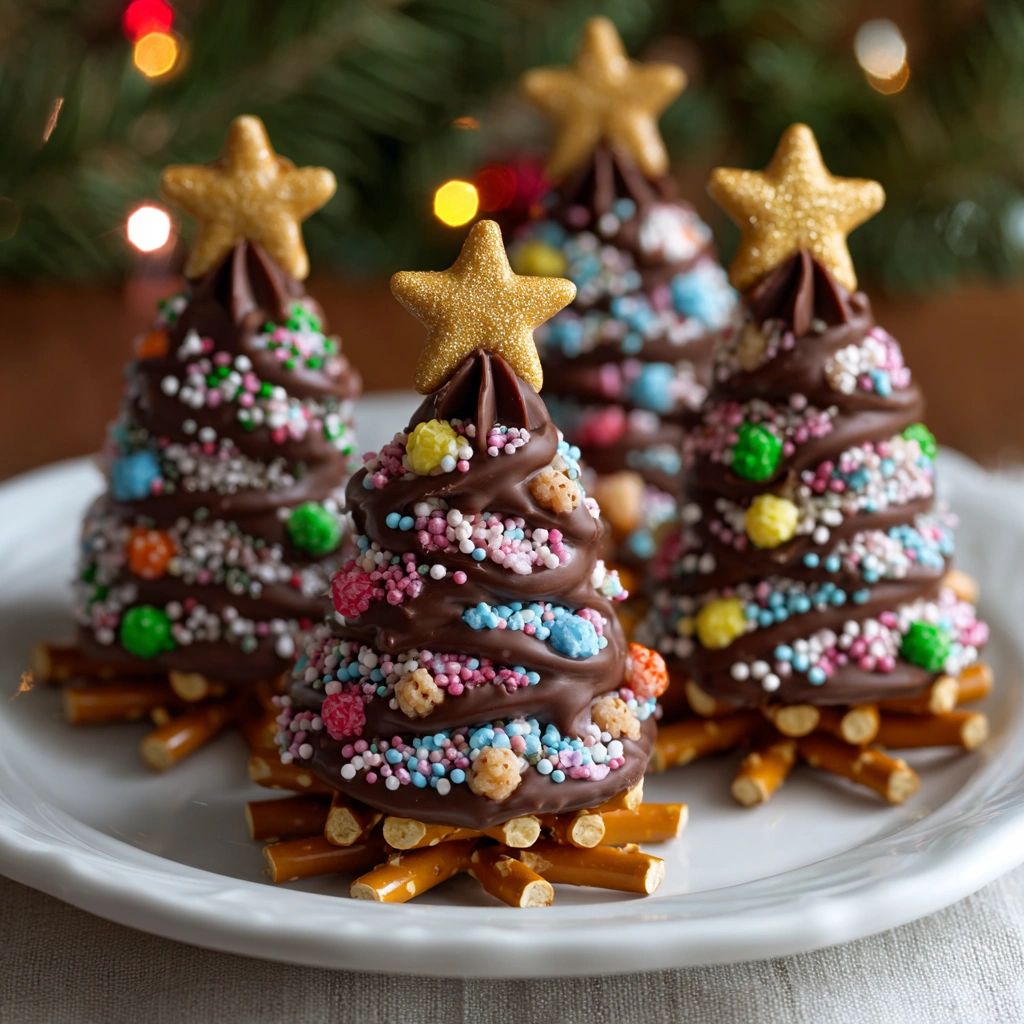
These No-Bake Chocolate Christmas Trees are adorable, festive, and super easy — perfect as holiday treats, gifts, or fun decor for party dessert tables. They combine rich melted chocolate with simple sticks or pretzels, decorated like mini evergreen trees for a playful crunchy-sweet snack.
Why You’ll Love This Recipe
- No baking required — just melt, pipe, and chill
- Great as holiday treats or gifts
- Fun to make with kids — messy (in a good way) and creative
- Easy to customize with sprinkles, candy “ornaments,” or seasonal decorations
- Light, crunchy, and chocolatey — perfect for a sweet snack
Ingredients
- ~100–150 g dark or milk chocolate (or chocolate chips), melted
- 8–16 pretzel sticks, biscuit sticks, or thin cookie sticks (for trunks)
- Sprinkles, mini candies, edible glitter or colored sugar (for decoration)
- Optional: a small candy or chocolate “star” for the top
Instructions
- Prepare the workspace
Line a baking sheet with parchment paper or a silicone baking mat. Arrange the pretzel/cookie sticks spaced out. - Melt the chocolate
Place the chocolate in a heat-proof bowl. Melt gently (microwave in 20–30 s intervals, stirring between each, or use a double boiler) until smooth and glossy. - Pipe or drip the chocolate “tree” on each stick
Transfer melted chocolate into a piping bag (or a small freezer/plastic bag with a tiny corner cut off).
Starting a little above the bottom of the stick (to leave some bare area for the trunk), pipe a zig-zag or back-and-forth pattern down the stick — making it wider near the bottom, narrower near the top, to resemble a tree shape. - Add decorations
While the chocolate is still wet, immediately sprinkle on edible decorations — sprinkles, mini candies, edible glitter, colored sugar, etc. Optionally place a small candy or chocolate star at the top of each tree to resemble a tree topper. - Let set
Allow the chocolate to harden completely. You can leave at room temperature or speed up by placing in the fridge for ~20–30 minutes. - Serve or store
Once solid, peel the trees gently off the parchment. Store in an airtight container — they stay crisp and delicious for several days.
Pro Tips & Notes
- Use a small piping bag (or a plastic bag with a tiny tip) to control the chocolate flow precisely.
- Work in small batches if decorating — chocolate can harden quickly.
- Get creative with decorations: colored sugar, edible glitter, festive sprinkles, crushed nuts, or tiny candy “ornaments.”
- If the chocolate thickens while you pipe, gently re-warm (low power / double boiler) before continuing for smooth lines.
Variations & Substitutions
- Substitute pretzel/cookie sticks with thin chocolate wafers, breadsticks, or candy sticks.
- Use white chocolate (colored with food coloring) for fun colored trees (green, red, pastel).
- For a nutty twist — melt a mix of chocolate + peanut butter before piping for extra flavor.
- Add a light dusting of powdered sugar or shredded coconut for a “snowy” tree look.
Serving Ideas & Storage
- Arrange on a festive platter with other holiday treats (cookies, truffles, candies)
- Wrap individually in small clear bags for gifting or party favors
- Store in a cool, dry place (room temp or fridge) — best eaten within ~1 week
Frequently Asked Questions
→ Can kids help make these?
Yes — kids can help arrange sticks, add sprinkles or decorations; just handle the piping and melting.
→ What if the chocolate gets too thick?
Warm it gently again (low heat or short microwave bursts), stir, then resume piping.
→ Can I use milk chocolate instead of dark?
Absolutely — milk (or even white) chocolate works fine.
→ How do I get a “snowy” look?
Before the chocolate fully sets, dust lightly with powdered sugar or shredded coconut.
Enjoy making these charming chocolate trees — simple, festive, and fun to share during the holidays! 🎄🍫
Print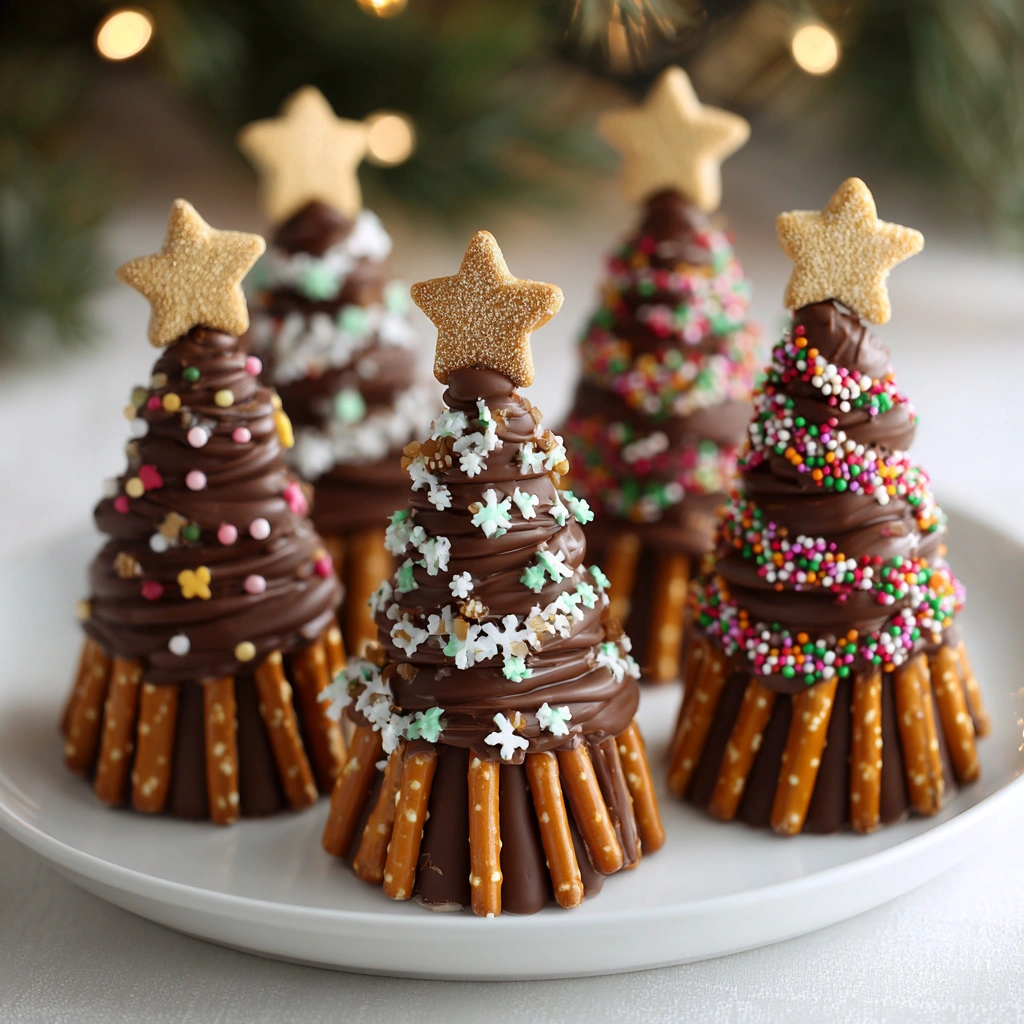
No-Bake Chocolate Christmas Trees
Description
These No-Bake Chocolate Christmas Trees are adorable, festive, and super easy — perfect as holiday treats, gifts, or fun decor for party dessert tables. They combine rich melted chocolate with simple sticks or pretzels, decorated like mini evergreen trees for a playful crunchy-sweet snack.
Ingredients
-
~100–150 g dark or milk chocolate (or chocolate chips), melted
-
8–16 pretzel sticks, biscuit sticks, or thin cookie sticks (for trunks)
-
Sprinkles, mini candies, edible glitter or colored sugar (for decoration)
-
Optional: a small candy or chocolate “star” for the top
Instructions
-
- Prepare the workspace
Line a baking sheet with parchment paper or a silicone baking mat. Arrange the pretzel/cookie sticks spaced out.
- Prepare the workspace
-
- Melt the chocolate
Place the chocolate in a heat-proof bowl. Melt gently (microwave in 20–30 s intervals, stirring between each, or use a double boiler) until smooth and glossy.
- Melt the chocolate
-
- Pipe or drip the chocolate “tree” on each stick
Transfer melted chocolate into a piping bag (or a small freezer/plastic bag with a tiny corner cut off).
Starting a little above the bottom of the stick (to leave some bare area for the trunk), pipe a zig-zag or back-and-forth pattern down the stick — making it wider near the bottom, narrower near the top, to resemble a tree shape.
- Pipe or drip the chocolate “tree” on each stick
-
- Add decorations
While the chocolate is still wet, immediately sprinkle on edible decorations — sprinkles, mini candies, edible glitter, colored sugar, etc. Optionally place a small candy or chocolate star at the top of each tree to resemble a tree topper.
- Add decorations
-
- Let set
Allow the chocolate to harden completely. You can leave at room temperature or speed up by placing in the fridge for ~20–30 minutes.
- Let set
-
- Serve or store
Once solid, peel the trees gently off the parchment. Store in an airtight container — they stay crisp and delicious for several days.
- Serve or store
Notes
-
Use a small piping bag (or a plastic bag with a tiny tip) to control the chocolate flow precisely.
-
Work in small batches if decorating — chocolate can harden quickly.
-
Get creative with decorations: colored sugar, edible glitter, festive sprinkles, crushed nuts, or tiny candy “ornaments.”
-
If the chocolate thickens while you pipe, gently re-warm (low power / double boiler) before continuing for smooth lines.