
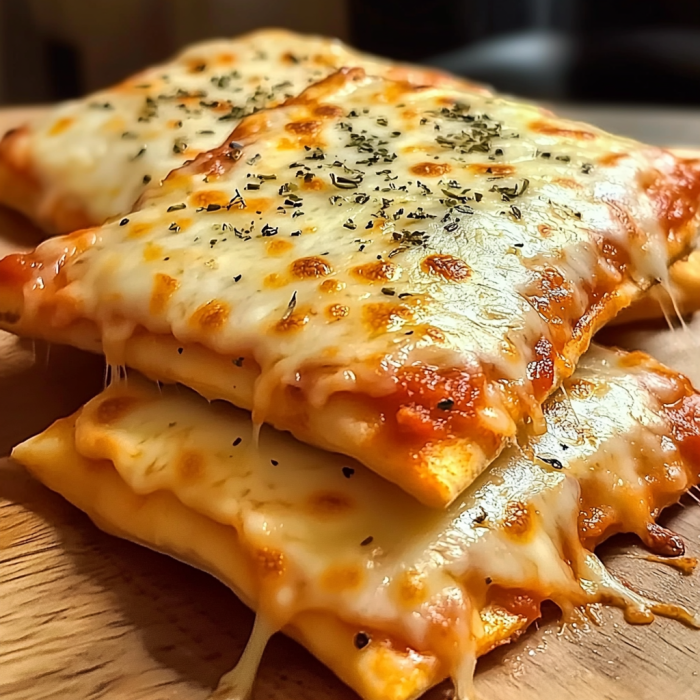
What the heck are these?
Okay, so you know how sometimes you want pizza but also don’t want to deal with the whole pizza-eating situation? Like maybe you need something portable, or you’re tired of pizza slices flopping around and dumping toppings in your lap? THESE are the answer. They’re basically homemade versions of those frozen pizza pockets we all secretly loved as kids, but like, actually good. Crispy on the outside, molten cheese and sauce on the inside, and you can customize them however you want. Plus, they freeze amazingly well, so you can make a bunch and have emergency pizza pockets for those “I need food NOW” moments.
Why You’ll Love This Recipe
Let me tell you why these little pockets of joy deserve a spot in your cooking rotation:
- They’re ridiculously satisfying to bite into – that moment when the steam escapes and the cheese stretches out? Pure magic.
- WAY better than the frozen kind (and you know exactly what’s in them).
- Perfect for eating on the go or in front of the TV without making a mess.
- Kids absolutely lose their minds over these (and will think you’re the coolest).
- They’re freezer-friendly, so you can meal prep like a boss.
- Customizable based on whatever leftovers are lurking in your fridge.
- Great for parties – everyone gets their own perfect little pizza package.
- They reheat beautifully (unlike leftover pizza which is never quite the same).
The Good Stuff You’ll Need
For the Dough (if you’re feeling ambitious):
- 2 ¼ cups all-purpose flour (plus extra for dusting)
- 1 packet active dry yeast (about 2 ¼ teaspoons)
- 1 teaspoon sugar (to feed those hungry yeast beasties)
- 1 teaspoon salt (don’t skip this or your dough will taste like nothing)
- 2 tablespoons olive oil (plus a little more for brushing)
- ¾ cup warm water (not too hot or you’ll kill the yeast – think nice bath water)
For the Dough (if you’re keeping it real):
- 2 cans refrigerated crescent roll dough (or pizza dough)
- OR 1 pound store-bought pizza dough
- A little flour for dusting
For the Filling:
- 1 cup pizza sauce (jarred is fine, I won’t tell anyone)
- 2 cups shredded mozzarella (low-moisture works best)
- ½ cup grated parmesan (the real stuff, not the weird powdery kind)
- 1 tablespoon Italian seasoning (or just oregano if that’s all you’ve got)
- 1 teaspoon garlic powder (because more garlic is always better)
- Optional: 1 cup of toppings – pepperoni, cooked sausage, mushrooms, bell peppers, etc. (just make sure they’re chopped small and any veggies are pre-cooked a bit so they don’t make everything soggy)
For Assembly:
- 1 egg beaten with 1 tablespoon water (for that gorgeous golden crust)
- 2 tablespoons grated parmesan for sprinkling on top
- 1 teaspoon dried oregano or Italian seasoning for sprinkling
- Optional: garlic salt for sprinkling (because why not?)
- Extra pizza sauce for dipping (because double-dipping sauce is never wrong)
Let’s Do This
If Making Dough From Scratch (30 minutes + 1 hour rise time):
- In a large bowl, mix the flour, yeast, sugar, and salt.
- Make a well in the center and pour in the warm water and olive oil. Mix until it forms a shaggy dough.
- Dump it onto a floured surface and knead for about 5-8 minutes until smooth and elastic. You’ll know it’s ready when you poke it and it springs back like a memory foam mattress.
- Place the dough in an oiled bowl, cover with a damp towel or plastic wrap, and let it rise somewhere warm for about an hour until doubled in size.
If Using Store-Bought Dough (0 minutes of prep):
- Let the dough come to room temperature for easier handling.
- Give yourself a high five for saving time.
For the Filling (5 minutes):
- In a bowl, mix the mozzarella, parmesan, Italian seasoning, and garlic powder.
- If using toppings, make sure they’re chopped small and relatively dry. Nobody wants a soggy pocket.
Assembly (20 minutes):
- Preheat your oven to 400°F and line a baking sheet with parchment paper.
- Divide your dough into 8 equal pieces (if using crescent rolls, use one triangle per pocket).
- Roll or stretch each piece into a rough circle about 6 inches across. Don’t stress about perfect circles – we’re going for rustic charm here.
- Place about 1½ tablespoons of pizza sauce in the center of each dough circle, leaving at least an inch border around the edges. (PRO TIP: don’t overdo the sauce or you’ll have a leaky mess!)
- Top the sauce with about ¼ cup of your cheese mixture and a sprinkle of your chosen toppings.
- Here’s the tricky part: fold the dough over to make a half-moon shape and pinch the edges firmly to seal. If you’re having trouble getting it to stick, wet your finger with a tiny bit of water and run it along the edge.
- Transfer your pockets to the prepared baking sheet. Cut a small slit in the top of each (this is your steam vent – super important unless you want pizza pocket explosions).
- Brush the tops with the egg wash, then sprinkle with the extra parmesan, oregano, and garlic salt if using.
Baking (15-18 minutes):
- Bake for 15-18 minutes until golden brown and gorgeous. Some cheese might ooze out, and that’s okay – those crispy cheese bits are the chef’s treat!
- Let them cool for at least 5 minutes before biting in. I CANNOT STRESS THIS ENOUGH. The filling is basically lava when it first comes out of the oven. I’ve lost taste buds learning this lesson for you.
Serving Suggestions
- Serve with extra warm pizza sauce on the side for dipping. Because more sauce is always better.
- A simple green salad on the side makes you feel like a responsible adult who eats balanced meals.
- If you’re feeling fancy, drizzle a little hot honey on top. It sounds weird but the sweet-spicy-savory combo is mind-blowing.
- For parties, make mini versions using smaller dough portions and serve with different dipping sauces (pesto, alfredo, spicy marinara).
- These are perfect for lunchboxes. Make them on Sunday, and you’ve got lunch sorted for half the week.
Switch It Up
Got the basic idea but want to get creative? Try these variations:
- Breakfast Pizza Pockets: Fill with scrambled eggs, cheese, and bacon or sausage. Weekend brunch game-changer!
- Buffalo Chicken: Shredded chicken mixed with buffalo sauce, blue cheese, and a little ranch drizzle on top.
- Mediterranean: Feta cheese, olives, spinach, and a little sun-dried tomato. Fancy!
- Dessert Pockets: Fill with Nutella and banana slices or cream cheese and berries. Dust with powdered sugar after baking.
- Taco Pockets: Ground beef with taco seasoning, cheddar cheese, and a little salsa. Serve with sour cream for dipping.
- BBQ Chicken: Shredded chicken, BBQ sauce instead of pizza sauce, red onions, and smoked gouda. Chef’s kiss!
Storage & Reheating
- Refrigerator: Once cooled, store in an airtight container for up to 3 days.
- Freezer: These are PERFECT for freezing! Let them cool completely, then wrap individually in plastic wrap and place in a freezer bag. They’ll keep for about 3 months.
- Reheating from refrigerated: About 10-12 minutes in a 350°F oven, or 1-2 minutes in the microwave (but the crust won’t be as crispy).
- Reheating from frozen: Don’t thaw first! Just pop them in a 375°F oven for about 15-20 minutes until heated through and crispy. You can also microwave for 2-3 minutes, but again, you’ll lose the crispy exterior.
- Air fryer reheat: 350°F for 3-4 minutes from refrigerated, 8-10 minutes from frozen. This is honestly the BEST way to reheat them – almost as good as fresh!
Questions People Actually Ask
Q: Can I use different cheeses?
A: Absolutely! Mozzarella is traditional, but feel free to mix it up with cheddar, provolone, fontina, or whatever cheese makes your heart happy. Just avoid very soft cheeses that might make things too runny.
Q: My pizza pockets leaked everywhere! What went wrong?
A: Three possible culprits: 1) You overstuffed them (we all get greedy), 2) You didn’t seal the edges well enough (really pinch them shut), or 3) You forgot the steam vent (that little cut on top is super important). Don’t worry, though – even ugly pizza pockets taste amazing.
Q: Can I make these ahead of time for a party?
A: Definitely! You can assemble them up to 24 hours ahead, keep them refrigerated, and bake just before serving. Or bake them ahead and reheat in the oven for 8-10 minutes at 350°F.
Q: Do I really need the egg wash?
A: Nope! You can use olive oil instead, or even skip it entirely. The egg wash just gives that bakery-style golden sheen. If you skip it, they’ll still taste great but won’t be quite as pretty.
Q: My dough is sticking to everything and driving me crazy!
A: Add more flour to your work surface, and make sure your hands are floured too. If it’s super sticky, let it rest for 5 minutes before trying again – sometimes the dough just needs a little time-out.
Q: Can I make these in the air fryer?
A: Yes! Cook at 350°F for about 8-10 minutes. You might need to work in batches depending on the size of your air fryer, but the results are extra crispy and amazing.

Easy Cheesy Pizza Pockets with Mozzarella & Sauce
Description
Okay, so you know how sometimes you want pizza but also don’t want to deal with the whole pizza-eating situation? Like maybe you need something portable, or you’re tired of pizza slices flopping around and dumping toppings in your lap? THESE are the answer. They’re basically homemade versions of those frozen pizza pockets we all secretly loved as kids, but like, actually good. Crispy on the outside, molten cheese and sauce on the inside, and you can customize them however you want. Plus, they freeze amazingly well, so you can make a bunch and have emergency pizza pockets for those “I need food NOW” moments.
Ingredients
For the Dough (if you’re feeling ambitious):
- 2 ¼ cups all-purpose flour (plus extra for dusting)
- 1 packet active dry yeast (about 2 ¼ teaspoons)
- 1 teaspoon sugar (to feed those hungry yeast beasties)
- 1 teaspoon salt (don’t skip this or your dough will taste like nothing)
- 2 tablespoons olive oil (plus a little more for brushing)
- ¾ cup warm water (not too hot or you’ll kill the yeast – think nice bath water)
For the Dough (if you’re keeping it real):
- 2 cans refrigerated crescent roll dough (or pizza dough)
- OR 1 pound store-bought pizza dough
- A little flour for dusting
For the Filling:
- 1 cup pizza sauce (jarred is fine, I won’t tell anyone)
- 2 cups shredded mozzarella (low-moisture works best)
- ½ cup grated parmesan (the real stuff, not the weird powdery kind)
- 1 tablespoon Italian seasoning (or just oregano if that’s all you’ve got)
- 1 teaspoon garlic powder (because more garlic is always better)
- Optional: 1 cup of toppings – pepperoni, cooked sausage, mushrooms, bell peppers, etc. (just make sure they’re chopped small and any veggies are pre-cooked a bit so they don’t make everything soggy)
For Assembly:
- 1 egg beaten with 1 tablespoon water (for that gorgeous golden crust)
- 2 tablespoons grated parmesan for sprinkling on top
- 1 teaspoon dried oregano or Italian seasoning for sprinkling
- Optional: garlic salt for sprinkling (because why not?)
- Extra pizza sauce for dipping (because double-dipping sauce is never wrong)