
Okay, so I’ve been on this whole “trying to eat healthier but still want dessert” kick for months now, and let me tell you – these frozen Greek yogurt bites have been a GAME CHANGER. They taste like little bites of peanut butter cheesecake but they’re actually pretty good for you!
My kids think they’re getting away with something when they eat these for snack time, and honestly, so do I when I’m sneaking them at 9 PM while watching Netflix. They’re creamy, just sweet enough, and that peanut butter flavor hits all the right spots. Plus, they take like 10 minutes to make and then the freezer does all the work!
What You’ll Need
For the Basic Bites:
- 2 cups plain Greek yogurt (I use the thick, full-fat kind – don’t go fat-free here!)
- 1/2 cup natural peanut butter (the kind where you have to stir in the oil)
- 1/4 to 1/3 cup honey (depending on how sweet you like things)
- 1 teaspoon vanilla extract
- Pinch of salt (trust me on this!)
For the Fun Coatings (totally optional but so worth it):
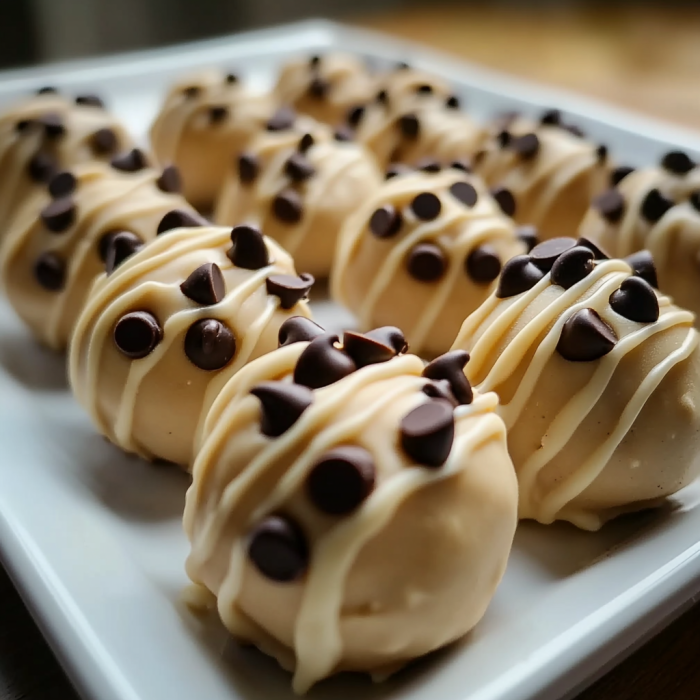
- 1/2 cup mini chocolate chips
- 1/4 cup chopped peanuts
- 2 tablespoons cocoa powder
- 1/4 cup shredded coconut
- Crushed graham crackers
Equipment You’ll Need:
- Mini muffin tin or silicone molds
- Paper mini muffin liners (makes removal SO much easier)
- Mixing bowl
- Whisk or electric mixer
Let’s Make These Little Nuggets of Joy
The Base Mixture:
- First, make sure your peanut butter is well-stirred. If it’s been sitting in the pantry with all that oil on top, give it a good mix until it’s smooth and creamy.
- In a medium bowl, whisk together the Greek yogurt, peanut butter, honey (start with 1/4 cup – you can always add more), vanilla, and that pinch of salt. I like to use my hand mixer on low speed for about a minute to make sure everything’s really well combined and fluffy.
- Taste it! This is the fun part. Too tart? Add more honey. Need more peanut butter flavor? Add another tablespoon. This is YOUR dessert, make it how you like it!
Assembly Time:
- Line your mini muffin tin with paper liners. I learned this the hard way – trying to pop these out without liners is a messy disaster.
- Spoon the mixture into each liner, filling them about 3/4 full. I use a small cookie scoop for this because I’m fancy like that, but a regular spoon works fine too.
- If you’re doing the coatings (and why wouldn’t you?), sprinkle them on top now. Press them down slightly so they stick.
- Pop the whole tray in the freezer for at least 3 hours. I usually make them in the morning and they’re perfect by afternoon snack time.
The Waiting Game:
- Once they’re frozen solid, you can pop them out of the liners and store them in a freezer bag or container. Or just eat them straight from the tray like I do!
Flavor Combinations I’m Obsessed With
After making these about a hundred times (not exaggerating), here are my favorite variations:
Chocolate PB Cup: Add 2 tablespoons cocoa powder to the base mix and top with mini chocolate chips. Tastes like a frozen Reese’s!
Tropical Twist: Use almond butter instead of peanut butter and top with shredded coconut and a tiny drizzle of honey.
S’mores Vibes: Crush up some graham crackers and mix half into the base, sprinkle the rest on top with mini chocolate chips.
Banana Bread: Mash half a ripe banana into the base mix and top with chopped walnuts and a sprinkle of cinnamon.
Cookies & Cream: Crush up some Oreos and fold them right into the yogurt mixture. My kids go CRAZY for this version.
PB&J: Add a tiny dollop of your favorite jam to each cup before freezing and swirl it in with a toothpick.
Serving Tips That Actually Matter
- Let them sit out for about 2-3 minutes before eating if they’re rock-hard frozen. You want them slightly soft but still frozen.
- These are perfect for lunchboxes! They’ll be perfectly soft by lunch time if you pack them frozen in the morning.
- For parties, I arrange them on a nice platter and let people pick their favorites. They look so fancy but took zero effort!
- Pro tip: Make different flavors and put them in different colored liners so people know which is which.
Storage Secrets
These little beauties will keep in the freezer for up to 3 months, though they never last that long in my house! I store them in a freezer-safe container with parchment paper between layers if I’m stacking them.
Want to make them more portable? Once they’re frozen, you can wrap each one individually in plastic wrap. Perfect for grabbing on your way out the door!
I’ve also discovered they’re amazing slightly thawed – like the texture of soft-serve ice cream. Sometimes I’ll take a few out and let them sit on the counter for about 10 minutes before eating.
Make-Ahead Magic
This is where these bites really shine. I usually make a double batch on Sunday and we have healthy desserts all week long. Different family members have claimed different flavors as “theirs” – my husband always grabs the chocolate ones, my daughter loves the coconut version, and my son hoards the cookies & cream ones.
You can also make the base mixture and keep it in the fridge for up to 3 days before scooping and freezing. Sometimes I’ll make the mixture in the morning, then let the kids help scoop them into the molds after school.

Troubleshooting (Because I’ve Made Every Mistake)
“My yogurt mixture is too runny!” You might be using a yogurt that’s not thick enough. Greek yogurt is key here – it’s much thicker than regular yogurt. If you only have regular yogurt, strain it through a coffee filter for a few hours first.
“They’re too tart!” Add more honey! Some Greek yogurts are more tart than others. Start with less and add more to taste.
“The peanut butter isn’t mixing in smoothly!” Make sure your peanut butter is at room temperature and well-stirred. If it’s too cold and thick, it won’t incorporate well.
“They’re too hard to bite when frozen!” Let them sit out for a few minutes, or try adding a tablespoon of cream cheese to the base mixture – it makes them softer when frozen.
“My toppings keep falling off!” Press them into the yogurt mixture slightly before freezing, or try mixing some of the toppings directly into the base instead of just sprinkling on top.
Why These Work So Well
Honestly, these have solved my “I want something sweet but not terrible for me” problem. The Greek yogurt gives you protein, the peanut butter adds healthy fats, and the honey is way better than processed sugar. My kids think they’re getting dessert, but I feel good about giving them something with actual nutrition.
They’re also incredibly versatile – you can make them as healthy or as indulgent as you want. Want them more dessert-like? Add chocolate chips and a drizzle of melted peanut butter on top. Keeping it clean? Stick with just the basic recipe and maybe some chopped nuts.
The texture is what really gets me though – they’re creamy and rich like ice cream but with that slight tanginess from the Greek yogurt that keeps them from being too sweet. And there’s something so satisfying about eating a frozen treat that doesn’t leave you feeling guilty afterward.
Give these a try! They’re honestly one of those recipes that sounds too simple to be amazing, but trust me – they are. My freezer is never without a stash of these little beauties now.
PrintFrozen Greek Yogurt Bites with Peanut Butter
Description
My kids think they’re getting away with something when they eat these for snack time, and honestly, so do I when I’m sneaking them at 9 PM while watching Netflix. They’re creamy, just sweet enough, and that peanut butter flavor hits all the right spots. Plus, they take like 10 minutes to make and then the freezer does all the work!
Ingredients
For the Basic Bites:
- 2 cups plain Greek yogurt (I use the thick, full-fat kind – don’t go fat-free here!)
- 1/2 cup natural peanut butter (the kind where you have to stir in the oil)
- 1/4 to 1/3 cup honey (depending on how sweet you like things)
- 1 teaspoon vanilla extract
- Pinch of salt (trust me on this!)
For the Fun Coatings (totally optional but so worth it):
- 1/2 cup mini chocolate chips
- 1/4 cup chopped peanuts
- 2 tablespoons cocoa powder
- 1/4 cup shredded coconut
- Crushed graham crackers
Equipment You’ll Need:
- Mini muffin tin or silicone molds
- Paper mini muffin liners (makes removal SO much easier)
- Mixing bowl
- Whisk or electric mixer