
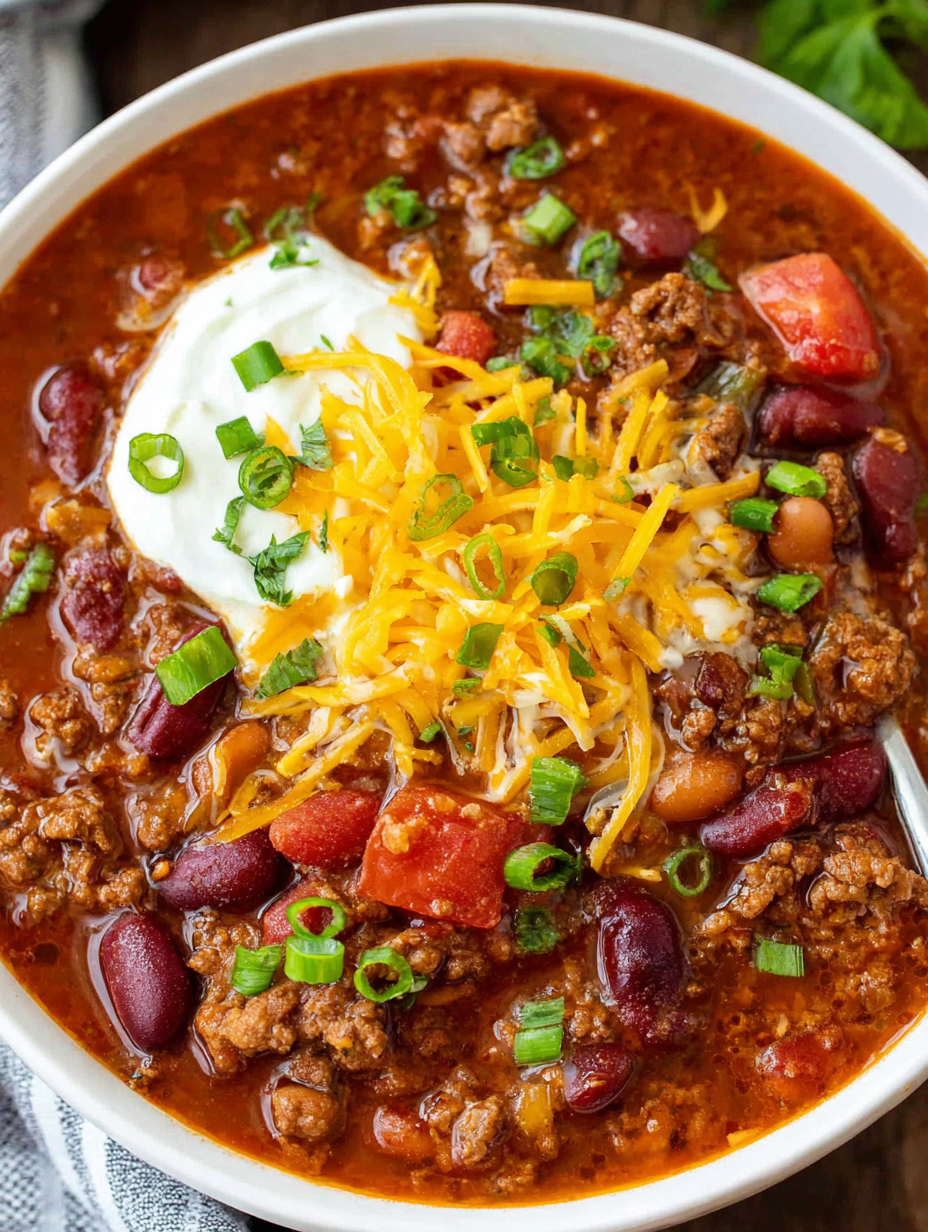
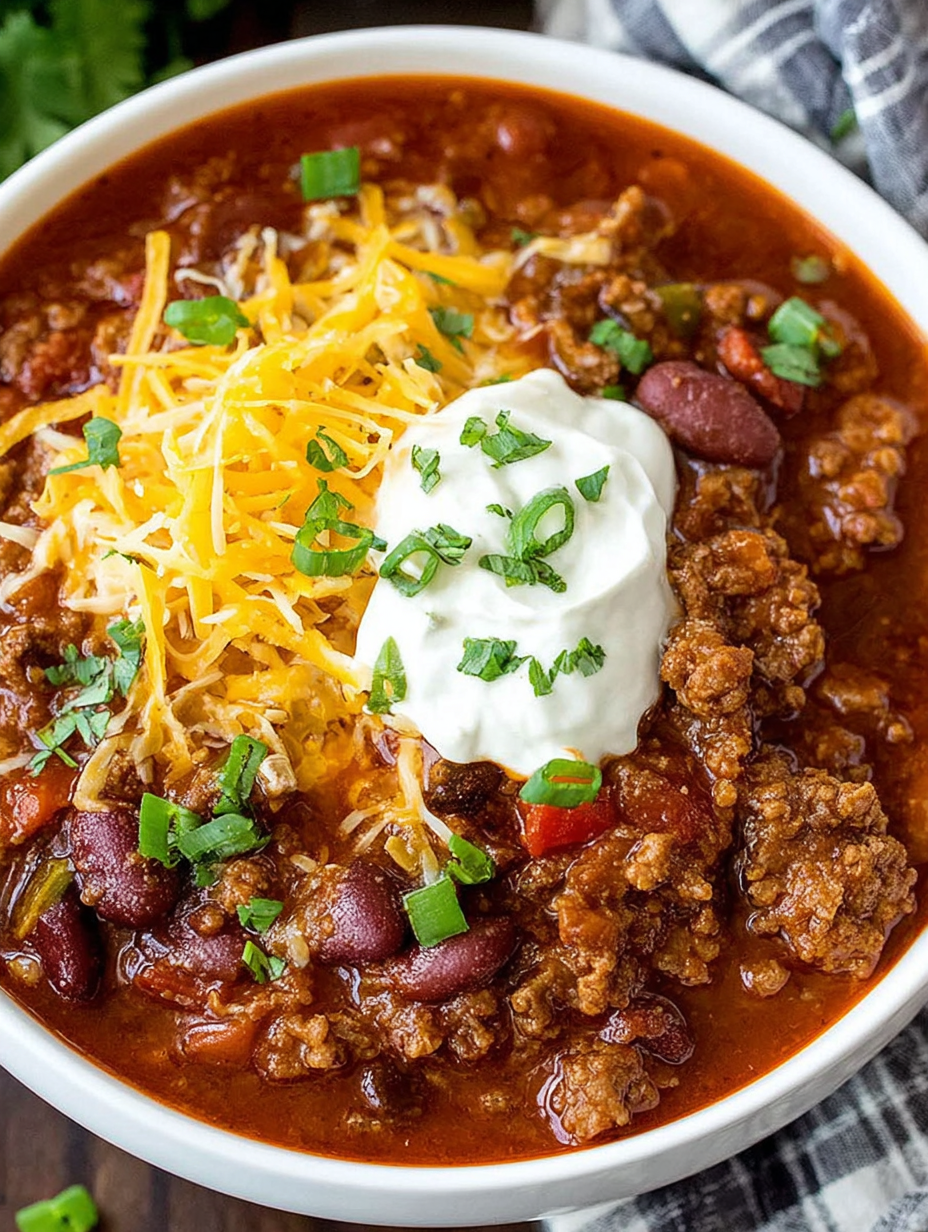
This hearty Instant Pot Chili Bowl delivers all the rich, complex flavors of traditional slow-simmered chili in a fraction of the time. Tender ground beef combines with a medley of kidney and pinto beans in a robust tomato base, enhanced with smoky paprika, earthy cumin, and a secret touch of cocoa powder that adds unexpected depth. The magic of pressure cooking transforms simple ingredients into a deeply satisfying bowl of comfort that tastes like it’s been simmering all day. Perfect for busy weeknights, game day gatherings, or meal prep sessions, this set-it-and-forget-it chili will become your go-to recipe when you crave authentic, soul-warming flavor without the all-day commitment. Top it with your favorite garnishes and watch it disappear from the table.
Ingredients
Proteins:
- 2 lbs ground beef, 90% lean
Vegetables and Aromatics:
- 1 large onion, finely diced
- 1½ tsp minced garlic
- 28 oz can diced tomatoes, undrained
Canned Goods (serves 6-8):
- 3 cans (8 oz each) tomato sauce
- 1 can (15 oz) kidney beans, drained and rinsed
- 1 can (15 oz) pinto beans, drained and rinsed
Liquids:
- ¾ cup beef broth
- 2 tsp olive oil
Spices and Seasonings:
- 2 tbsp chili powder
- 2 tsp ground cumin
- 2 tsp smoked paprika
- 2 tsp cocoa powder (unsweetened)
- 1 tsp granulated sugar
- 1½ tsp kosher salt
- ¾ tsp ground black pepper
Toppings (optional):
- Shredded cheese (cheddar or Mexican blend)
- Diced fresh tomatoes
- Chopped green onions
- Sour cream
- Sliced jalapeños
- Fresh cilantro
Instructions (Total Time: 35 minutes)
Step 1: Prepare Instant Pot (2 min.)
- Plug in Instant Pot and ensure inner pot is properly seated
- Select ‘Sauté’ mode and adjust to ‘More’ setting
- Allow pot to heat up until display shows ‘Hot’
- Tip: Have all ingredients prepped and ready before starting
Step 2: Brown the Beef (8 min.)
- Add olive oil to hot Instant Pot
- Add ground beef in an even layer
- Let cook undisturbed for 2-3 minutes to develop browning
- Break up meat with spatula, continuing to cook until no pink remains
- Important: Don’t drain fat – it adds flavor to the chili
Step 3: Sauté Aromatics (4 min.)
- Add finely diced onion to the browned beef
- Sauté for 3 minutes, stirring occasionally until softened
- Add minced garlic and cook for additional 30 seconds
- Watch carefully: Garlic can burn quickly at high heat
- Stir constantly once garlic is added
Step 4: Add Remaining Ingredients (3 min.)
- Stir in diced tomatoes with their juice
- Add all three cans of tomato sauce
- Pour in beef broth and mix well
- Add all spices: chili powder, cumin, smoked paprika, cocoa powder, sugar, salt, and pepper
- Final addition: Stir in both types of beans, drained and rinsed
Step 5: Pressure Cook (25 min.)
- Stir mixture well to combine all ingredients
- Secure Instant Pot lid, ensuring valve is set to ‘Sealing’
- Cancel ‘Sauté’ mode and select ‘Chili/Beans’ program
- If no Chili program: Use ‘Manual’ or ‘Pressure Cook’ for 20 minutes on high pressure
- Natural release: Allow pressure to release naturally for 10 minutes, then quick release
Step 6: Final Adjustments (3 min.)
- Carefully remove lid, tilting away from your face
- Stir chili and taste for seasoning
- Adjust: Add more salt, pepper, or chili powder as needed
- Let chili rest for 2-3 minutes to thicken slightly
- Consistency tip: For thicker chili, use ‘Sauté’ mode with lid off for 5 minutes
Step 7: Serve and Garnish (2 min.)
- Ladle hot chili into bowls
- Classic toppings: Shredded cheese, sour cream, green onions
- Extra touches: Diced tomatoes, jalapeños, cilantro
- Serve immediately with cornbread or crackers
Essential Tips
- Meat choice: 90% lean beef provides perfect fat content without excess grease
- Don’t skip browning: This step develops crucial flavor foundation
- Cocoa secret: Unsweetened cocoa adds rich depth without sweetness
- Bean preparation: Rinse canned beans to reduce sodium and improve texture
- Natural release: Prevents beans from bursting and meat from becoming tough
Instant Pot Chili Knowledge
What makes pressure cooker chili special?
- Pressure breaks down tough fibers in meat quickly
- Intense steam circulation melds flavors rapidly
- High pressure extracts maximum flavor from spices
- Consistent temperature prevents burning or uneven cooking
Why add cocoa powder?
- Adds rich, earthy depth without chocolate flavor
- Traditional ingredient in Cincinnati-style chili
- Balances acidity from tomatoes
- Creates more complex flavor profile
Spice blend science:
- Chili powder: Base heat and earthy flavor
- Cumin: Warm, nutty undertones
- Smoked paprika: Smoky depth and color
- Sugar: Balances acidity and heat
Frequently Asked Questions (FAQ)
Q: Can I use different types of ground meat? A: Absolutely! Ground turkey, chicken, or pork work well. Adjust cooking time slightly for leaner meats.
Q: My chili is too thin, how do I thicken it? A: Use ‘Sauté’ mode with lid off to reduce liquid, or stir in a cornstarch slurry (2 tbsp cornstarch + 2 tbsp cold water).
Q: Can I add more vegetables? A: Yes! Bell peppers, corn, and jalapeños are great additions. Add with the onions for best results.
Q: How spicy is this chili? A: Mild to medium heat. Increase chili powder or add cayenne pepper for more heat.
Q: Can I make this ahead of time? A: Perfect make-ahead meal! Flavors improve overnight. Store up to 4 days refrigerated or 3 months frozen.
Q: What if I don’t have a Chili/Beans setting? A: Use Manual/Pressure Cook on high pressure for 20 minutes – results will be identical.
Troubleshooting Common Issues
Pressure problems:
- Won’t pressurize: Check seal ring and ensure valve is set to ‘Sealing’
- Takes too long: Make sure there’s enough liquid (at least 1 cup total)
- Burn notice: Deglaze bottom better after browning meat
Flavor issues:
- Too bland: Add more salt and let rest 10 minutes before serving
- Too acidic: Stir in additional sugar, 1 tsp at a time
- Not enough heat: Add hot sauce or cayenne to taste
Nutritional Information per Serving
- Calories: approximately 385
- Protein: 32g
- Carbohydrates: 28g
- Fat: 16g
- Fiber: 10g
- Iron: 25% daily value
Delicious Variations
Protein swaps:
- Turkey chili: Use ground turkey for lighter option
- Chicken chili: Shredded rotisserie chicken added in final 5 minutes
- Vegetarian: Replace meat with extra beans and diced mushrooms
Bean alternatives:
- Three-bean: Add black beans to kidney and pinto
- White chili: Use white beans with chicken and green chiles
- Bean-free: Omit beans for keto-friendly version
Spice level options:
- Mild family: Reduce chili powder to 1 tbsp, omit black pepper
- Medium heat: Add 1 diced jalapeño with onions
- Fire hot: Include chipotle peppers in adobo sauce
Storage and Reheating
Refrigerator: 4-5 days in airtight containers Freezer: 3 months in freezer-safe containers or bags Reheating: Stovetop over medium heat or microwave in 1-minute intervals
Storage tips:
- Cool completely before refrigerating
- Leave space at top of containers for expansion when freezing
- Label with date and contents
- Thaw frozen chili overnight in refrigerator
Perfect Pairings and Occasions
Ideal for:
- Game day parties and tailgating
- Weeknight family dinners
- Meal prep containers for busy weeks
- Cold weather comfort food
- Potluck contributions
Serve alongside:
- Warm cornbread with honey butter
- Baked sweet potatoes as chili vessels
- Crispy tortilla chips for dipping
- Fresh avocado slices
- Cold beer or iced tea
Timing Breakdown
- Prep time: 10 minutes
- Sauté phase: 12 minutes
- Pressure cooking: 20 minutes
- Natural release: 10 minutes
- Final adjustments: 5 minutes
- Total time: 35 minutes active
Rich, hearty, and ready in minutes – comfort food made simple!