Quick Overview
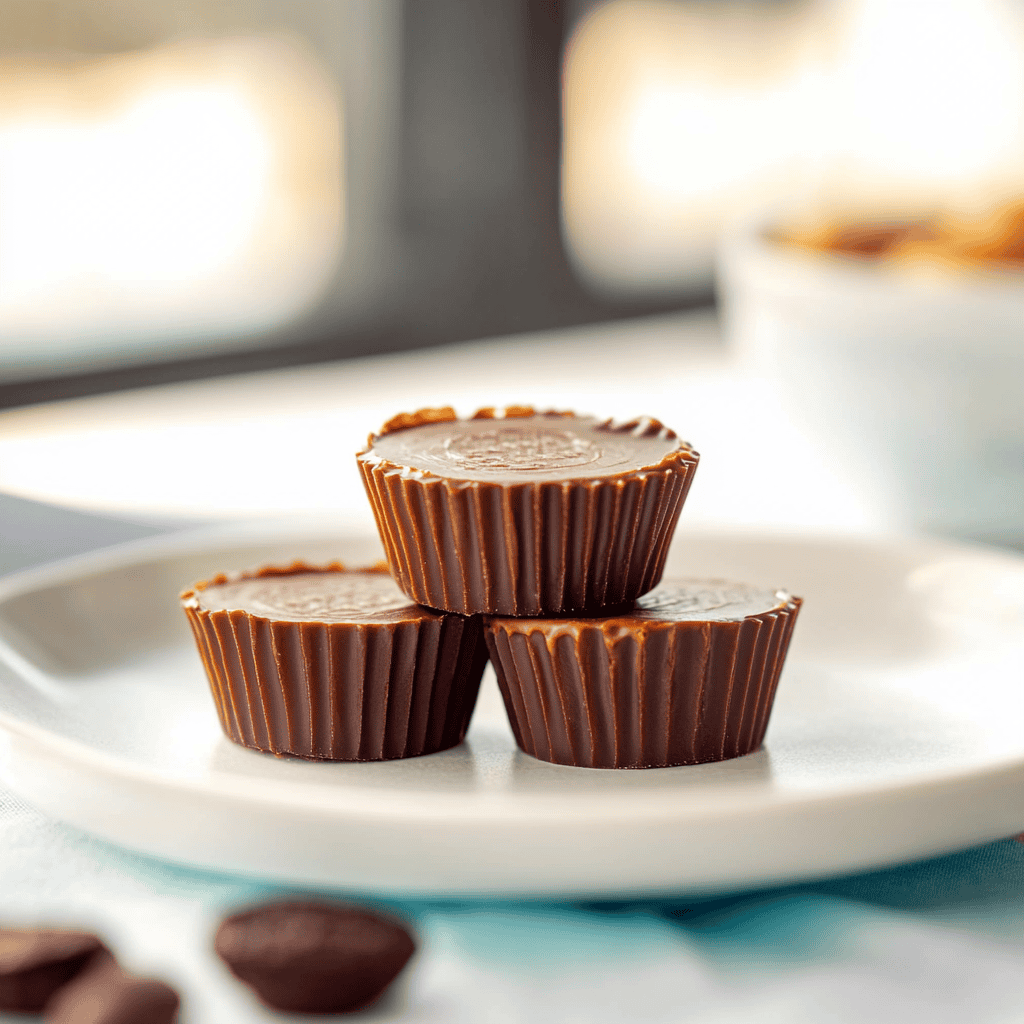
Peanut Butter Cups are a delightful combination of creamy peanut butter and rich chocolate that create a sweet indulgence loved by many. This simple recipe allows you to make these treats at home, ensuring freshness and flavor that store-bought versions can’t match. With just a few ingredients and easy steps, you can whip up this classic favorite and enjoy them anytime. Whether for a party or a personal treat, these Peanut Butter Cups will surely satisfy your cravings.
Ingredient Breakdown
Peanut Butter
For this recipe, you’ll need 1 cup of creamy peanut butter. The creaminess helps create the smooth texture that pairs perfectly with chocolate. Choose natural peanut butter for the best flavor and quality.
Powdered Sugar
Use 1 cup of powdered sugar to add sweetness and enhance the peanut butter’s flavor. It also helps achieve the right consistency, making the filling firm yet soft.
Chocolate Chips
You will require 2 cups of semi-sweet chocolate chips for coating your cups. They melt easily and provide a perfect balance of sweetness without overpowering the filling.
Coconut Oil
Incorporate 2 tablespoons of coconut oil into your melted chocolate to give it a smooth texture when coating the cups. This oil also helps the chocolate set nicely once cooled.
Sea Salt (optional)
A pinch of sea salt adds depth to the flavors and balances the sweetness. Use it sparingly to enhance but not overpower the taste of your Peanut Butter Cups.
Step By Step Recipe: Peanut Butter Cups
Prepare Your Ingredients
Start by gathering all your ingredients on a clean countertop or workspace. Measure out each ingredient precisely to ensure consistent results in texture and flavor throughout your Peanut Butter Cups.
Melt Chocolate Chips
In a microwave-safe bowl, place 2 cups of semi-sweet chocolate chips along with 2 tablespoons of coconut oil. Heat in bursts of 30 seconds, stirring between each until fully melted and smooth. Allow it to cool slightly before using it for coating.
Line Your Muffin Tin
Take a standard muffin tin and line it with cupcake liners. This step makes removing your Peanut Butter Cups much easier once they have set. Ensure that you cover each cavity well for proper shape.
Coat The Bottom With Chocolate
Spoon about 1 tablespoon of melted chocolate into each lined muffin cup, spreading it evenly across the bottom. This layer serves as the base for your filling and should be thick enough to hold its shape after setting.
Mix Peanut Butter Filling
In a mixing bowl, combine 1 cup of creamy peanut butter with 1 cup of powdered sugar. Stir until well blended and smooth without any lumps. The mixture should be thick but pliable enough to form scoops easily.
Add The Filling
Using a spoon or small cookie scoop, add approximately 1 tablespoon of the peanut butter mixture on top of the chocolate layer in each muffin liner. Gently press down to flatten slightly but avoid mixing it with the chocolate layer below.
Top With More Chocolate
Once all cups are filled with peanut butter mixture, spoon another tablespoon of melted chocolate over each one, covering it completely. Ensure that no filling is visible above the chocolate layer; this creates an appealing look and perfect bite.
Chill Until Firm
Place your muffin tin in the refrigerator for at least 30 minutes or until fully set. Chilling allows both layers to harden properly so they maintain their shape when removed from liners later on.
Remove From Liners
After they have set completely, carefully peel away the cupcake liners from each Peanut Butter Cup. If you find them difficult to remove, place them in warm water briefly; this can help loosen them without damage.

Serving and Storing Tips
Serving Suggestions
Serve your Peanut Butter Cups chilled or at room temperature according to preference! They make great snacks or desserts after meals. Pair them with coffee or milk for an even more enjoyable experience!
Storage Guidelines
Store any leftover Peanut Butter Cups in an airtight container in the refrigerator for up to two weeks. Keeping them chilled maintains their firmness while extending freshness significantly beyond room temperature storage.
Freezing Options
For longer storage options, consider freezing individual cups wrapped tightly in plastic wrap and then placed in freezer bags or containers. They can last up to three months in freezing conditions without losing flavor!
Enjoy making these delightful homemade Peanut Butter Cups! They’re perfect for sharing or indulging all on your own!
Mistakes to avoid
One common mistake when making Peanut Butter Cups is not tempering the chocolate properly. If you skip this step, your chocolate may not have the right sheen or snap, ruining the overall texture. Always gently melt your chocolate and ensure it reaches the correct temperature for a smooth finish.
Another mistake is using the wrong type of peanut butter. Natural or unsweetened peanut butter can yield different flavors and textures compared to creamy, processed varieties. Choose a brand that aligns with your desired taste and consistency for the filling.
Overfilling your cups can lead to messy results. While it’s tempting to add extra peanut butter, too much can spill over and make them hard to remove from their molds. Stick with a balanced amount to ensure easy serving.
Failing to let the cups set completely can also be problematic. If you try to remove them too soon, they may break apart. Allow sufficient time in the refrigerator for them to harden fully before enjoying.
Lastly, don’t forget about storage! Leaving your Peanut Butter Cups at room temperature for extended periods can cause them to melt or become sticky. Store them in an airtight container in a cool place or the fridge for optimal freshness.
Tips and tricks
To achieve the best results with Peanut Butter Cups, start by selecting high-quality ingredients. Use good chocolate with a cocoa content you enjoy; this will enhance the flavor significantly. Dark chocolate works wonderfully for those who prefer a richer taste, while milk chocolate is great for sweeter options.
When preparing your filling, consider mixing in powdered sugar or cream cheese with peanut butter for added sweetness and creaminess. This variation can create a delightful contrast against the bitterness of dark chocolate and elevate your dessert experience.
Always use silicone molds if possible; they make it easier to remove the finished Peanut Butter Cups without damage. If you only have metal molds, lightly grease them before pouring in the chocolate mixture. This small step can save you from frustration later on.
Experimenting with toppings can also add flair to your Peanut Butter Cups. A sprinkle of sea salt on top balances sweetness while adding texture. You might also try drizzling melted white chocolate over them for an elegant touch.
Lastly, keep track of your timing during each step of preparation. Rushing through melting or setting times can compromise texture and flavor. Take your time to ensure everything is done perfectly; this attention will reflect in every bite.
Suggestions for Peanut Butter Cups
Consider adding different flavors to your Peanut Butter Cups by incorporating extracts like vanilla or almond into the filling. A few drops can create a unique twist that enhances the overall taste profile without overpowering the classic peanut butter flavor.
If you’re looking for healthier versions of Peanut Butter Cups, consider using dark chocolate with higher cocoa content and natural sweeteners like honey or maple syrup instead of granulated sugar. These alternatives provide sweetness without excessive refined sugars while maintaining delicious flavors.
For those who love crunch, try mixing crushed nuts into your peanut butter filling or sprinkling some on top before allowing them to set. This extra crunch adds a delightful texture that contrasts beautifully with the smoothness of both chocolate and peanut butter.
When serving these treats at gatherings, consider offering mini versions as bite-sized delights. This way, guests can enjoy multiple flavors without feeling too indulgent after one serving—perfect for parties or special occasions!
Lastly, don’t hesitate to pair your homemade Peanut Butter Cups with complementary flavors like banana slices or strawberry compote as accompaniments. These additions create delightful flavor combinations that will impress anyone who tries them!
FAQs
What are Peanut Butter Cups made of?
Peanut Butter Cups typically consist of two main components: a creamy peanut butter filling and a coating of chocolate. The filling often blends peanut butter with powdered sugar or other sweeteners to enhance its taste and texture. The outer layer is usually made from milk or dark chocolate that encases the filling, providing a perfect balance between sweet and salty flavors.
How do I store homemade Peanut Butter Cups?
To keep homemade Peanut Butter Cups fresh, store them in an airtight container in a cool place or refrigerator. They can last up to two weeks if kept chilled properly. Avoid leaving them out at room temperature for long periods as heat may cause melting or stickiness—especially important during warmer months!
Can I use crunchy peanut butter instead of creamy?
Yes! Using crunchy peanut butter instead of creamy will add delightful texture variations to your Peanut Butter Cups. The added crunch creates interesting contrasts against both the smooth chocolate coating and other components within each cup—making it an exciting option if you’re looking for extra bite!
Are there any vegan options available for making these cups?
Definitely! You can make vegan Peanut Butter Cups by substituting dairy-based chocolate with plant-based alternatives like dark chocolate chips labeled as vegan-friendly—many brands offer these now! Additionally, use natural nut butters that do not contain animal products ensuring all ingredients align with vegan dietary preferences.
Can I freeze my Peanut Butter Cups?
Yes! Freezing is an excellent option if you want longer-lasting treats without sacrificing flavor or texture! Wrap individual cups tightly in plastic wrap before placing them inside an airtight container—this prevents freezer burn while keeping them fresh up until three months without compromising quality!
How do I know when my Peanut Butter Cups are ready?
You’ll know your Peanut Butter Cups are ready once they have fully set in their molds—this usually takes about 30 minutes in refrigeration after pouring melted chocolate over fillings! They should be firm but slightly yielding when pressed gently—the perfect indication that they’re ready to enjoy!
Summary
In conclusion, making delightful Peanut Butter Cups requires attention to detail throughout every step—from selecting quality ingredients to allowing ample time for setting properly. By avoiding common mistakes and following tips provided here, anyone can craft delicious homemade treats that satisfy cravings perfectly! Remember storage methods play an essential role too; keeping these sweet delights fresh ensures enjoyment lasts longer!
Irresistible Peanut Butter Cups Recipe
Description
Peanut Butter Cups are a delightful combination of creamy peanut butter and rich chocolate that create a sweet indulgence loved by many. This simple recipe allows you to make these treats at home, ensuring freshness and flavor that store-bought versions can’t match. With just a few ingredients and easy steps, you can whip up this classic favorite and enjoy them anytime. Whether for a party or a personal treat, these Peanut Butter Cups will surely satisfy your cravings.
Ingredients
Peanut Butter
For this recipe, you’ll need 1 cup of creamy peanut butter. The creaminess helps create the smooth texture that pairs perfectly with chocolate. Choose natural peanut butter for the best flavor and quality.
Powdered Sugar
Use 1 cup of powdered sugar to add sweetness and enhance the peanut butter’s flavor. It also helps achieve the right consistency, making the filling firm yet soft.
Chocolate Chips
You will require 2 cups of semi-sweet chocolate chips for coating your cups. They melt easily and provide a perfect balance of sweetness without overpowering the filling.
Coconut Oil
Incorporate 2 tablespoons of coconut oil into your melted chocolate to give it a smooth texture when coating the cups. This oil also helps the chocolate set nicely once cooled.
Sea Salt (optional)
A pinch of sea salt adds depth to the flavors and balances the sweetness. Use it sparingly to enhance but not overpower the taste of your Peanut Butter Cups.