
Look, I’m gonna tell you a secret
After years of testing vanilla cake recipes that were either dry as cardboard or tasted like someone just emptied a bottle of artificial vanilla into the batter, I FINALLY cracked the code. This is the vanilla cake recipe I’ve been hunting for my entire baking life. It’s ridiculously moist (sorry if you hate that word, but there’s just no better way to describe it), has ACTUAL vanilla flavor, and somehow stays soft for days – if it lasts that long. The first time I made this, my husband ate three slices before I could even frost the thing. That’s when I knew I’d nailed it.
Why You’ll Love This Recipe
- This cake is basically moisture heaven. No more of those sad, dry vanilla cakes that need a gallon of milk to swallow.
- The flavor is legit vanilla – not that fake candy taste, but warm, fragrant, real-deal vanilla flavor that makes you close your eyes when you take a bite.
- It’s actually pretty foolproof. I’ve made this while simultaneously helping my kid with homework and talking on the phone, and it STILL turned out perfect.
- The texture is that perfect balance between fluffy and dense – it holds up to frosting but still feels light.
- You can make it ahead! It actually gets BETTER after a day, which is basically sorcery in cake form.
- Works as layers, cupcakes, or a sheet cake – it’s the Swiss Army knife of vanilla cakes.
- People will absolutely beg you for the recipe and assume you went to pastry school or something.
The Good Stuff You’ll Need
For the Cake:
- 3 cups all-purpose flour (don’t use self-rising – and for the love of all things sweet, please fluff and spoon it into measuring cups, don’t scoop!)
- 1 tablespoon baking powder (check the expiration date – old baking powder = flat sad cake)
- 1/2 teaspoon baking soda
- 1 teaspoon salt (don’t skip this!)
- 1 cup unsalted butter, softened (that’s 2 sticks – leave them out for at least an hour)
- 2 cups granulated sugar
- 4 large eggs, room temperature (seriously, room temp matters – cold eggs = lumpy batter)
- 1 tablespoon pure vanilla extract (the good stuff, not the imitation garbage)
- 1 vanilla bean, seeds scraped (optional but AMAZING if you can swing it)
- 1 cup buttermilk, room temperature (no buttermilk? add 1 tbsp lemon juice or vinegar to regular milk and let sit 5 minutes)
- 1/4 cup vegetable oil (the secret to that ridiculous moisture)
- 1/4 cup sour cream (another moisture miracle worker)
For Simple Vanilla Buttercream:
- 1 1/2 cups unsalted butter, softened
- 5-6 cups powdered sugar (depends how sweet you like it)
- 1/4 cup heavy cream
- 2 teaspoons pure vanilla extract
- Pinch of salt (brings out the flavor, trust me)
Let’s Do This
Prep Work (10 minutes):
- Preheat your oven to 350°F. Whatever you do, don’t skip preheating! Cold oven = disaster.
- Grease and line your pans like your cake’s life depends on it, because it does. For two 8-inch rounds, two 9-inch rounds, or a 9×13 pan – butter the pans, line with parchment, then butter the parchment too. I know it seems excessive. Do it anyway.
- Get all your ingredients to room temperature. I’m not kidding about this part. Cold ingredients don’t play nice together.
Make the Batter (15 minutes):
- In a medium bowl, whisk together the flour, baking powder, baking soda, and salt. Set aside.
- In your stand mixer (or a large bowl with a hand mixer), beat the softened butter and sugar together until it’s super light and fluffy – like at LEAST 3-4 minutes. Don’t skimp on this step! This creates tiny air pockets that give your cake that tender crumb.
- Add the eggs ONE AT A TIME, beating well after each. If the mixture looks a little curdled, don’t freak out. It’ll come together.
- Pour in the vanilla extract and vanilla bean seeds if using. Mix until just combined.
- Mix the buttermilk and oil together in a measuring cup.
- Now for the crucial part: Add the flour mixture and buttermilk mixture ALTERNATELY, starting and ending with flour (so that’s flour, milk, flour, milk, flour). Mix on low speed just until combined after each addition. DO NOT OVERMIX or you’ll activate the gluten and get tough cake.
- Fold in the sour cream with a spatula. The batter should be smooth and silky.
Bake It (25-35 minutes):
- Pour the batter into your prepared pan(s). Smooth the top with a spatula.
- For 8-inch pans: bake 30-35 minutes For 9-inch pans: bake 25-30 minutes For 9×13 pan: bake 35-40 minutes For cupcakes: bake 18-20 minutes
- The cake is done when a toothpick inserted in the center comes out with just a few moist crumbs (not wet batter). The top should spring back when lightly touched.
- THIS IS CRUCIAL: Let the cakes cool in the pans for exactly 10 minutes. Set a timer! Then run a knife around the edges and turn them out onto a cooling rack to cool COMPLETELY.
Make the Frosting (10 minutes):
- Beat the softened butter for a full 3-4 minutes until it’s super pale and fluffy.
- Add 2 cups of powdered sugar, mix on low until incorporated.
- Add the vanilla and a splash of cream, beat again.
- Gradually add remaining powdered sugar until you reach your desired sweetness and consistency.
- Beat in the pinch of salt and the rest of the cream. Then whip the frosting on medium-high for a full 3 minutes until it’s light as a cloud.
Assembly:
- Make sure your cake layers are 100% COOL before frosting! Warm cake + frosting = melty mess.
- If your cake layers have a dome, trim them flat with a serrated knife. (Save the scraps for snacking – baker’s privilege!)
- Place one layer on your cake plate, add a generous dollop of frosting, spread it evenly.
- Top with second layer, then frost the top and sides. Use an offset spatula if you have one.
- For the smoothest finish, dip your spatula in hot water, wipe it dry, then glide it over the frosting.
Serving Suggestions
- This cake is perfect for birthdays, obviously. Add some colorful sprinkles and watch people fight over the last slice.
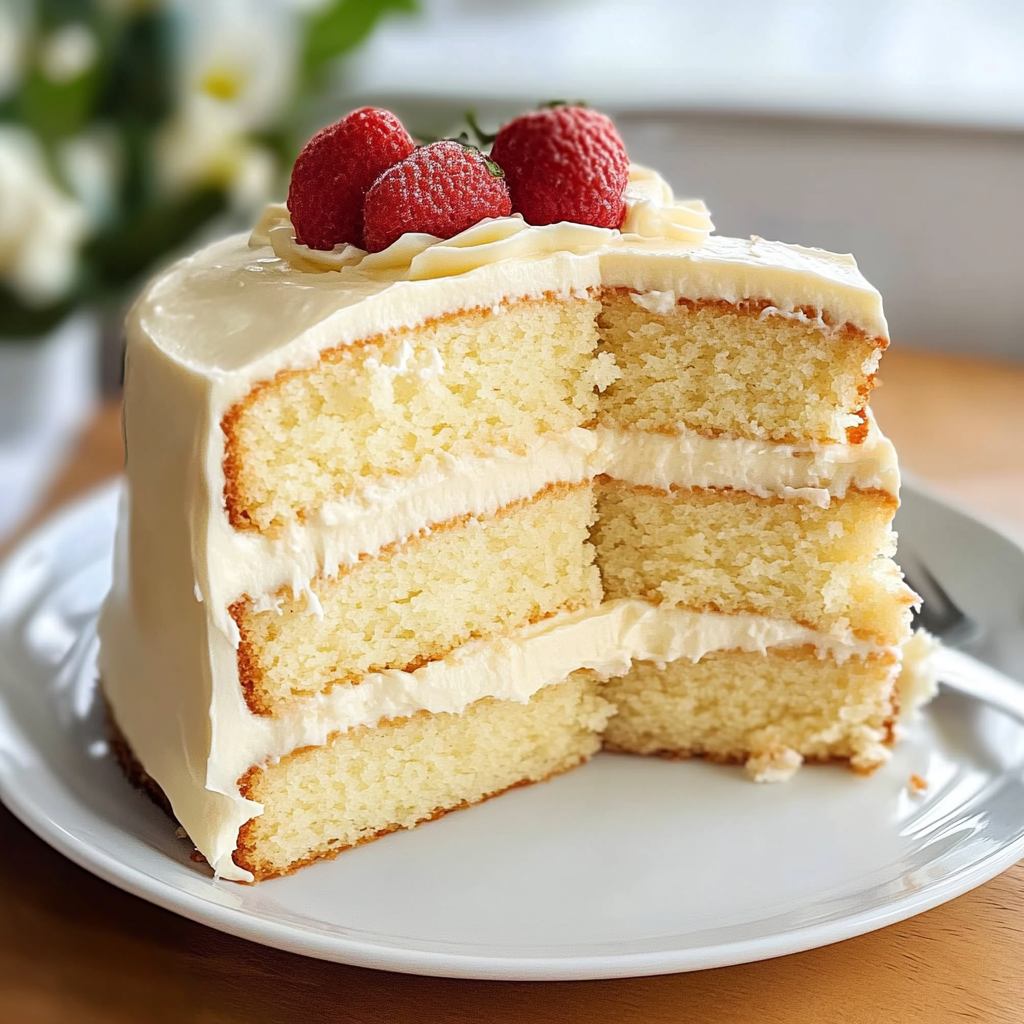
- Want to fancy it up? Add fresh berries between the layers and on top – strawberries and vanilla are basically soul mates.
- For a next-level dessert, serve slightly warm with a scoop of good vanilla ice cream and maybe a drizzle of caramel sauce. I might have done this for “dinner” once. No regrets.
- Coffee or tea are the perfect beverages to serve alongside this cake. The slight bitterness balances the sweetness perfectly.
- If you’re serving it for a special occasion, add some edible flowers on top for that “I totally have my life together and can make beautiful things” vibe.
Switch It Up
- Lemon Vanilla Cake: Add the zest of 2 lemons to the batter and replace 2 tablespoons of buttermilk with fresh lemon juice.
- Almond Vanilla: Add 1/2 teaspoon almond extract to the batter and top the frosted cake with toasted sliced almonds.
- Funfetti: Fold 1/2 cup of rainbow sprinkles into the batter at the very end. Not the nonpareils (little balls) – they bleed color!
- Vanilla Latte Cake: Add 1 tablespoon of espresso powder to the frosting for a coffee-vanilla vibe that’s to die for.
- Coconut Vanilla: Replace the vanilla bean with 1 teaspoon of coconut extract, and fold in 1/2 cup shredded coconut. Press toasted coconut onto the frosted sides.
- Berry Swirl: Gently swirl 1/4 cup of slightly warmed seedless raspberry jam into the batter before baking.
Storage Tips
- This cake actually gets BETTER on day 2! The flavors deepen and it gets even more moist. Store unfrosted layers wrapped in plastic wrap at room temperature overnight.
- Once frosted, the cake can sit at room temperature in a cake keeper or under a dome for 3-4 days.
- Refrigerate if your kitchen is warm or if you used a perishable filling like whipped cream. Just let it come back to room temp before serving or it’ll taste like sweet butter.
- To freeze unfrosted layers: Wrap completely cooled layers in plastic wrap, then foil, and freeze for up to 3 months. Thaw overnight in the refrigerator before frosting.
- Leftover slices can be individually wrapped and frozen. Future you will be SO grateful when a cake craving hits.
Questions People Actually Ask
Q: Can I use cake flour instead of all-purpose?
A: Absolutely! Your cake will be even more tender. Use 3 1/4 cups of cake flour instead of the 3 cups all-purpose.
Q: I don’t have a stand mixer. Can I still make this?
A: Yep! A hand mixer works fine, you’ll just need a bit more arm endurance for the butter/sugar creaming part. Get it REALLY fluffy before moving on.
Q: Can I make this into cupcakes?
A: For sure! This recipe makes about 24-30 cupcakes. Fill the liners about 2/3 full and bake for 18-20 minutes.
Q: Do I really need both oil AND butter?
A: YES. This is the secret to a cake that’s buttery AND moist. The butter gives flavor, the oil gives moisture. Magic.
Q: My cake sank in the middle! What went wrong?
A: Three likely culprits: 1) Your baking powder/soda was old, 2) You opened the oven door too early, or 3) You underbaked it. Make sure to test with a toothpick before removing from the oven!
Q: Can I make this ahead for a party?
A: This is actually THE PERFECT make-ahead cake. Bake the layers up to two days ahead, wrap well in plastic wrap, and store at room temp. Frost the day of or the day before your event. The flavor gets even better as it sits!

Moist Homemade Vanilla Cake Recipe
Description
After years of testing vanilla cake recipes that were either dry as cardboard or tasted like someone just emptied a bottle of artificial vanilla into the batter, I FINALLY cracked the code. This is the vanilla cake recipe I’ve been hunting for my entire baking life. It’s ridiculously moist (sorry if you hate that word, but there’s just no better way to describe it), has ACTUAL vanilla flavor, and somehow stays soft for days – if it lasts that long. The first time I made this, my husband ate three slices before I could even frost the thing. That’s when I knew I’d nailed it.
Ingredients
- 3 cups all-purpose flour (don’t use self-rising – and for the love of all things sweet, please fluff and spoon it into measuring cups, don’t scoop!)
- 1 tablespoon baking powder (check the expiration date – old baking powder = flat sad cake)
- 1/2 teaspoon baking soda
- 1 teaspoon salt (don’t skip this!)
- 1 cup unsalted butter, softened (that’s 2 sticks – leave them out for at least an hour)
- 2 cups granulated sugar
- 4 large eggs, room temperature (seriously, room temp matters – cold eggs = lumpy batter)
- 1 tablespoon pure vanilla extract (the good stuff, not the imitation garbage)
- 1 vanilla bean, seeds scraped (optional but AMAZING if you can swing it)
- 1 cup buttermilk, room temperature (no buttermilk? add 1 tbsp lemon juice or vinegar to regular milk and let sit 5 minutes)
- 1/4 cup vegetable oil (the secret to that ridiculous moisture)
- 1/4 cup sour cream (another moisture miracle worker)
For Simple Vanilla Buttercream:
- 1 1/2 cups unsalted butter, softened
- 5–6 cups powdered sugar (depends how sweet you like it)
- 1/4 cup heavy cream
- 2 teaspoons pure vanilla extract
- Pinch of salt (brings out the flavor, trust me)