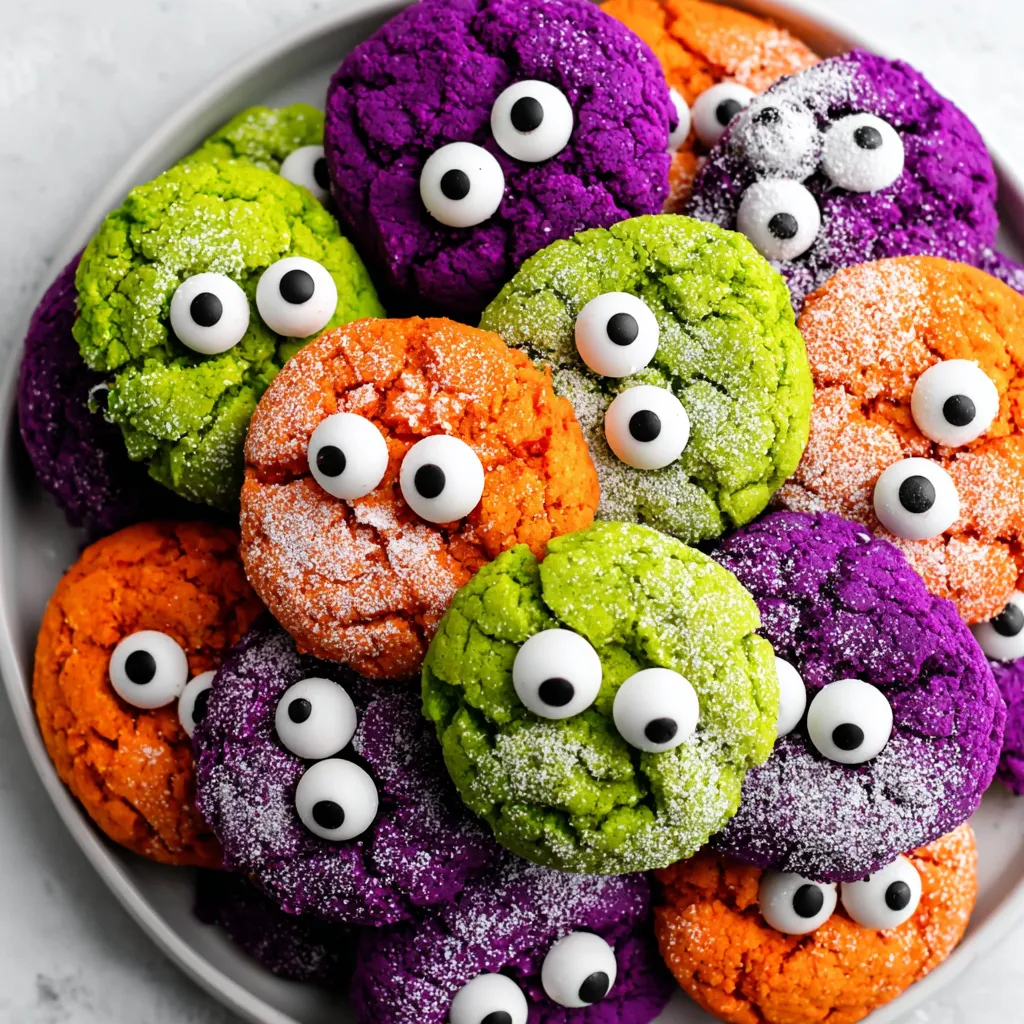
Monster Eye Cookies are the perfect Halloween treat — bright, colorful, and just spooky enough to make everyone smile. These playful cookies are made with simple ingredients, including a box of cake mix and some food coloring, but the result looks like something straight from a bakery display. They’re soft, chewy, and topped with candy eyes that give each cookie its own quirky monster personality.
This recipe began as a last-minute school party idea and has since become a yearly Halloween tradition. Using cake mix keeps things quick and foolproof, while powdered sugar adds that signature crackle effect. Whether you’re baking with kids, hosting a Halloween bash, or just want something festive and fun, these Monster Eye Cookies are the ultimate crowd-pleaser.
Ingredients
For the Cookies:
- 1 box white cake mix (18.25 oz)
- 2 large eggs
- 1/3 cup vegetable oil
- 1 teaspoon vanilla extract
For Coloring:
- Green food coloring
- Orange food coloring
- Purple food coloring
- Powdered sugar (for rolling)
For the Eyes:
- 48–72 candy eyes (various sizes)
- 1/4 cup white chocolate chips (melted, used as “glue”)
Instructions
1. Preheat the Oven
Preheat your oven to 350°F (175°C). Line two or three baking sheets with parchment paper for easy cleanup.
2. Make the Cookie Dough
In a large bowl, combine the white cake mix, eggs, vegetable oil, and vanilla extract. Mix until fully combined — the dough will be thick and sticky.
3. Divide and Color
Divide the dough evenly into three bowls. Add a few drops of green, orange, and purple food coloring into each bowl. Stir until the colors are bright and well mixed. Use gel food coloring for the most vibrant hues.
4. Shape and Coat
Roll each colored dough portion into small balls (about 1 inch wide). Roll each ball generously in powdered sugar until completely covered — this creates the signature crackle effect when baked.
5. Arrange on Baking Sheets
Place cookie dough balls on prepared baking sheets, leaving at least 2 inches of space between each. Lightly flatten the tops with your fingers.
6. Bake
Bake for 10–12 minutes, or until the cookies are set around the edges but still soft in the center. They’ll crack naturally on top, revealing the bright color underneath.
7. Cool and Decorate
Allow cookies to cool for 2 minutes on the baking sheet, then transfer them to a wire rack.
Melt the white chocolate chips in the microwave in 30-second intervals until smooth.
8. Add the Monster Eyes
While cookies are still slightly warm, dab a small amount of melted chocolate onto the back of each candy eye and stick them randomly on the cookies. Mix and match sizes — some with one big eye, others with several smaller ones.
9. Let Set and Store
Let the cookies rest until the chocolate sets (about 15 minutes). Store them in an airtight container at room temperature for up to five days.
Tips for Perfect Monster Eye Cookies
- Use Gel Food Coloring: Gel-based coloring produces vivid colors without adding too much liquid to the dough.
- Generous Powdered Sugar: Roll each dough ball thoroughly to get that dramatic crackled finish.
- Avoid Overbaking: Take cookies out when the centers still look slightly soft; they’ll continue to bake on the sheet.
- Even Sizes: Use a cookie scoop to make uniform cookies that bake evenly.
- Eye Placement: Attach eyes while the cookies are still warm so the melted chocolate adheres well.
- Sticky Dough Fix: If the dough becomes too soft, chill it for 10 minutes before rolling.
FAQs
Why didn’t my cookies crackle properly?
You probably didn’t use enough powdered sugar or your oven temperature was slightly low. Make sure to coat cookies generously and preheat your oven fully before baking.
Can I use a different cake mix flavor?
Yes! While white cake mix gives the brightest colors, you can use vanilla, lemon, or even chocolate for darker, spookier monsters.
How do I keep the eyes from falling off?
Ensure your cookies are slightly warm when attaching the eyes. If they’re too cool, reapply a bit of melted chocolate as glue.
Can I make these cookies ahead of time?
Absolutely. Prepare and bake them up to two days in advance, or freeze them after baking for up to two months. Thaw at room temperature before serving.
Can I make them without food coloring?
Yes, but the monster theme relies on bright colors. You can substitute with natural colorings like beet juice (red/purple), spinach powder (green), or turmeric (yellow/orange).
Final Thoughts
Monster Eye Cookies bring a splash of fun and color to any Halloween celebration. They’re easy enough for kids to make, impressive enough for parties, and delicious enough to disappear quickly. The combination of a soft, chewy center, sugary crackle, and silly candy eyes makes them both spooky and sweet — the best of both worlds.
Whether you’re baking for a classroom, a family get-together, or just want something festive for October, these cookies will become your go-to Halloween favorite. So grab your cake mix, food coloring, and candy eyes — it’s time to make your own batch of adorable edible monsters!