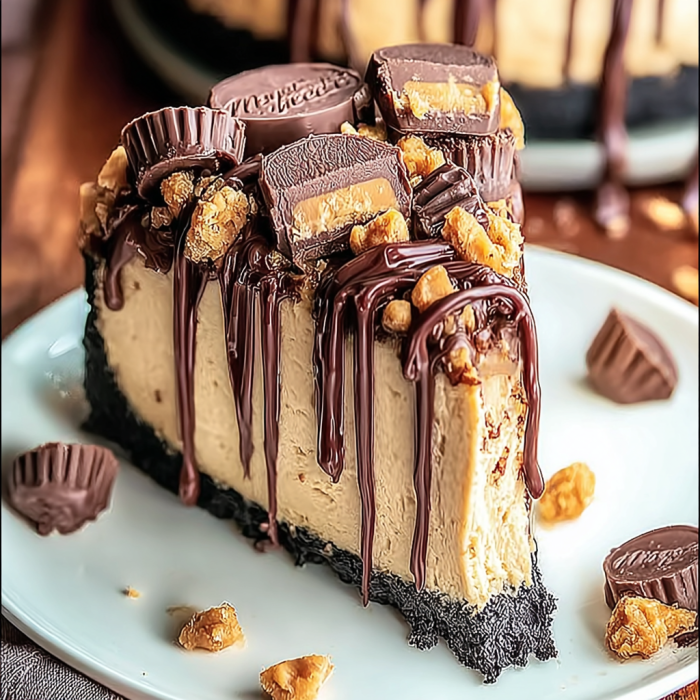
What the heck is this masterpiece?
Okay, so picture this: It’s summer, it’s hot as blazes, and you’re craving cheesecake but the thought of turning on your oven makes you want to cry. Enter this absolute DREAM of a dessert. It’s everything you love about cheesecake – that creamy, rich, tangy goodness – but with zero baking required. Plus, it’s loaded with Reese’s peanut butter cups because, let’s be honest, everything is better with Reese’s. This thing has saved my butt at more potlucks and family gatherings than I can count. One bite and people literally ask for the recipe before they’ve even finished chewing.
Why You’ll Love This Recipe
Trust me, this isn’t just another “throw some stuff together” dessert:
- NO OVEN REQUIRED! Perfect for hot summer days or when your oven is already occupied with dinner.
- It’s basically foolproof – if you can use a mixer, you can make this.
- The peanut butter-chocolate combo is scientifically proven to make people happy (okay, I made that up, but it should be true).
- You can make it 2-3 days ahead, which is a lifesaver for party planning.
- It feeds a crowd and looks way fancier than the effort you put in.
- Seriously creamy texture that rivals any baked cheesecake I’ve ever had.
- Kids go absolutely nuts for it, but it’s sophisticated enough for adults too.
The Good Stuff You’ll Need
For the Crust:
- 2 sleeves graham crackers (about 18-20 crackers)
- 1/4 cup sugar (because sweet crust = happy life)
- 6 tablespoons butter, melted (don’t even think about using margarine)
- Pinch of salt (enhances all the flavors)
For the Peanut Butter Layer:
- 8 oz cream cheese, softened (and I mean REALLY softened – leave it out for at least an hour)
- 1 cup creamy peanut butter (I use Jif, but use whatever makes you happy)
- 1 cup powdered sugar (sifted if you’re feeling fancy)
- 1 teaspoon vanilla extract (the real stuff, not imitation)
- 1 1/2 cups heavy whipping cream (this is what makes it fluffy and amazing)
For the Chocolate Layer:
- 8 oz cream cheese, softened (yes, more cream cheese – live your best life)
- 1/2 cup cocoa powder (unsweetened, not the hot chocolate mix!)
- 3/4 cup powdered sugar
- 1 teaspoon vanilla extract
- 1 1/4 cups heavy whipping cream
- 1/4 cup mini chocolate chips (because why not add more chocolate?)
For the Toppings:
- 12-15 Reese’s peanut butter cups, chopped (buy the full-size ones, not the minis – trust me on this)
- Extra whipped cream if you’re feeling extra
- Chocolate shavings or a drizzle of melted peanut butter (optional but highly recommended)
- A few whole Reese’s for decoration if you want to show off
Let’s Do This
Make the Crust (10 minutes):
- Grab your food processor (or a rolling pin and some serious anger management) and crush those graham crackers into fine crumbs. You want them pretty fine but not dust – think coarse sand.
- Mix the crumbs with sugar, melted butter, and that pinch of salt. It should hold together when you squeeze it but not be soggy. If it seems too dry, add another tablespoon of melted butter.
- Press this mixture into the bottom of a 9-inch springform pan. Really press it down – use the bottom of a measuring cup if your hands aren’t doing the job. You want it compact so it doesn’t fall apart later.
- Stick it in the fridge while you make the filling. Cold crust = happy crust.
Peanut Butter Layer Magic (15 minutes):
- In a big bowl (and I mean BIG – this stuff expands), beat the softened cream cheese until it’s smooth and fluffy. No lumps allowed! This takes about 2-3 minutes with an electric mixer.
- Add the peanut butter and beat until combined. Then add the powdered sugar and vanilla. Beat until everything is smooth and gorgeous.
- Here’s where the magic happens: In a separate bowl, whip that heavy cream until stiff peaks form. Don’t overdo it or you’ll have butter (which is awkward).
- Gently fold about 1/3 of the whipped cream into the peanut butter mixture to lighten it up, then fold in the rest. Be gentle – we want to keep all that lovely fluffiness.
- Spread this beautiful mixture over your chilled crust. Make it as smooth or swirly as you want. Pop it back in the fridge.
Chocolate Layer Heaven (15 minutes):
- Clean your bowl (or use a different one if you have it) and beat the second batch of cream cheese until smooth.
- Add cocoa powder, powdered sugar, and vanilla. Beat until it’s all combined and looks like chocolate heaven.
- Whip the remaining heavy cream to stiff peaks (same deal as before – don’t go crazy).
- Fold the whipped cream into the chocolate mixture just like you did with the peanut butter layer.
- Gently spread this over the peanut butter layer. Try not to mix them together too much – we want distinct layers for that “wow” factor when you cut into it.
- Sprinkle those mini chocolate chips on top if you’re using them.
The Waiting Game (4+ hours):
- Cover the whole thing with plastic wrap (don’t let it touch the surface) and refrigerate for at least 4 hours. Overnight is even better – patience is a virtue, my friend.
- About 30 minutes before you want to serve it, take it out and add your chopped Reese’s on top. If you add them too early, they might get soggy from the humidity in the fridge.
The Grand Finale:
Run a knife around the edge before removing the springform pan sides. This prevents the dreaded cheesecake crack of doom. Slice with a sharp knife that you’ve run under warm water (wipe clean between cuts for pretty slices).
Serving Suggestions
- Serve each slice with a dollop of whipped cream and a drizzle of warm chocolate sauce. Because more is more.
- For extra fancy points, dust the plate with cocoa powder and add a few fresh berries. The tartness cuts through all that rich goodness perfectly.
- This pairs surprisingly well with coffee – like, REALLY well. The bitterness of the coffee balances all the sweetness.
- If you’re feeling wild, serve it with vanilla ice cream on the side. Hot and cold, creamy and creamy… it works.
- Want to make individual portions? Use mason jars! Layer everything the same way and top with whipped cream and chopped Reese’s. So cute for parties.
Switch It Up
Got the basic idea but want to get creative? Here are some variations that’ll blow your mind:
- Oreo Overload: Swap the graham cracker crust for crushed Oreos and add mini Oreos to the chocolate layer instead of chocolate chips.
- Salted Caramel Dream: Drizzle each layer with salted caramel sauce and sprinkle with sea salt. Sweet and salty perfection.
- Nutella Obsession: Replace half the peanut butter with Nutella and add chopped hazelnuts to the chocolate layer.
- Mint Chocolate Chip: Add peppermint extract to the chocolate layer and use mint chocolate chips instead of regular ones.
- Cookies & Cream: Mix crushed chocolate sandwich cookies into both layers for extra texture.
- Banana Split Style: Add sliced bananas between the layers and top with maraschino cherries. Sounds weird, tastes amazing.
Make-Ahead Magic
This is actually BETTER when made ahead:
- You can make the whole thing up to 3 days in advance. Just add the Reese’s topping on the day you’re serving.
- The crust can be made and pressed up to a week ahead. Just wrap it well.
- Each layer can be made separately and assembled later if you want to spread out the work.
- Freeze individual slices wrapped in plastic for up to a month. Thaw in the fridge for a few hours before serving.
- Pro tip: Make two at once. One for the event, one to hide in your freezer for late-night emergencies.
Questions People Actually Ask
Q: My cream cheese is still lumpy even after beating it. What did I do wrong?
A: It wasn’t soft enough to start with. Next time, leave it out longer or cut it into smaller pieces. For now, try beating it longer on high speed, or press it through a fine-mesh strainer to get the lumps out.
Q: Can I use crunchy peanut butter instead of creamy?
A: You CAN, but it won’t be as smooth and silky. If you love the texture of crunchy PB, go for it! Just know it’ll be a bit chunkier.
Q: My whipped cream deflated when I folded it in. Did I ruin it?
A: Probably overwhipped the cream or folded too aggressively. The cheesecake will still taste amazing, just won’t be quite as fluffy. Next time, stop whipping as soon as you hit stiff peaks.
Q: Can I make this in a regular cake pan instead of springform?
A: Sure! Line it with parchment paper with some overhang so you can lift it out. Or just serve it directly from the pan – no shame in that game.
Q: How long does this last in the fridge?
A: About 5 days, covered. Though in my experience, it’s usually gone way before then!
Q: My family has peanut allergies. Can I adapt this?
A: Absolutely! Use sunflower seed butter or just make it a double chocolate cheesecake. For the topping, try chopped chocolate bars or chocolate-covered pretzels instead of Reese’s.
Q: Can I make mini versions?
A: YES! Use a muffin tin lined with paper cups. Just layer everything the same way but in smaller portions. They’re perfect for parties and portion control (ha!).
No-Bake Reese’s Peanut Butter Cheesecake Dream
Description
Okay, so picture this: It’s summer, it’s hot as blazes, and you’re craving cheesecake but the thought of turning on your oven makes you want to cry. Enter this absolute DREAM of a dessert. It’s everything you love about cheesecake – that creamy, rich, tangy goodness – but with zero baking required. Plus, it’s loaded with Reese’s peanut butter cups because, let’s be honest, everything is better with Reese’s. This thing has saved my butt at more potlucks and family gatherings than I can count. One bite and people literally ask for the recipe before they’ve even finished chewing.
Ingredients
For the Crust:
- 2 sleeves graham crackers (about 18–20 crackers)
- 1/4 cup sugar (because sweet crust = happy life)
- 6 tablespoons butter, melted (don’t even think about using margarine)
- Pinch of salt (enhances all the flavors)
For the Peanut Butter Layer:
- 8 oz cream cheese, softened (and I mean REALLY softened – leave it out for at least an hour)
- 1 cup creamy peanut butter (I use Jif, but use whatever makes you happy)
- 1 cup powdered sugar (sifted if you’re feeling fancy)
- 1 teaspoon vanilla extract (the real stuff, not imitation)
- 1 1/2 cups heavy whipping cream (this is what makes it fluffy and amazing)
For the Chocolate Layer:
- 8 oz cream cheese, softened (yes, more cream cheese – live your best life)
- 1/2 cup cocoa powder (unsweetened, not the hot chocolate mix!)
- 3/4 cup powdered sugar
- 1 teaspoon vanilla extract
- 1 1/4 cups heavy whipping cream
- 1/4 cup mini chocolate chips (because why not add more chocolate?)
For the Toppings:
- 12–15 Reese’s peanut butter cups, chopped (buy the full-size ones, not the minis – trust me on this)
- Extra whipped cream if you’re feeling extra
- Chocolate shavings or a drizzle of melted peanut butter (optional but highly recommended)
- A few whole Reese’s for decoration if you want to show off