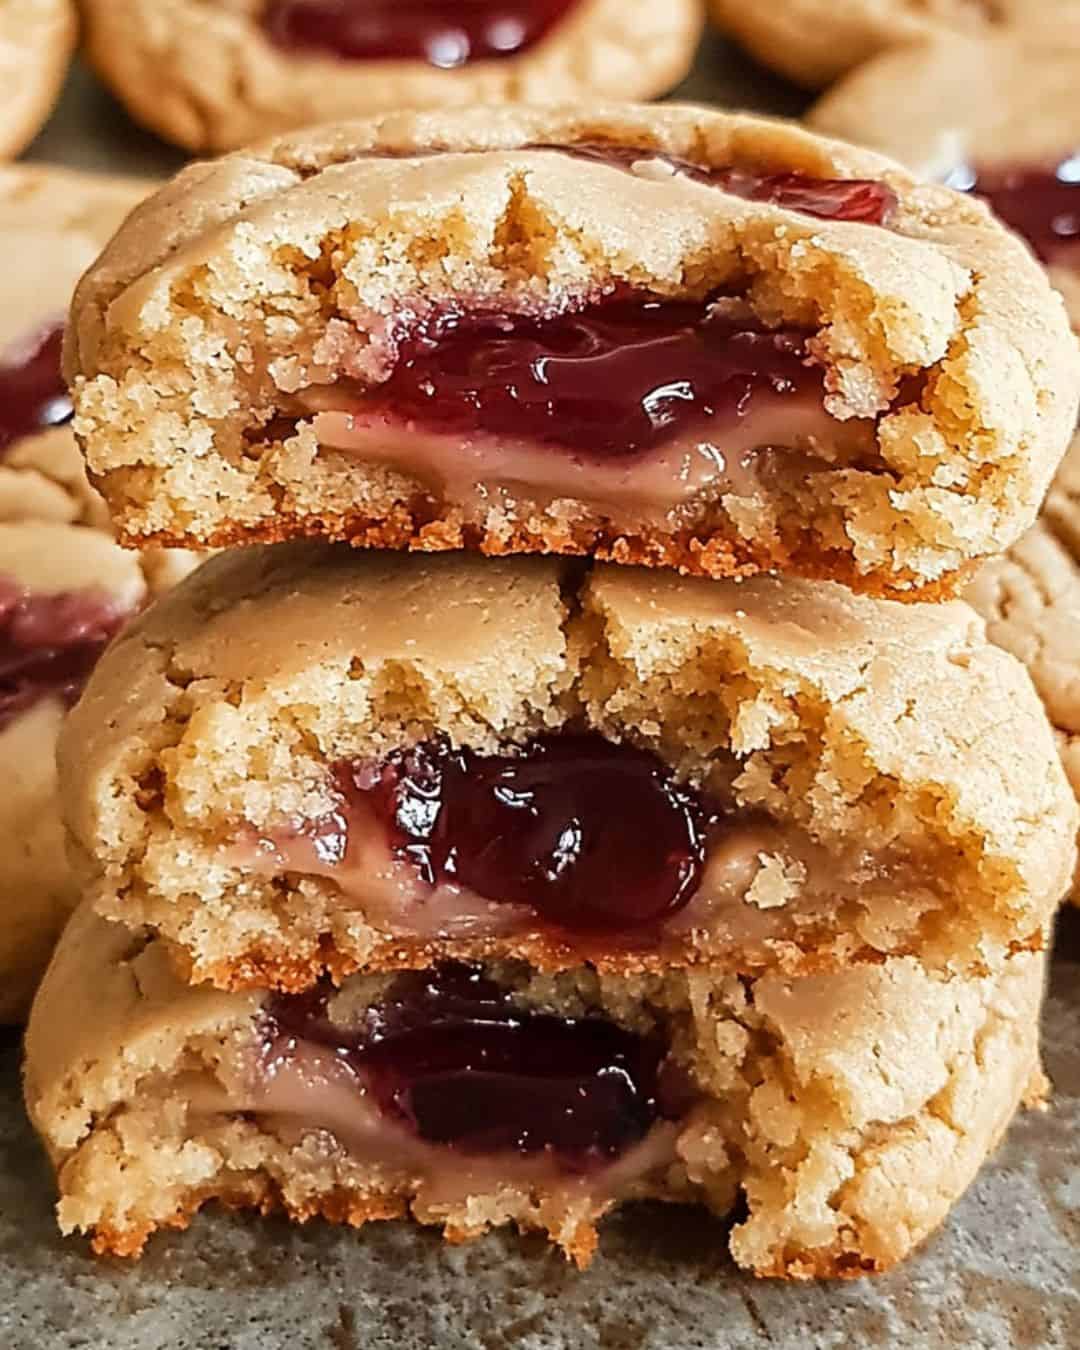
Who doesn’t love the classic combination of peanut butter and jelly? Now, imagine that iconic duo stuffed into soft, chewy cookies! These Peanut Butter and Jelly Stuffed Cookies are a delicious twist on the classic sandwich, bringing all the childhood nostalgia into a warm, gooey treat. Perfect for snacking, sharing, or indulging in a comforting dessert, these cookies are sure to please peanut butter lovers and kids of all ages.
Ingredients
- 1 cup creamy peanut butter
- 1/2 cup unsalted butter, softened
- 1/2 cup granulated sugar
- 1/2 cup packed brown sugar
- 1 large egg
- 1 tsp vanilla extract
- 1 1/4 cups all-purpose flour
- 1/2 tsp baking soda
- 1/4 tsp salt
- 1/2 cup jelly or jam (any flavor)
Step-by-Step Instructions
- Preheat the Oven:
Preheat your oven to 350°F (175°C) and line a baking sheet with parchment paper. This ensures the cookies bake evenly and don’t stick to the pan. - Cream the Ingredients:
In a large bowl, cream together the peanut butter, softened butter, granulated sugar, and brown sugar until the mixture is light and fluffy. This takes about 2-3 minutes with an electric mixer. Then, beat in the egg and vanilla extract until fully combined. The creamy peanut butter adds richness and depth to the cookie dough, while the butter gives it a tender texture. - Mix the Dry Ingredients:
In a separate bowl, whisk together the all-purpose flour, baking soda, and salt. Gradually add the dry ingredients into the wet mixture, stirring until just combined. Be careful not to overmix, as this can make the cookies tough. You want to mix until no streaks of flour remain and the dough is soft and pliable. - Form Cookie Balls with Jelly Filling:
Take about 1 tablespoon of the dough and flatten it slightly in your hand. Add a small spoonful of jelly or jam in the center (about 1/2 teaspoon). Carefully fold the dough around the jelly to form a ball, making sure the jam is completely sealed inside. Repeat with the remaining dough, placing each ball on the prepared baking sheet about 2 inches apart. If you’re worried about the jelly leaking out during baking, just make sure the dough is securely wrapped around the filling. - Bake the Cookies:
Place the baking sheet in the preheated oven and bake the cookies for 10-12 minutes, or until the edges are lightly golden. Be careful not to overbake, as you want the cookies to remain soft and chewy. The centers may appear slightly underbaked, but they will continue to set as they cool. - Cool and Serve:
Let the cookies cool on the baking sheet for about 5 minutes before transferring them to a wire rack to cool completely. This helps them firm up and makes them easier to handle. Once cooled, enjoy the gooey, peanut butter goodness with that sweet, fruity jelly center!
Additional Tips (Serving & Storage)
Serving Suggestions:
- Serve these cookies warm for the ultimate gooey experience. Pair them with a cold glass of milk for the perfect after-school snack or a comforting treat.
- If you want to get creative, try using different flavors of jam for variety. Grape jelly, strawberry jam, raspberry preserves, or even apricot are all excellent choices. You can also mix and match to create new flavor combinations!
Storage:
- Store these cookies in an airtight container at room temperature for up to 3 days. The peanut butter base will keep the cookies soft and tender.
- You can also freeze the dough balls (before baking) for later use. Place the unbaked cookie dough balls on a baking sheet and freeze until solid. Transfer them to a freezer-safe bag or container, and when you’re ready to bake, pop them into the oven straight from the freezer. Just add 1-2 extra minutes to the baking time.
FAQs About Peanut Butter and Jelly Stuffed Cookies
- Can I use crunchy peanut butter instead of creamy?
Yes, you can substitute crunchy peanut butter for a bit of added texture. Just be aware that the texture of the cookies may be slightly different due to the peanut pieces. - What types of jelly or jam work best?
You can use any type of jelly or jam you like! Popular choices include grape jelly, strawberry jam, raspberry preserves, or even blackberry. The sweetness and fruitiness pair perfectly with the creamy peanut butter base. - Can I make the dough in advance?
Absolutely! You can prepare the dough and refrigerate it for up to 24 hours before baking. If you’re planning to refrigerate it, just make sure to let the dough come to room temperature for about 10 minutes before shaping and baking. - How do I keep the cookies soft after baking?
Store the baked cookies in an airtight container with a slice of bread or a marshmallow. The bread or marshmallow will help maintain the moisture in the cookies, keeping them soft for several days. - Can I freeze the cookies after baking?
Yes, you can freeze the baked cookies. Place them in an airtight container or freezer-safe bag, separating layers with wax paper to prevent them from sticking together. They can be frozen for up to 3 months. When ready to enjoy, simply thaw at room temperature or warm them in the microwave for a few seconds.
Nutritional Information (Per Serving)
- Calories: 180
- Total Fat: 10g
- Saturated Fat: 4g
- Cholesterol: 25mg
- Sodium: 120mg
- Total Carbohydrates: 19g
- Dietary Fiber: 1g
- Sugars: 12g
- Protein: 4g
These Peanut Butter and Jelly Stuffed Cookies are the perfect fusion of a classic PB&J sandwich and a soft, chewy cookie. The gooey jam center adds a delightful surprise with every bite, while the peanut butter cookie base brings rich, nutty flavor to the table. Whether you’re making them for a nostalgic treat or just because you’re a peanut butter fan, these cookies are bound to become a favorite in your household. Try them out today, and enjoy a taste of childhood wrapped in cookie form!