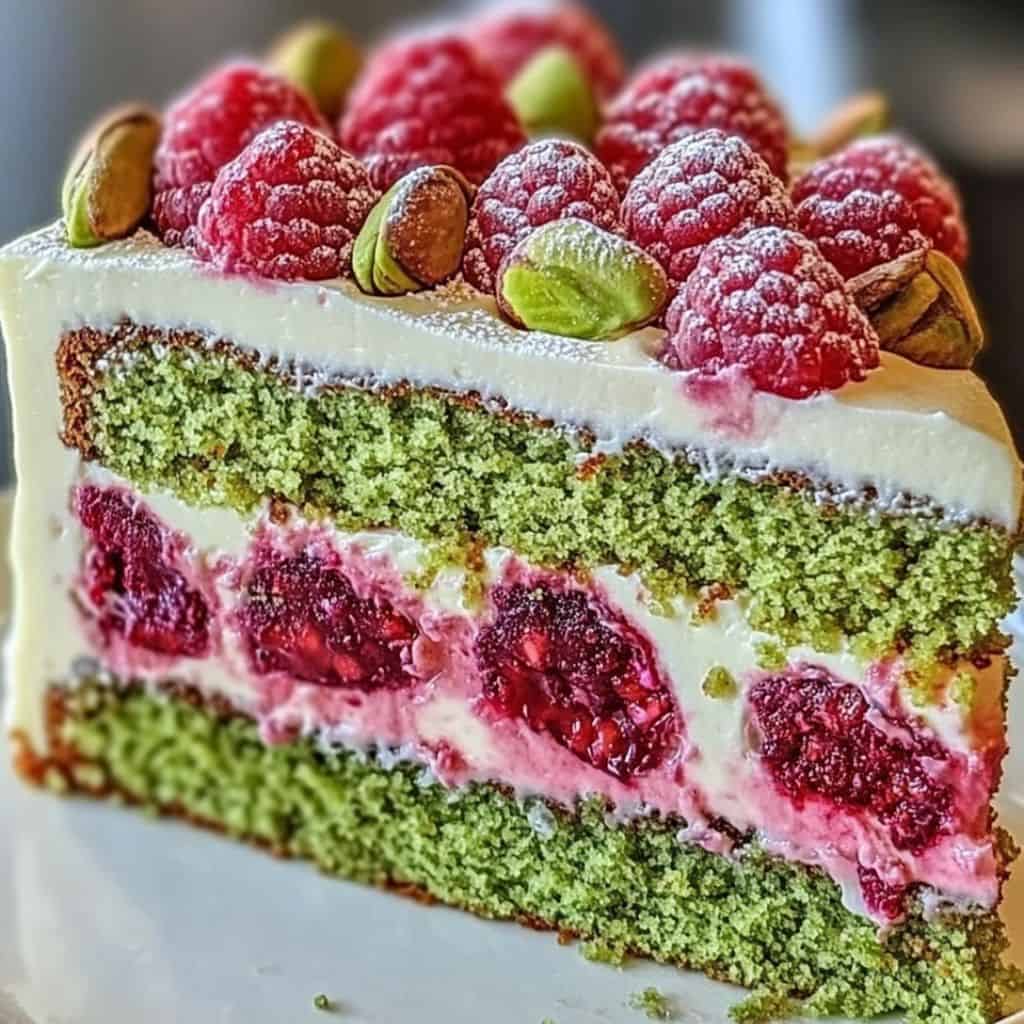
Indulge in a delightful Pistachio Raspberry Dream Cake, featuring layers of pistachio-flavored sponge and a creamy raspberry filling. This beautiful cake is perfect for any special occasion or celebration!
Ingredients:
- 1 cup unsalted butter, softened
- 1 ½ cups sugar
- 4 large eggs
- 2 cups all-purpose flour
- 1 ½ tsp baking powder
- ½ tsp salt
- ½ cup pistachio flour (ground pistachios)
- 1 cup milk
- 1 tsp vanilla extract
- 1 ½ cups raspberries
- 1 ½ cups heavy cream
- ½ cup powdered sugar
- 8 oz cream cheese, softened
- ½ cup pistachios, for garnish
- Fresh raspberries, for garnish
Step-by-Step Instructions:
- Preheat the oven:
Preheat your oven to 350°F (175°C). Grease and line two 8-inch round cake pans with parchment paper. - Cream the butter and sugar:
In a large bowl, cream together the softened butter and sugar until light and fluffy. Add the eggs one at a time, beating well after each addition. - Combine dry ingredients:
In a separate bowl, whisk together the all-purpose flour, pistachio flour, baking powder, and salt. - Mix wet and dry ingredients:
Gradually add the dry ingredients to the wet ingredients, alternating with the milk. Stir in the vanilla extract until well combined. - Bake the cake:
Divide the batter evenly between the two prepared pans and smooth the tops. Bake for 25-30 minutes, or until a toothpick inserted into the center comes out clean. Let the cakes cool completely in the pans. - Prepare the whipped cream:
While the cakes are cooling, whip the heavy cream and powdered sugar together until soft peaks form. Set aside. - Make the cream cheese mixture:
In a separate bowl, beat the cream cheese until smooth, then gently fold in the whipped cream until well combined. - Assemble the cake:
To assemble, spread a layer of the cream mixture on top of one cake layer, followed by a layer of fresh raspberries. Place the second cake layer on top and repeat the process with another layer of cream and raspberries. - Garnish the cake:
Garnish the top of the cake with fresh raspberries and chopped pistachios. - Chill and serve:
Chill the assembled cake in the refrigerator for at least 1 hour before serving. Enjoy your delightful Pistachio Raspberry Dream Cake!
Tips for Making Pistachio Raspberry Dream Cake:
- Pistachio flour: You can make your own pistachio flour by grinding unsalted pistachios in a food processor until finely ground.
- Raspberry substitution: Fresh raspberries work best, but you can use frozen raspberries if fresh ones aren’t available. Just thaw and drain excess liquid before using.
- Storage: Store any leftovers in the refrigerator for up to 3 days.
FAQs About Pistachio Raspberry Dream Cake:
- Can I use other nuts instead of pistachios?
Yes, you can substitute with almond or hazelnut flour for a different flavor. - Is there a gluten-free option for this cake?
You can use gluten-free all-purpose flour in place of regular flour. - How can I make this cake more chocolatey?
Add cocoa powder to the batter to create a chocolate version of this cake. - Can I make the cake layers in advance?
Yes, you can bake the cake layers a day ahead. Just store them in the refrigerator wrapped in plastic wrap until ready to assemble. - What can I serve with this cake?
This cake pairs wonderfully with a scoop of vanilla ice cream or a dollop of whipped cream.
Nutritional Information (per serving):
- Calories: 380
- Protein: 6g
- Carbohydrates: 45g
- Fats: 20g
This Pistachio Raspberry Dream Cake is a showstopper for any gathering, combining delightful flavors and stunning visuals. Try it for your next special occasion and impress your guests!