What the heck are these?
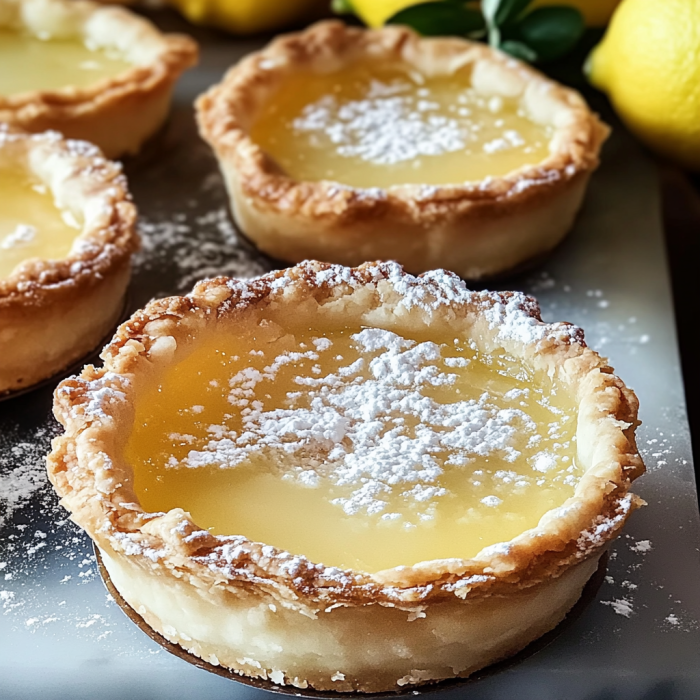
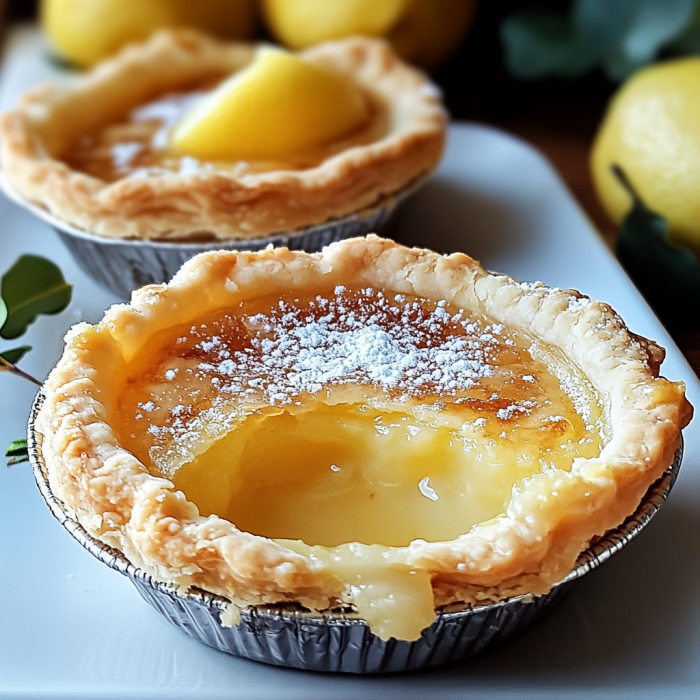
Okay, so these little miracles are what happen when you’re too lazy to make an actual pie crust but still want something amazing for dessert! They’re called “impossible” pies because they magically form their own crust while baking. I discovered these when my grandma’s recipe box fell off the shelf (literally), and this yellowed recipe card fluttered out. One batch later and my family was fighting over the last one. They’re basically individual-sized lemon pies that separate into layers while baking – a crust on the bottom, a custard-y middle, and a slightly cakey top. AND they’re made in a muffin tin, so everyone gets their own little pie without having to share. Genius, right?
Why You’ll Love This Recipe
Listen, I’m not saying these will change your life, but… they might:
- They’re ridiculously easy – everything gets dumped in a blender. Like, that’s basically it.
- That magical self-forming crust thing will make people think you’re some kind of kitchen wizard.
- They’re perfectly portioned (though I definitely eat two every time).
- The lemon flavor is PERFECT – not too sweet, not too tart, just bright and happy.
- They’re pretty foolproof – I’ve made these while half-asleep and they still turned out great.
- You probably have all the ingredients already, no weird stuff required.
- They’re kinda retro-cool, so you get bonus points for vintage baking cred.
- They take like 10 minutes to prep. TEN. MINUTES.
The Good Stuff You’ll Need
- 1/2 cup butter (1 stick), melted and slightly cooled (don’t use margarine, I’m begging you)
- 2 cups milk (whole milk makes them richer, but 2% works fine too)
- 4 large eggs (room temperature if you remember, but who actually plans that far ahead?)
- 1 cup granulated sugar
- 1/2 cup all-purpose flour
- 1/4 teaspoon salt
- 2 tablespoons lemon zest (from about 2 lemons – zest them before juicing!)
- 1/3 cup fresh lemon juice (please use real lemons, the bottled stuff is NOT the same)
- 1 teaspoon vanilla extract (the real kind, not that imitation nonsense)
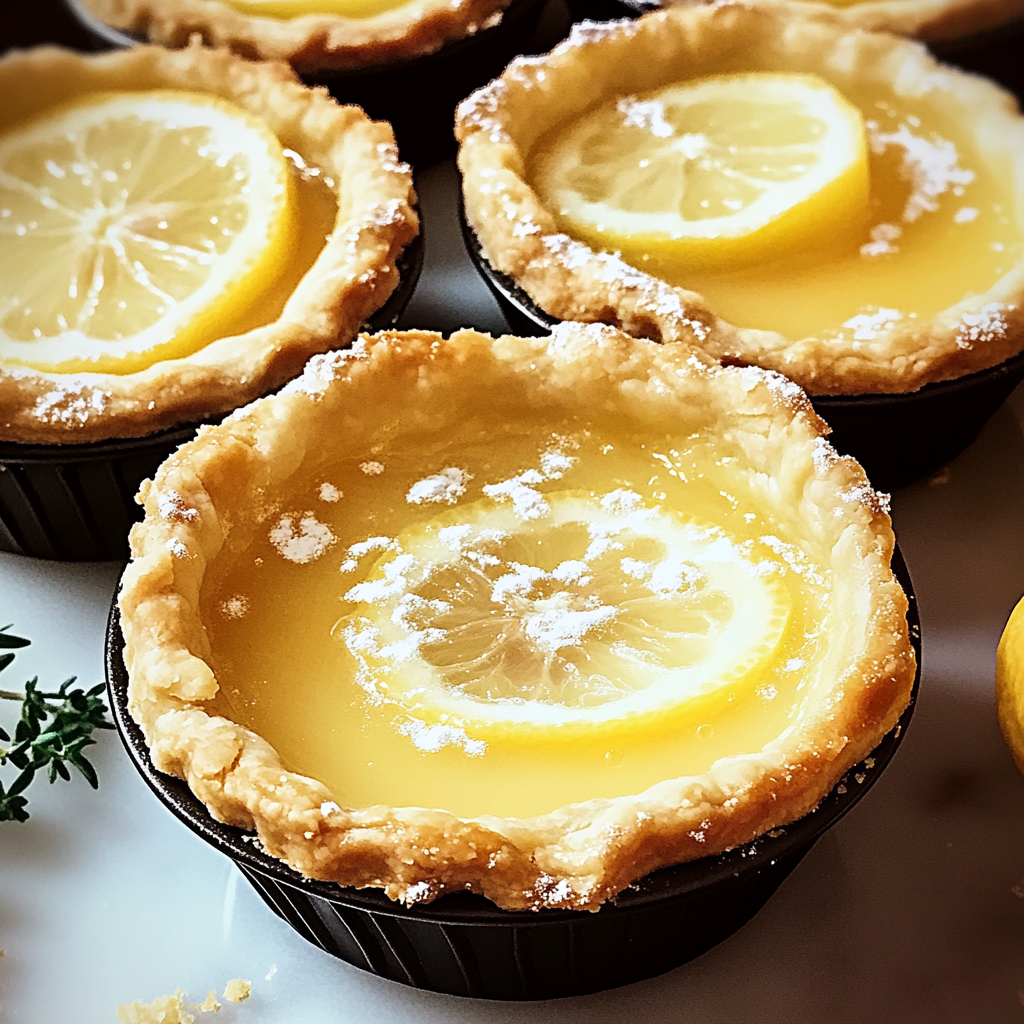
- Powdered sugar for dusting (because it makes everything look fancy)
Let’s Do This
Prep Time (5 minutes):
- Preheat your oven to 350°F. Your oven actually being at the temperature it says it is? That’s a whole other issue.
- Grease a 12-cup muffin tin REALLY well. Like, get in all the corners. These little guys like to stick, and we’re not dealing with that drama today. You can use paper liners if you want, but I find they stick to those too, so I just grease the living daylights out of the tin.
Mix the Magic (5 minutes):
- Throw EVERYTHING except the powdered sugar into a blender. Yes, everything. Melted butter, milk, eggs, sugar, flour, salt, lemon zest, lemon juice, and vanilla.
- Blend until smooth, about 30 seconds. Stop and scrape down the sides if needed, then blend another 10 seconds. The mixture will be super thin, like a crepe batter. Don’t panic, that’s exactly right.
- Let the mixture sit for about 5 minutes. This gives the flour a chance to absorb some liquid and the foam to settle. I usually use this time to clean up my mess or scroll through Instagram.
Baking Time (25-30 minutes):
- Give the batter a quick stir with a spoon (it tends to separate a bit while sitting), then pour it evenly into the prepared muffin cups. They should be filled about 3/4 full.
- Carefully place in the oven – the batter is thin and sloshy, so move slowly!
- Bake for 25-30 minutes until the tops are golden brown and the centers are set. They’ll puff up like little soufflés in the oven, then settle as they cool. This is normal, they’re not falling flat because you did something wrong.
Cooling & Serving (1 hour cooling, 2 minutes to serve):
- Let them cool in the pan for about 15-20 minutes. They’ll continue to set up as they cool.
- Run a knife around the edges, then gently remove them from the pan. If they’re being stubborn, let them cool a bit longer.
- Cool completely on a wire rack (another 30-40 minutes), then dust with powdered sugar right before serving.
- Marvel at how they’ve magically formed layers – a kind of crust on the bottom, custardy middle, and slight cakey top. SCIENCE!
Best Way to Serve These Bad Boys
- These taste amazing slightly warm or at room temperature. Cold from the fridge works too, but let them sit out for 10 minutes to take the chill off.
- A small dollop of lightly sweetened whipped cream on top is chef’s kiss.
- Fresh berries on the side add nice color and cut through the sweetness.
- If you’re feeling extra, a tiny mint leaf makes them look like you’re running a fancy bakery.
- For brunch, serve with a side of extra berries and some yogurt (pretend they’re healthy-ish).
- Coffee or tea is a must-have pairing – the bitterness balances the sweet-tart lemon perfectly.
Switch It Up
Bored with plain lemon? Try these wild variations:
- Lemon-Blueberry: Sprinkle a few fresh blueberries into each muffin cup before baking. They’ll sink and create little pockets of berry goodness.
- Lemon-Raspberry: Same as above but with raspberries. The tartness plays really well with the lemon.
- Coconut-Lemon: Add 1/2 cup shredded sweetened coconut to the batter. It creates this amazing chewy texture.
- Meyer Lemon: If you can get your hands on Meyer lemons, use them! Reduce the sugar by 2 tablespoons since they’re sweeter.
- Lime Instead: Swap all the lemon for lime for a key lime pie vibe. Add a graham cracker crumb topping for extra points.
- Boozy Version: Add a tablespoon of limoncello to the batter. I’ll never tell.
Making Ahead & Storage
- These keep well in an airtight container at room temperature for about 2 days.
- They’ll last in the fridge for up to 5 days, but the texture changes a bit (still delicious though).
- Don’t add the powdered sugar until right before serving or it dissolves into the tops and looks sad.
- These actually freeze pretty well! Freeze them uncovered until solid, then wrap individually and store in a freezer bag for up to 3 months. Thaw overnight in the fridge.
- If you’re taking these to a potluck, transport them in the muffin tin – it keeps them protected and looking pretty.
Questions People Actually Ask
Q: Can I make one big pie instead of individual ones?
A: Yep! Use a greased 9-inch pie plate and bake for about 35-40 minutes. It won’t have quite the same magic as the little ones, but still delicious.
Q: Mine stuck to the pan. What did I do wrong?
A: Probably nothing! These are super sticky little dudes. Next time, try using non-stick spray AND a light dusting of flour. Or just use silicone muffin cups, which are basically magic.
Q: Can I use a hand mixer instead of a blender?
A: Absolutely. Just make sure you get the batter really smooth and lump-free. Maybe sift the flour first if you’re going this route.
Q: Mine didn’t form distinct layers. Did I mess up?
A: Not at all! Sometimes the layers are subtle. It depends on your oven temperature, how well the ingredients were mixed, and probably the alignment of the planets. They’ll still taste amazing.
Q: Can I make these gluten-free?
A: Yep! Just substitute the all-purpose flour with a cup-for-cup gluten-free flour blend. They might not form quite the same layers, but they’ll still be delicious.
Q: How do I know when they’re done?
A: The tops should be golden brown, and if you gently press the center, it should spring back. A toothpick inserted in the center should come out mostly clean (a few moist crumbs are okay).
Baby Lemon Impossible Pies
Description
Okay, so these little miracles are what happen when you’re too lazy to make an actual pie crust but still want something amazing for dessert! They’re called “impossible” pies because they magically form their own crust while baking. I discovered these when my grandma’s recipe box fell off the shelf (literally), and this yellowed recipe card fluttered out. One batch later and my family was fighting over the last one. They’re basically individual-sized lemon pies that separate into layers while baking – a crust on the bottom, a custard-y middle, and a slightly cakey top. AND they’re made in a muffin tin, so everyone gets their own little pie without having to share. Genius, right?
Ingredients
- 1/2 cup butter (1 stick), melted and slightly cooled (don’t use margarine, I’m begging you)
- 2 cups milk (whole milk makes them richer, but 2% works fine too)
- 4 large eggs (room temperature if you remember, but who actually plans that far ahead?)
- 1 cup granulated sugar
- 1/2 cup all-purpose flour
- 1/4 teaspoon salt
- 2 tablespoons lemon zest (from about 2 lemons – zest them before juicing!)
- 1/3 cup fresh lemon juice (please use real lemons, the bottled stuff is NOT the same)
- 1 teaspoon vanilla extract (the real kind, not that imitation nonsense)
- Powdered sugar for dusting (because it makes everything look fancy)