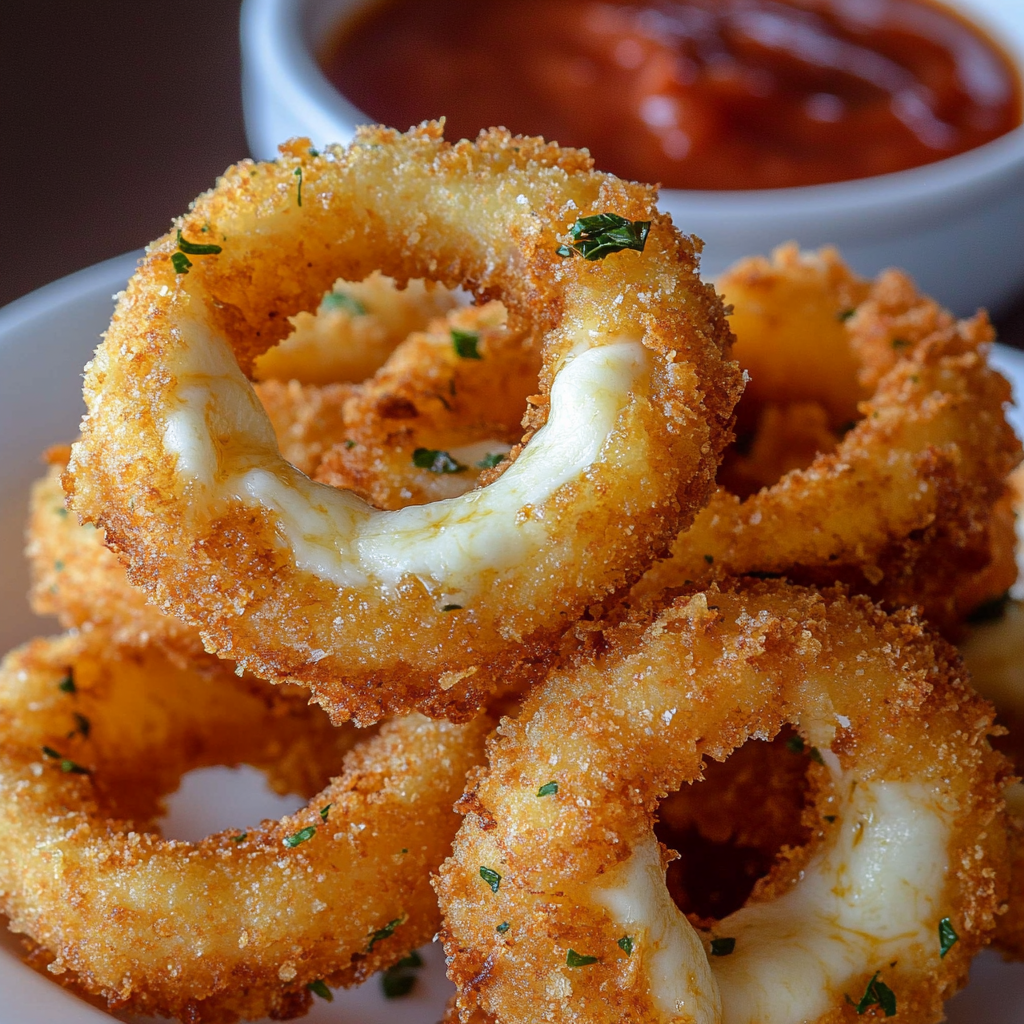
These cheesy onion rings take the classic appetizer to the next level! Stuffed with mozzarella and fried until crispy – perfect with marinara sauce.
These onion rings came about when I was desperately trying to figure out what to make for my husband’s poker night that would actually impress his friends. Regular onion rings seemed too boring, but I didn’t want to attempt anything too complicated either. I had some mozzarella sticks in the fridge and suddenly thought, what if I just stuffed them inside onion rings? It sounded crazy but I was running out of time, so I gave it a shot.
When his buddies bit into them and hit that molten cheese center, you should have seen their faces. Now they specifically request these whenever we host anything.
Why You’ll Love These
Total surprise factor – Nobody expects cheese inside onion rings, so people get genuinely excited
Way better than regular onion rings – The cheese makes them feel more like a real appetizer instead of just fried vegetables
Always starts conversations – People want to know how you did it and usually ask for the recipe immediately
My neighbor Mike, who’s pretty hard to impress when it comes to food, tried one of these at our barbecue and immediately went back for three more. He kept saying he’d never thought of putting cheese inside onion rings and that it was “genius.” His wife started laughing because he never gets that excited about appetizers, but he couldn’t stop talking about them.
Ingredients
Big sweet onion – You need one with really large rings that can hold the cheese without falling apart
String cheese – The individually wrapped mozzarella sticks work perfectly and are already the right shape
Standard breading setup – Flour, egg wash, and panko crumbs for that restaurant-style crunch
Toothpicks – Absolutely essential for keeping everything together while they cook
Plenty of oil – You need enough to completely cover them for even frying
Step-by-Step Instructions
Getting The Onions Ready
Cut your onion into thick slices, maybe half an inch or so, then separate all the rings. You’re going to pair them up with a bigger ring on the outside and a smaller one that fits inside with some space between them. This space is where your cheese is going to live.
Cheese Sandwich Assembly
Take your mozzarella sticks and cut them to fit in that gap between your onion rings. Put the cheese in there and stick a toothpick through the whole thing to hold it together. This part is a little fiddly, but it’s what makes these special instead of just regular onion rings.
First Coating Round
Mix up flour, baking powder, and salt in a bowl and roll each assembled ring in this mixture. Set them on a wire rack while you make the batter because they need to sit for a minute to help the coating stick better.
Batter Time
Beat together milk and egg, then mix that into your leftover flour mixture until you get a smooth batter. It should be thick enough to stick to the onions but not so thick that it’s like paste.
Final Coating
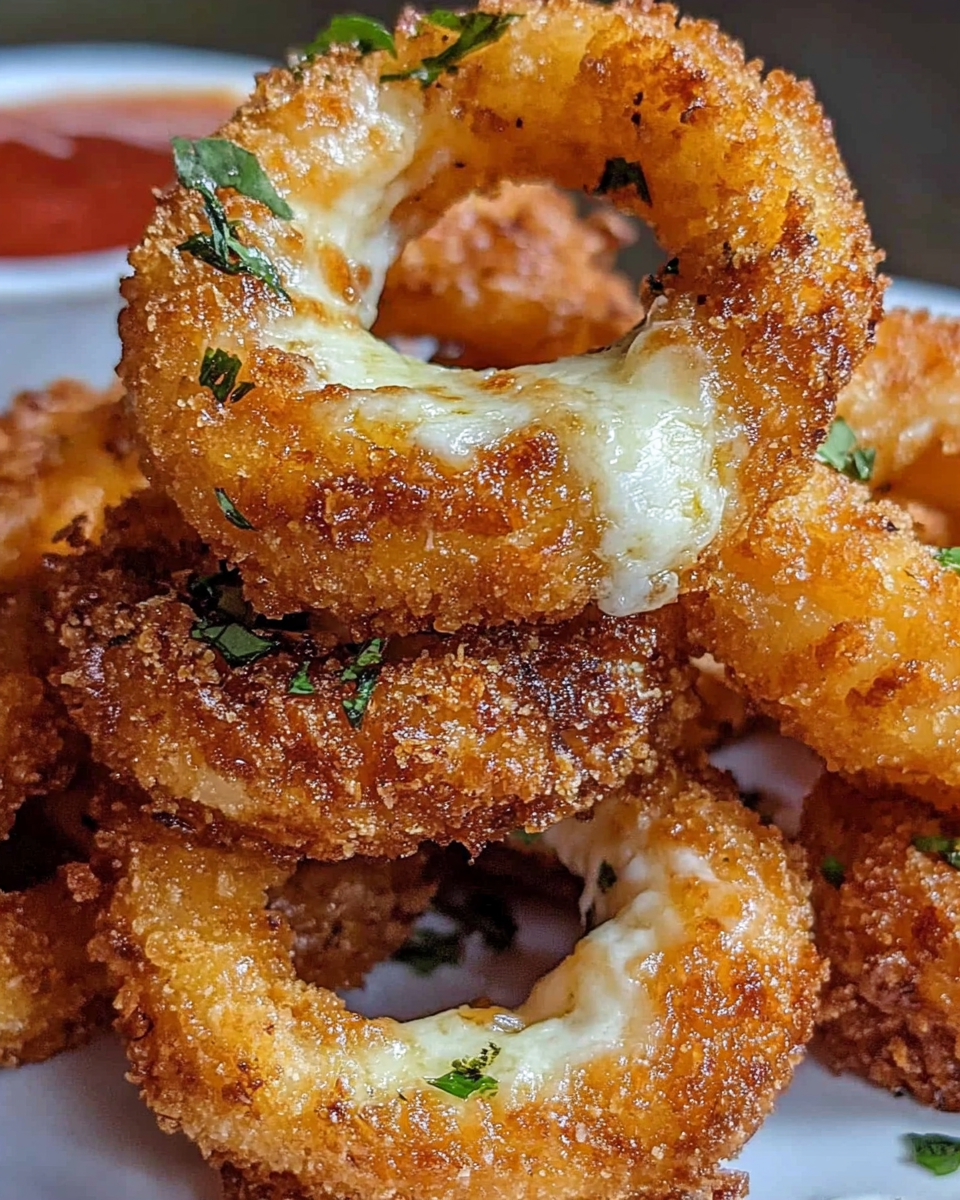
Dip each floured ring into your batter, let the extra drip off, then roll them in panko breadcrumbs. Press the crumbs on gently so they stick well. This triple coating is what gives you that amazing crunch.
Frying Process
Heat your oil to 350 degrees and carefully drop in a few rings at a time. Don’t crowd them or they won’t cook evenly. Fry until one side is golden brown, flip them over, and do the other side. The cheese inside will be perfectly melted by the time the outside is crispy.
Things to Remember
Leave those toothpicks in – Take them out right before serving, not while cooking, or your cheese will escape
Don’t rush the oil temperature – Too hot burns the outside before the cheese melts, too cool makes them greasy
Work in batches – Trying to fry too many at once drops the oil temperature and makes everything soggy
I learned about the toothpicks the hard way when I took them out too early and watched half my cheese leak into the oil. Now I always wait until the very last second to remove them. Also, I used to think hotter oil would cook them faster, but it just burned the coating while leaving the inside cold.
What to Serve With Them
These are amazing with marinara sauce because the tomato cuts through all that rich cheese and crispy coating. Ranch dressing works great too if you want something creamy. They’re perfect as appetizers, but they’re also incredible alongside burgers or as part of a big game day spread.
You could also try them with:
- Spicy mayo for some heat
- Honey mustard for sweetness
- Blue cheese dressing if you’re feeling fancy
- Even just ketchup works in a pinch
Switch Things Up
Different cheeses work great – pepper jack adds heat, sharp cheddar gives more flavor. You could mix herbs into the flour for extra taste, or try cream cheese mixed with chives for something different. I’ve even seen people make them with thick bell pepper rings instead of onions.
Cheese variations that work:
- Pepper jack for spice lovers
- Sharp cheddar for more cheese flavor
- Provolone for something milder
- Even cream cheese with herbs
Seasoning ideas:
- Garlic powder in the flour
- Italian herbs for pizza vibes
- Paprika for color and smokiness
- A little cayenne if you like heat
Keeping Them Fresh
These really need to be eaten right away while the cheese is still gooey and the coating is crispy. They don’t keep well because reheating makes the coating soggy and the cheese weird. If you absolutely have to store them, refrigerate and try reheating in the oven, but they’ll never be as good as fresh.
Trust me on this – don’t even bother trying to save leftovers. Just make fewer if you’re worried about waste. The magic is in eating them hot and fresh.
Kitchen Tips
Use a thermometer – Guessing oil temperature never works as well as actually knowing
Let excess batter drip – Too much makes them heavy instead of light and crispy
Serve immediately – These lose their magic fast once they start cooling down
Have everything ready – Set up your breading station before you start because once you begin, you need to move fast
The Secret to Success
These cheesy onion rings have become my secret weapon for any time I want to make something that gets people talking. They’re familiar enough that everyone wants to try them, but different enough to be memorable. The technique takes a little practice, but once you figure it out, they’re not actually that hard to make.
Every time I serve them, people act like I’m some kind of cooking genius, which is pretty funny since they’re really just cheese stuffed inside onions. But that’s the beauty of it – simple concept, amazing results.
Why Everyone Asks for the Recipe
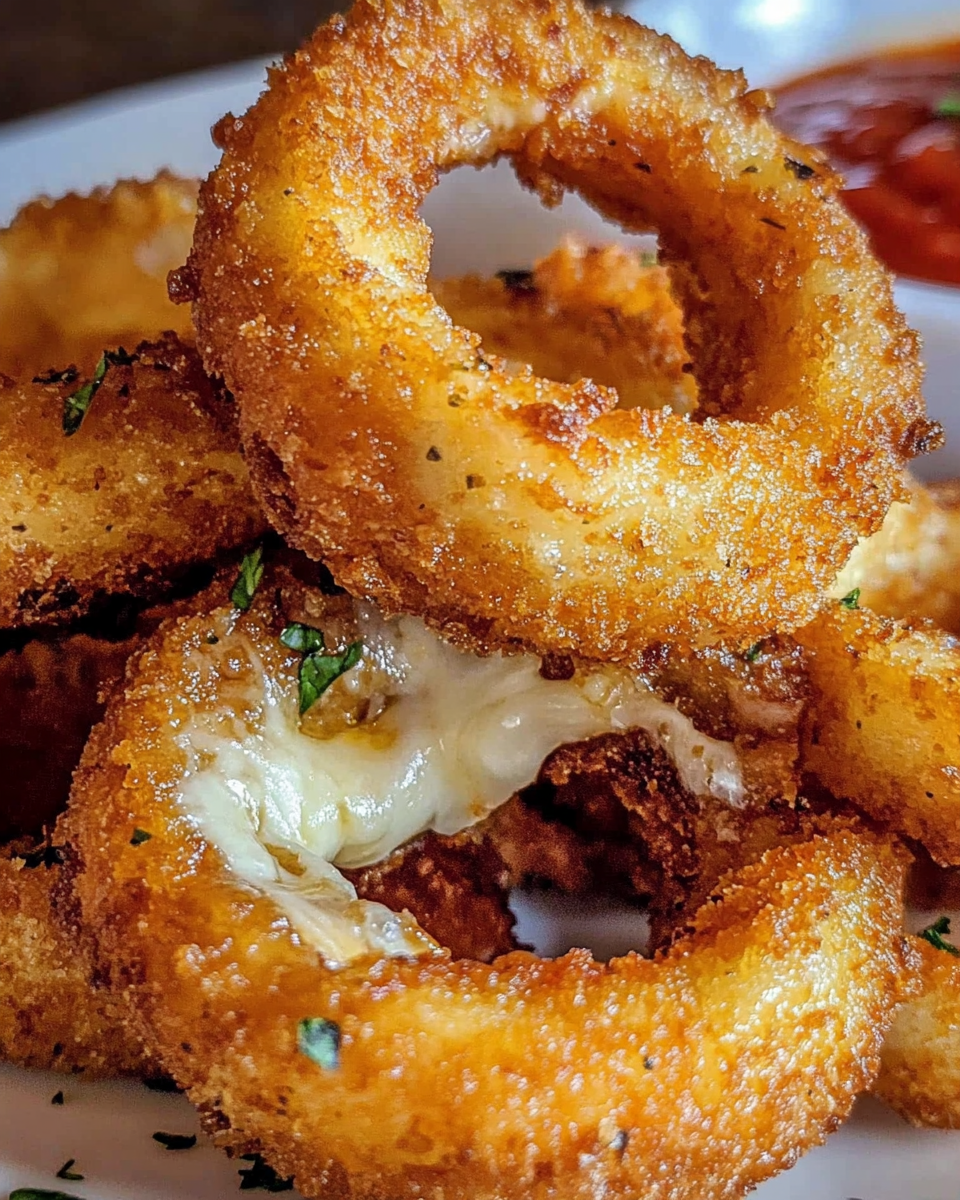
There’s something about the surprise factor that gets people every time. They bite into what looks like a regular onion ring and suddenly there’s this burst of melted cheese. It’s not complicated, but it feels special.
I’ve served these at probably twenty different gatherings now, and every single time, at least three people ask for the recipe. My sister-in-law started making them for her book club and now she’s the “fancy cook” in her group.
Perfect for Any Occasion
Game day parties? Check. Casual dinners? Absolutely. Even brought them to a potluck once and they were the first thing to disappear. Kids love them, adults love them, even picky eaters can’t resist them.
The best part is watching people’s faces when they take that first bite. You can literally see the moment they realize there’s cheese inside. It never gets old.
Frequently Asked Questions
→ How Do I Prevent The Cheese From Leaking Out? Make sure to secure the cheese tightly between the onion rings with toothpicks, and don’t overfill the space. The batter and breadcrumb coating also help seal everything in.
→ What Oil Temperature Should I Use For Frying? Heat the oil to about 350°F (175°C). If you don’t have a thermometer, test with a small piece of batter – it should sizzle and float immediately.
→ Can I Bake These Instead Of Frying? You can try baking at 400°F for about 15-20 minutes, flipping halfway through, but they won’t be quite as crispy as the fried version.
→ What Other Cheeses Can I Use? Any good melting cheese works! Try cheddar, pepper jack, or provolone. Just make sure it’s in stick or block form so you can slice it to fit.
→ How Do I Know When They’re Done Frying? They should be golden brown on both sides and the coating should be crispy. The cheese inside should be melted but not completely leaked out.
→ Can I Make These Ahead of Time? Not really. These are definitely a “serve immediately” kind of dish. You can prep the components ahead, but once they’re fried, they need to be eaten right away.
→ What If I Don’t Have Panko Breadcrumbs? Regular breadcrumbs work, but panko gives you that extra crispy texture that makes these special. If you only have regular breadcrumbs, try crushing some crackers or cereal for extra crunch.
Final Thoughts
Look, I’m not going to pretend these are health food. They’re fried, cheesy, and completely indulgent. But sometimes you need something that makes people smile, and these definitely do that.
The first time you make them might feel a little chaotic – keeping track of the toothpicks, managing the oil temperature, making sure the cheese doesn’t escape. But stick with it. Once you get the hang of it, they become your go-to impressive appetizer.
And here’s the thing – even if you mess up the first batch a little, people are still going to be amazed by the concept. The bar is pretty low because nobody expects cheese inside their onion rings. You’re already ahead of the game just by trying it.
So next time you want to bring something that’ll get people talking, give these a shot. Just be prepared to share the recipe, because everyone’s going to want to know how you did it.
Print
Cheesy Onion Rings – The Appetizer That Changes Everything
- Total Time: 22 Minutes
- Yield: 4 Servings (8 stuffed onion rings)
Description
These cheesy onion rings take the classic appetizer to the next level! Stuffed with mozzarella and fried until crispy – perfect with marinara sauce.
Ingredients
Big sweet onion – You need one with really large rings that can hold the cheese without falling apart
String cheese – The individually wrapped mozzarella sticks work perfectly and are already the right shape
Standard breading setup – Flour, egg wash, and panko crumbs for that restaurant-style crunch
Toothpicks – Absolutely essential for keeping everything together while they cook
Plenty of oil – You need enough to completely cover them for even frying
Instructions
Cut your onion into thick slices, maybe half an inch or so, then separate all the rings. You’re going to pair them up with a bigger ring on the outside and a smaller one that fits inside with some space between them. This space is where your cheese is going to live.
Take your mozzarella sticks and cut them to fit in that gap between your onion rings. Put the cheese in there and stick a toothpick through the whole thing to hold it together. This part is a little fiddly, but it’s what makes these special instead of just regular onion rings.
Mix up flour, baking powder, and salt in a bowl and roll each assembled ring in this mixture. Set them on a wire rack while you make the batter because they need to sit for a minute to help the coating stick better.
Beat together milk and egg, then mix that into your leftover flour mixture until you get a smooth batter. It should be thick enough to stick to the onions but not so thick that it’s like paste.
Dip each floured ring into your batter, let the extra drip off, then roll them in panko breadcrumbs. Press the crumbs on gently so they stick well. This triple coating is what gives you that amazing crunch.
Heat your oil to 350 degrees and carefully drop in a few rings at a time. Don’t crowd them or they won’t cook evenly. Fry until one side is golden brown, flip them over, and do the other side. The cheese inside will be perfectly melted by the time the outside is crispy.
Notes
Use a thermometer – Guessing oil temperature never works as well as actually knowing
Let excess batter drip – Too much makes them heavy instead of light and crispy
Serve immediately – These lose their magic fast once they start cooling down
Have everything ready – Set up your breading station before you start because once you begin, you need to move fast
- Prep Time: 15 Minutes
- Cook Time: 7 Minutes
- Cuisine: American