What Are Burger Bowls?
Ok, so picture your favorite juicy burger with ALL the toppings, but ditch the bun and throw everything into a bowl instead. That’s basically what we’re making here! I came up with these burger bowls a couple years ago when my husband started cutting carbs, and honestly? They’ve become a regular in our dinner rotation even though neither of us is strictly low-carb anymore.
These bowls give you everything you love about a great burger—seasoned beef, melty cheese, fresh veggies, special sauce—without needing to mess with buns that get all soggy on the bottom. Plus, you can customize them however you want! It’s like the burger joint experience but in convenient bowl form.
Why You’ll Make These On Repeat
I’m not exaggerating when I say these burger bowls have saved dinner at our house at least a hundred times. Here’s why I love them (and why you will too):
- They take like 20 minutes from start to finish
- Everyone can customize their own bowl with their favorite toppings
- Way less messy to eat than actual burgers (no sauce dripping down your arms!)
- Great for meal prep—components keep well in the fridge
- Perfect for different diets (low-carb, gluten-free, or just plain hungry people)
- Uses simple ingredients you probably already have
- Honestly tastes BETTER than most restaurant burgers
The first time I made these, my 7-year-old (who normally picks apart everything I make) devoured his entire bowl and asked for seconds. VICTORY!
What You’ll Need
For the burger part (the star of the show):
- 1 pound ground beef (I use 80/20 for more flavor, but leaner works too)
- 1 tablespoon Worcestershire sauce
- 1 teaspoon garlic powder
- 1 teaspoon onion powder
- Salt and pepper to taste
- 1 tablespoon olive oil or butter for cooking
For the special sauce (trust me, don’t skip this):
- 1/4 cup mayo
- 2 tablespoons ketchup
- 1 tablespoon yellow mustard
- 1 tablespoon pickle relish
- 1/2 teaspoon garlic powder
- Splash of hot sauce (optional but recommended!)
For the bowl assembly:
- Chopped romaine or iceberg lettuce (about 4-6 cups)
- 1 cup cherry tomatoes, halved
- 1/2 red onion, thinly sliced
- 1 cup shredded cheddar cheese
- 6-8 dill pickle slices, chopped
- 1 avocado, sliced or diced
- 4-6 strips of bacon, cooked and crumbled (because BACON)
Optional extras I sometimes throw in:
- Sliced jalapeños
- Sautéed mushrooms
- Crispy french fried onions (the ones that come in a can)
- Extra cheese (because there’s no such thing as too much cheese)
- A fried egg on top (game-changer for brunch burger bowls!)
Let’s Get Cooking!
The Burger Magic:
- Grab a large bowl and mix your ground beef with the Worcestershire sauce, garlic powder, onion powder, salt, and pepper. Don’t overmix or your meat gets tough! Just gently combine until everything’s incorporated.
- Heat your oil or butter in a large skillet over medium-high heat. Once it’s hot, add the seasoned beef.
- Break the meat up with a wooden spoon or spatula as it cooks. I like to keep some bigger chunks—it makes it feel more like burger pieces rather than just taco meat.
- Cook for about 7-8 minutes until nicely browned and no pink remains. If there’s a lot of excess grease, drain it off (but leave a little for flavor!).
The Special Sauce:
- While your beef is cooking, make the sauce by mixing all those sauce ingredients together in a small bowl. Give it a taste and adjust as needed—sometimes I add more pickle relish when I’m feeling extra tangy.
Putting It All Together:
- Now for the fun part! Grab your bowls and start building:
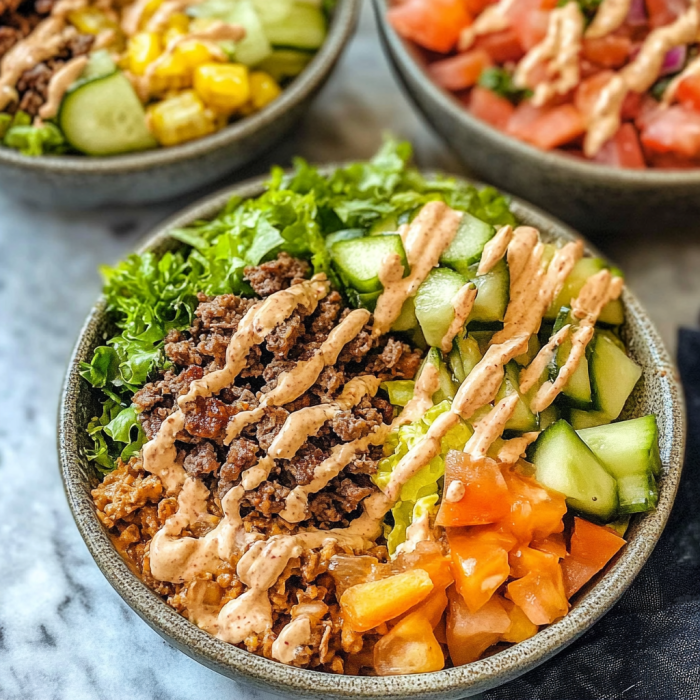
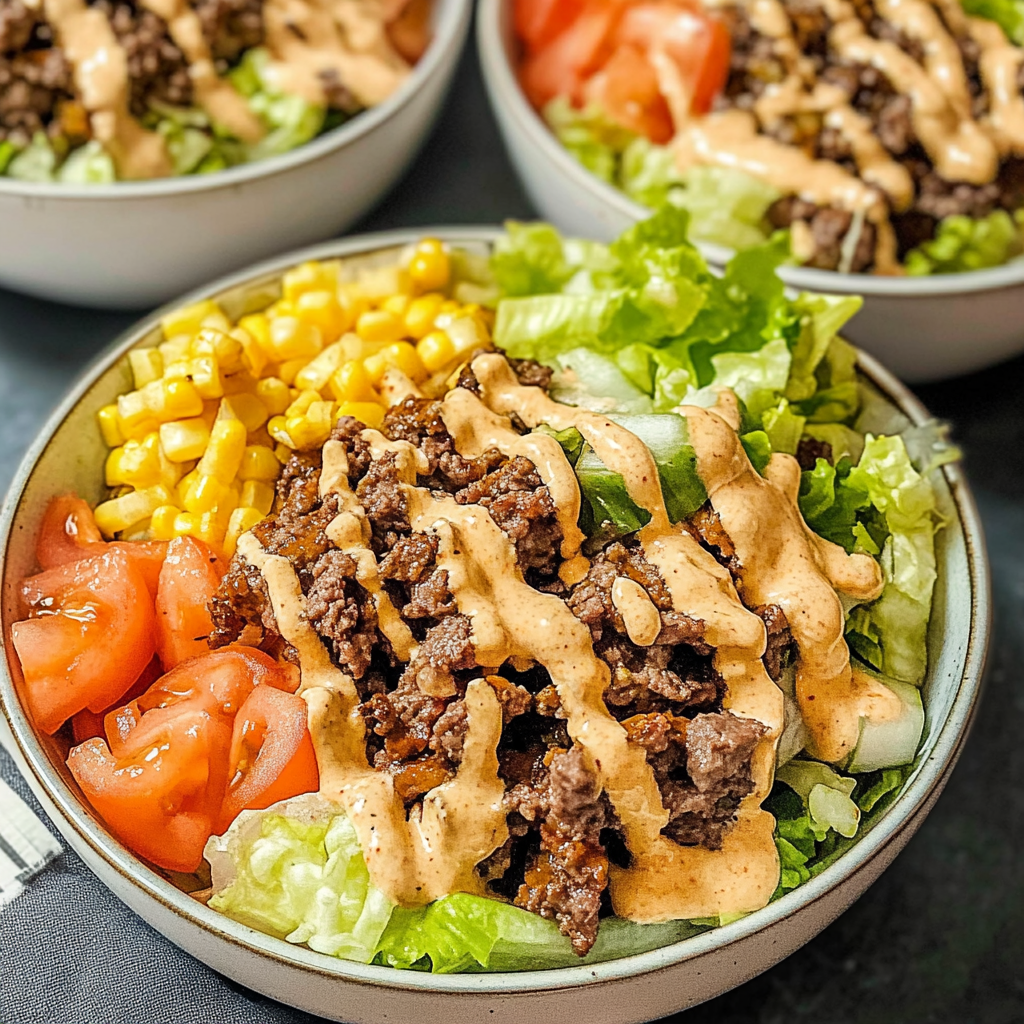
- Layer of lettuce on the bottom
- Scoop of hot burger meat in the center
- Immediately sprinkle cheese on the hot meat so it gets melty
- Arrange your toppings around in little piles—tomatoes, pickles, avocado, bacon, onions
- Drizzle that amazing special sauce all over
- Finish with an extra crack of black pepper because I’m fancy like that
- Dig in while it’s hot! I like to mix everything up after I admire how pretty it looks for about 3 seconds.
Some real talk from my kitchen experiments:
- If the burger meat seems a little dry, add a splash of beef broth while cooking
- For a spicier version, add some taco seasoning to the meat
- The sauce tastes even better if it sits in the fridge for an hour, but who has that kind of patience when dinner’s almost ready?
Serving Ideas That Won Me Brownie Points
These burger bowls are pretty much a complete meal on their own, but here are some ways I’ve served them that earned me major praise:
For family dinner: I set up a “burger bowl bar” where everyone builds their own. My kids think this is the coolest thing ever, and somehow they eat vegetables willingly when they’re in charge of building their bowl.
For meal prep: Prepare all components separately and store in containers in the fridge. Just reheat the meat when ready to eat and assemble your fresh bowl. The prepped ingredients last about 3 days.
For a party: Make mini burger bowls in clear plastic cups for a fun appetizer. Layer everything in smaller portions and stick a decorative toothpick with a gherkin on top.
For low-carb friends: Exactly as written! They’ll be thrilled to have a satisfying “burger” experience without breaking their diet.
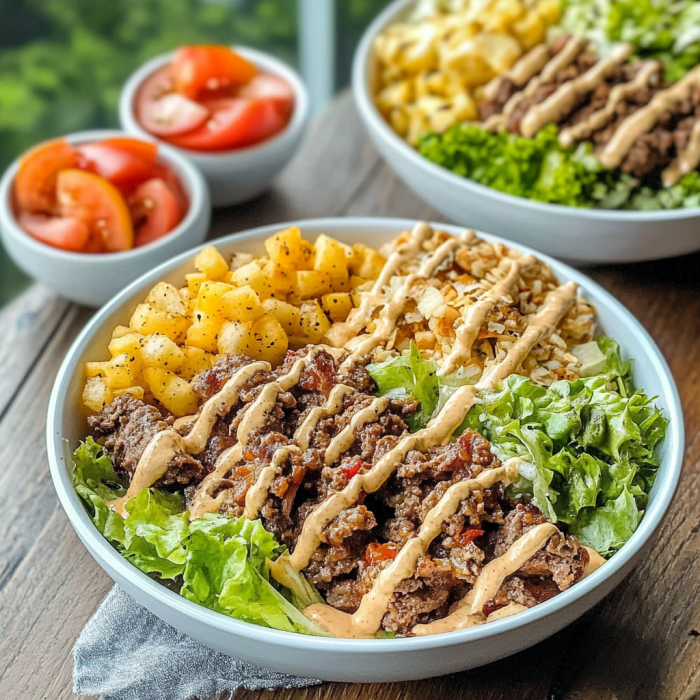
For carb lovers: Add some air-fried potato chunks or a handful of french fries right in the bowl. My husband calls this the “burger and fries bowl” and it’s his favorite Friday night meal.
Switch It Up: My Favorite Variations
After making these approximately a zillion times, I’ve created some fun variations:
Breakfast Burger Bowl: Cook the beef with breakfast sausage seasonings (sage, thyme, maple), then top with scrambled eggs and breakfast potatoes. Mind. Blown.
Mediterranean Burger Bowl: Season the beef with oregano and garlic, then top with feta cheese, olives, cucumbers, and tzatziki sauce instead of the special sauce.
Mushroom Swiss Burger Bowl: Cook sliced mushrooms with the beef, top with Swiss cheese instead of cheddar, and add a dollop of sour cream.
Mexican Burger Bowl: Season the beef with taco seasoning, then top with pepper jack cheese, avocado, salsa, and crushed tortilla chips for crunch.
BBQ Burger Bowl: Mix some BBQ sauce into the meat while cooking, top with cheddar, crispy fried onions, and extra BBQ sauce drizzle.
Keeping Everything Fresh
If you’re meal prepping these bowls (which I highly recommend!):
Store cooked burger meat in an airtight container in the fridge for up to 4 days. It reheats beautifully in the microwave with a splash of water to keep it moist.
The special sauce actually gets better after a day in the fridge as the flavors meld. Keep it in a jar for up to a week.
Prep lettuce, tomatoes, and other veggies ahead, but store them separately and don’t dress them until ready to eat.
Pre-cook and crumble bacon, then store in the fridge. Warm it briefly before using (15 seconds in the microwave works).
Pro tip: If you’re taking this for lunch at work, pack the hot components (meat) separately from the cold components for the best texture when assembled.
Questions You Might Have
“Can I use ground turkey or chicken instead of beef?” Absolutely! I’ve made these with ground turkey many times. Just add a little extra Worcestershire and maybe a teaspoon of olive oil to the meat mixture since turkey is leaner.
“My kids don’t eat vegetables. Will they still like this?” Mine were skeptical at first too. Start with just the meat, cheese and sauce over chopped lettuce. Once they’re on board with that, start adding one veggie at a time. My formerly veggie-hating son now loads up on tomatoes and even onions!
“Is this actually healthier than a regular burger?” It can be! You’re cutting out the bun carbs and can control exactly how much of each ingredient goes in. Plus, you tend to eat more veggies this way. That said, I don’t make these because they’re “healthy”—I make them because they’re DELICIOUS.
“Can I make the burger meat in advance?” Yes! It reheats really well. I often make a double batch and use it throughout the week for quick lunches.
“My husband says he needs something starchy. What can I add?” Throw in some roasted potato chunks, sweet potato cubes, or even some cooked rice at the base. I’ve also added corn kernels which adds a nice sweetness and texture.
“Can I use store-bought burger sauce to save time?” Sure, though the homemade stuff takes literally 2 minutes to mix up and tastes WAY better. But on super busy nights, I’ve totally used store-bought and it works fine!
“How do I make this vegetarian?” Great question! You can use plant-based ground “meat” products, seasoned the same way. Or try roasted and seasoned chickpeas or black beans for a different but equally delicious protein option.
Print
Loaded Burger Bowls: All the Flavor, None of the Bun!
Description
Ok, so picture your favorite juicy burger with ALL the toppings, but ditch the bun and throw everything into a bowl instead. That’s basically what we’re making here! I came up with these burger bowls a couple years ago when my husband started cutting carbs, and honestly? They’ve become a regular in our dinner rotation even though neither of us is strictly low-carb anymore.
These bowls give you everything you love about a great burger—seasoned beef, melty cheese, fresh veggies, special sauce—without needing to mess with buns that get all soggy on the bottom. Plus, you can customize them however you want! It’s like the burger joint experience but in convenient bowl form.
Ingredients
For the burger part (the star of the show):
- 1 pound ground beef (I use 80/20 for more flavor, but leaner works too)
- 1 tablespoon Worcestershire sauce
- 1 teaspoon garlic powder
- 1 teaspoon onion powder
- Salt and pepper to taste
- 1 tablespoon olive oil or butter for cooking
For the special sauce (trust me, don’t skip this):
- 1/4 cup mayo
- 2 tablespoons ketchup
- 1 tablespoon yellow mustard
- 1 tablespoon pickle relish
- 1/2 teaspoon garlic powder
- Splash of hot sauce (optional but recommended!)
For the bowl assembly:
- Chopped romaine or iceberg lettuce (about 4-6 cups)
- 1 cup cherry tomatoes, halved
- 1/2 red onion, thinly sliced
- 1 cup shredded cheddar cheese
- 6–8 dill pickle slices, chopped
- 1 avocado, sliced or diced
- 4–6 strips of bacon, cooked and crumbled (because BACON)
Optional extras I sometimes throw in:
- Sliced jalapeños
- Sautéed mushrooms
- Crispy french fried onions (the ones that come in a can)
- Extra cheese (because there’s no such thing as too much cheese)
- A fried egg on top (game-changer for brunch burger bowls!)